


php editor Banana teaches you how to quickly create a new account in Win11! In the Win11 system, creating a new account allows multiple people to share the computer and protect personal privacy. This article will introduce in detail how to create a new account in Win11, so that you can easily do it!
Introduction to how to create a new account in win11:
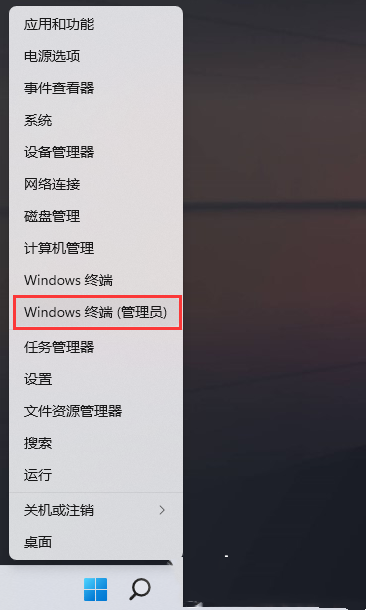
1. Right-click Start in the taskbar in the lower left corner and select "Windows Terminal (Administrator)" in the option list.
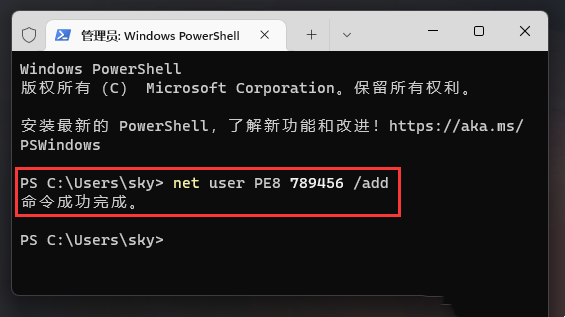
#2. After entering the window, enter "net user PE8 789456 /add" to create a user named "PE8" with a login password of 789456.
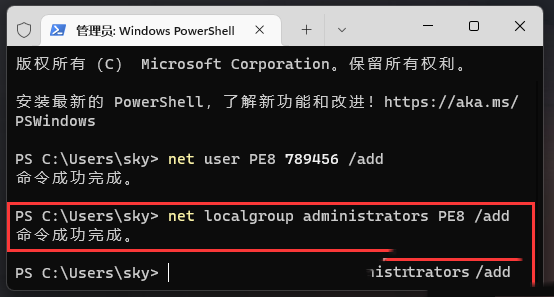
3. Then enter "net localgroup administrators PE8 /add" again to give the "PE8" user administrator rights.
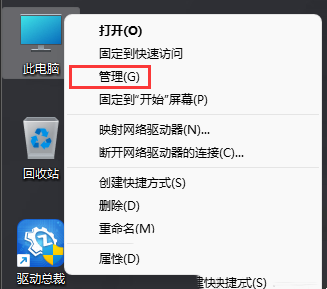
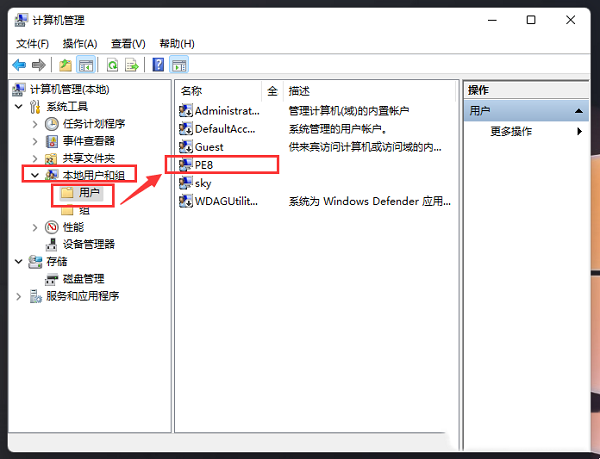
#4. Right-click "This PC" on the desktop and select "Manage" in the option list.
5. After entering the new window, click "Local Users and Groups - Users" in the left column, and then click "PE8" on the right That's it.
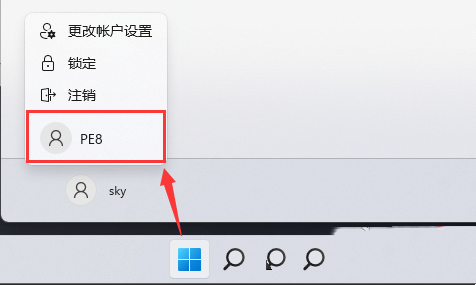
#6. Finally, click the start icon in the lower left corner, then click the user avatar, select the new user to switch to log in.
The above is the detailed content of How to create a new account in win11? Introduction to how to create a new account in win11. For more information, please follow other related articles on the PHP Chinese website!
 There is no WLAN option in win11
 How to skip online activation in win11
 Win11 skips the tutorial to log in to Microsoft account
 How to open win11 control panel
 Introduction to win11 screenshot shortcut keys
 Windows 11 my computer transfer to the desktop tutorial
 Solution to the problem of downloading software and installing it in win11
 How to skip network connection during win11 installation


![[Web front-end] Node.js quick start](https://img.php.cn/upload/course/000/000/067/662b5d34ba7c0227.png)


