


php editor Youzi will introduce to you how to open the camera in win10 education version. In the Win10 Education Edition, the camera may be turned off by default, resulting in inability to use it normally. However, with a simple setting adjustment, you can easily turn on the camera. Just follow the steps below:
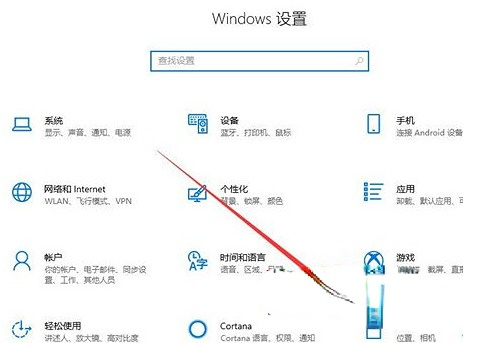
1. Confirm whether the camera permission is turned on. First press the shortcut key "Win I" to bring up the settings interface, then find and click "Camera Settings" in the privacy options.
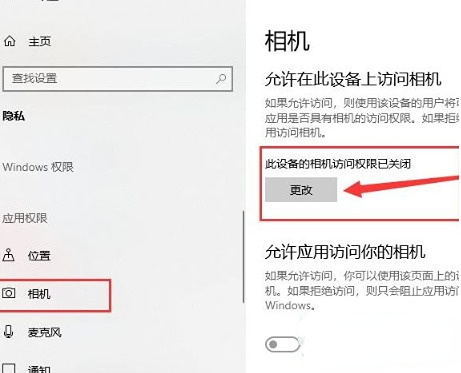
2. Locate the "Camera" item in the left menu. It can be seen that the current device access permission is turned off. Click "Change" on the right.
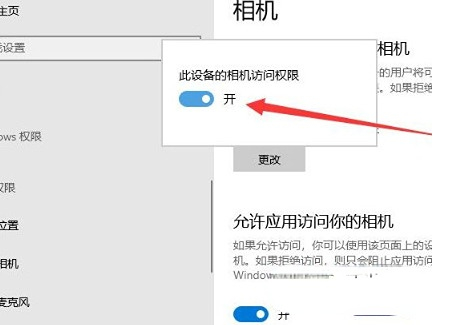
3. Select the "Open" option. After successfully turning on the camera, you can start taking pictures.
4. Use the Cortana search box to search for "camera" and click on the result to start the computer camera. Additionally, you can pin it to the Start screen or taskbar via right-click commands.

5. If the camera still fails to display the image after it is installed, this may indicate that the corresponding driver has not been fully installed.
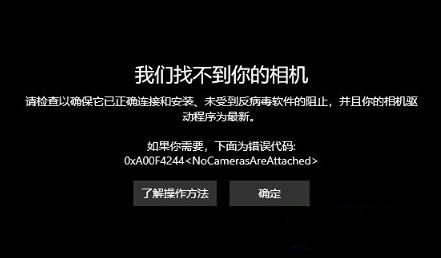
Right-click on "This PC" and select "Manage", then click "Device Manager", "Image Devices", right-click to find the device name and select "Update" Driver Software".
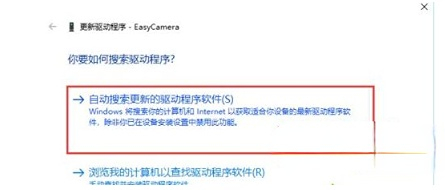
6. Select "Automatically search and update drivers" and wait patiently for the driver update to be completed.
7. Next, start the camera again, and you can take pictures and photos normally. To record a video, just click on the "Camera" icon.

The above is the detailed content of How to open the camera in win10 education version. For more information, please follow other related articles on the PHP Chinese website!
 win10 bluetooth switch is missing
 Why do all the icons in the lower right corner of win10 show up?
 The difference between win10 sleep and hibernation
 Win10 pauses updates
 What to do if the Bluetooth switch is missing in Windows 10
 win10 connect to shared printer
 Clean up junk in win10
 How to share printer in win10


![[Web front-end] Node.js quick start](https://img.php.cn/upload/course/000/000/067/662b5d34ba7c0227.png)


