php Xiaobian Yuzai brings you a tutorial about CorelDRAW. We will teach you how to set the saturation in a few simple steps and do it easily. CorelDRAW is a powerful graphic design software that can make image colors more vivid and vivid by adjusting saturation. In this tutorial, we will introduce a simple and intuitive method to adjust the saturation of an image without complicated operations, making it easy for you to master. Whether you are a beginner or an experienced designer, you can quickly master this technique through this tutorial and add highlights to your design works. let's start!
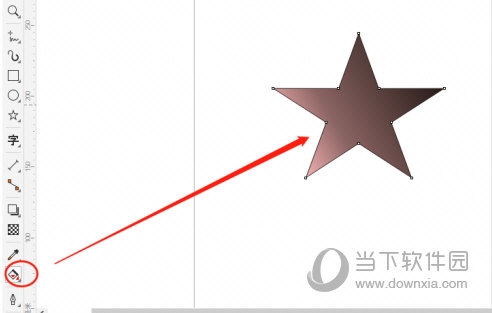
1. Open the CorelDRAW software, draw a graphic and fill it with color

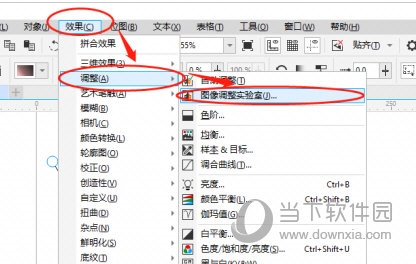
2. Click the [Effects] above ], find [Adjustment] in the drop-down menu, and select [Image Adjustment Experiment]

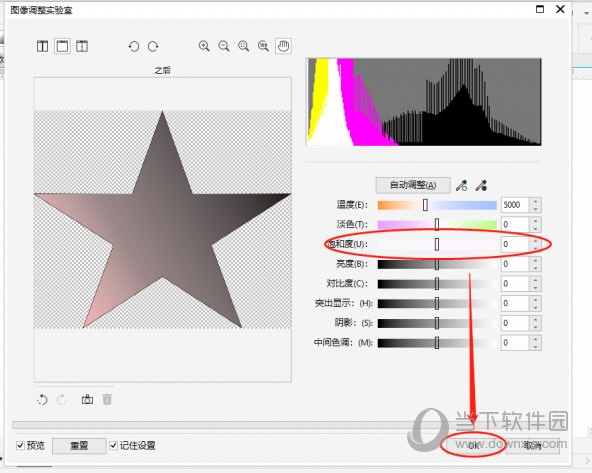
3. Set the brightness, contrast and other data of the graphics in the [Image Adjustment Laboratory] Just

In the Image Adjustment Lab, pull the node left and right to change the saturation. You can also see the preview effect on the left, just select the result you like. The above is the CorelDRAW related tutorial brought by the editor, I hope it can help everyone.
The above is the detailed content of How to set saturation in CorelDRAW with just a few simple steps. For more information, please follow other related articles on the PHP Chinese website!


