php Editor Apple brings you a tutorial on how to use CorelDRAW to adjust color effects using the Levels and Curves tools. The Levels and Curves tools are powerful color correction tools in CorelDRAW, which can help you accurately adjust the color and contrast of the image to make the image more vivid and vivid. This tutorial will introduce in detail how to use the Levels and Curves tools, including the steps to adjust brightness, contrast, hue, saturation, etc., allowing you to easily master image coloring techniques and improve the color effects of your design works. Whether you are a beginner or someone with some design experience, you can benefit from this tutorial, come and learn!
1. Color Level Tool
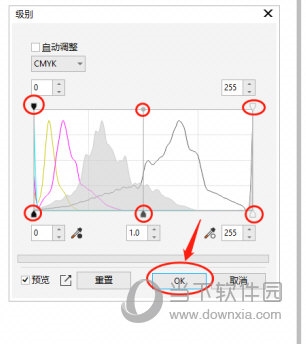
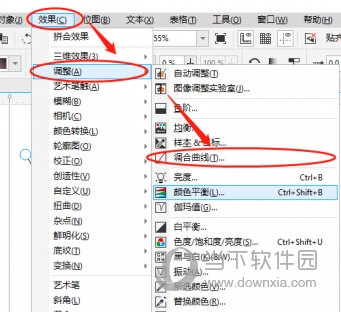
1) Open the CorelDRAW software, and after drawing the graphic and filling it with color, click [Effect] in the upper menu bar. , [Adjustment], [Color Level], bring up the color level adjustment box

2) Next, pull the color level adjustment lever or enter a value to adjust the color of the graphic. The effect is

2. Curve Tool
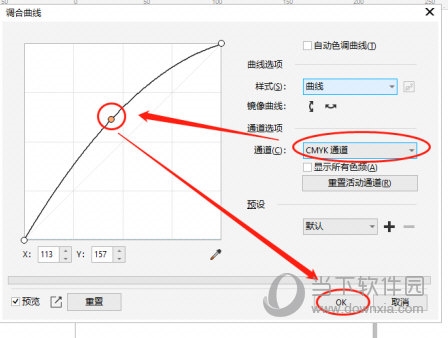
1) For the Curve Tool, click [Effect], [Adjust], [Adjust] in the menu bar above. Select Combined Curve] to bring up the curve option box.

2) Next, select the color channel to be adjusted in the [Channel] on the right, then adjust the curve on the left, and finally click [OK] below Adjust the color effect of the graphics through the curve function

Two methods, "Level Tool" and "Curve Tool", can make the color of the picture more beautiful. Which one to use? Depending on the preferences of users, the above is the CorelDRAW related tutorial brought by the editor. I hope it can help everyone.
The above is the detailed content of How to use the Levels and Curves tools to adjust color effects in CorelDRAW. How-to tutorial. For more information, please follow other related articles on the PHP Chinese website!


