


In Linux systems, users are the key to system security. Through good user management practices, you can ensure that systems are authorized only to authorized personnel and limit unauthorized access. Therefore, mastering Linux user management is an essential skill for every system administrator. Today, we will introduce you to one of the most basic and practical commands in Linux user management – useradd.
Environment: CentOS8 Requirements: Manually create a new user, the user name is zhangsan, the uid is set to 1024 (provided that the uid is not occupied), the gid is also set to 1024, the group name has the same name as the user name, and the home directory In /home/zhangsan, the default shell is /bin/bash
Note: The following steps are performed using the root user. Some commands and operations only have permissions for the root user.
Step 1: Modify the /etc/passwd file
vim Open the /etc/passwd file and append a line of information

Each line of the /etc/passwd file represents a user's information, and each field separated by a colon represents a different meaning.
Modification is completed, save and exit.
Step 2: Modify the /etc/shadow file
Use vim to open the /etc/shadow file and enter the input mode. The system will give a warning. It tells you that you are planning to modify a read-only file (in fact, you do not have read permission).

You can take a look, the shadow file does not have any permissions

But it doesn’t matter. The root user we use can do whatever we want. Press Enter to continue.
Append a line of information at the end of the shadow file.

The shadow file is also information about one user per line, and each field has a different meaning.
Step 3: Modify the /etc/group file
Append the following information at the end

group file has four fields in one line
Step 4: Create a new user home directory
mdkir /home/zhangsan
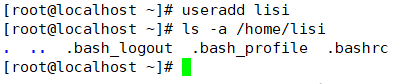
Step 5: Copy the environment variable configuration file in the /etc/skel directory to the home directory

这几个文件里面是用户的环境变量配置信息,我们使用 useradd 命令新建用户也会复制这几个文件到用户的家目录下。
第六步:修改家目录的权限和属主
到现在为止,用户 zhangsan 的家目录和其中的所有文件都是root用户的
将这些文件的归属权给 zhangsan,并修改文件权限
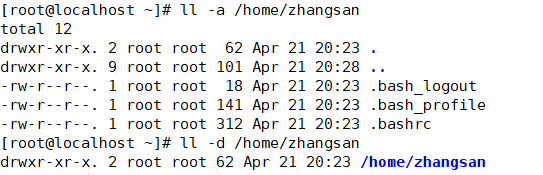
# 将用户 zhangsan 的家目录 /home/zhangsan 的属主和组修改为 zhangsan
chown -R zhangsan:zhangsan /home/zhangsan

# 修改文件的权限,只允许属主有读写权限,其他用户和组没有任何权限
chmod 700 /home/zhangsan
修改后的结果如下

第七步:创建邮箱文件
# 创建邮箱文件
touch /var/spool/mail/zhangsan

# 同样需要修改邮箱的所有者
chown zhangsan:zhangsan /var/spool/mail/zhangsan
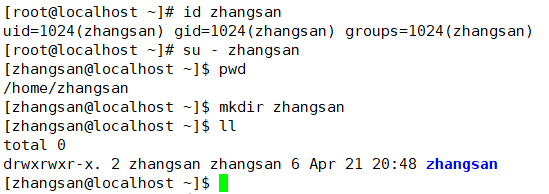
第八步:确认用户创建成功
本文介绍了Linux用户管理命令useradd的基本使用方法和常用选项,包括用户创建、密码设置、家目录分配等。当然,Linux系统中还有其他强大的用户管理命令,例如userdel、usermod等。但是,掌握useradd对于初学者来说是非常重要的,它是学习更高级别用户管理命令的基础。希望本文能够帮助您更好地进行Linux用户管理,保障您的系统安全。
The above is the detailed content of From Beginner to Mastery: A Guide to Linux User Management. For more information, please follow other related articles on the PHP Chinese website!


![[Web front-end] Node.js quick start](https://img.php.cn/upload/course/000/000/067/662b5d34ba7c0227.png)


