
php editor Youzi will introduce to you today how to use a USB boot disk to enter the PE system. As computer operating systems are constantly updated and upgraded, sometimes we may need to enter the PE system to perform some operations and maintenance work. Using a USB boot disk to enter the PE system is a convenient and fast method. With simple steps, we can install the PE system into a USB flash drive, and then start the computer through the USB flash drive to enter the PE system. Next, let’s learn about the specific steps!
The method of making a USB bootable disk is simple. There are many tools to choose from online, such as the GeekDog Installation Master software. It not only supports online system reinstallation, but can also be used to create a USB boot disk.

Although there are many such tools on the market, the usage methods in the tutorials are often briefly explained, which leads some friends to find that they don’t know how to use them after making a USB boot disk. For example, how to let the computer enter the USB boot disk PE system?

For reinstalling the system or maintaining the system from the USB disk, the first step is to ensure that the USB disk can be started. Only by setting up a USB disk to boot can you enter the PE environment and use PE's built-in tools for system reinstallation or maintenance.
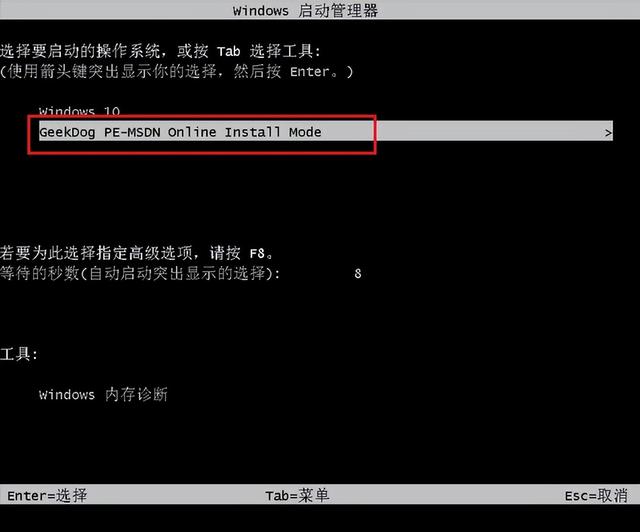
Below, the editor will briefly introduce the steps for booting from a USB disk. Although it is a bit boring, this step is essential for reinstalling the system using a USB disk.
Under normal circumstances, that is, when we do not reinstall the system, the computer boots from the hard disk and directly enters the operating system desktop.
Now, we need to change the startup mode to a U disk, so that we can enter the U disk PE system.
 Setting method 1: Shortcut key setting for U disk startup
1. According to your computer brand and type, check the U disk startup hotkeys, usually F2/F11/F12.
PS: Different brands and types of computers may have different startup hotkeys. You can refer to the following U disk startup hotkeys for various types of computers.

2. Insert the USB boot disk into the computer.

3. Restart the computer or turn it on, immediately press the startup hotkey, and press it several times. (Because it is set during computer startup)

4. Enter the following startup menu page.
PS: The startup menu page may be different if you don’t use a computer, but the setting method is similar.
5. The key step is here. On this page, we need to select the U disk so that we can boot from the U disk. Generally, the USB flash drive will display the name of your USB flash drive or the USB type. For example, the editor should select "KingstonDataTraveler G2 1.00" here. This is the Kingston USB disk. Just press Enter after selecting it.
 Setting method two: Enter bios to set up the USB boot disk
 1. After inserting the USB boot disk into the computer, restart the computer. Pay attention to the startup logo page, which will prompt you what button to press to enter the bios. For example, the MSI motherboard displays, Press DEL key to run setup, and when booting, press the DEL key to enter the BIOS.
PS: As shown in the picture, pressing the F11 key is the USB boot shortcut key. Press this key to enter the settings in method one.

2. After entering bios, click on the upper right corner to switch the language to Chinese, and then click "SETTINGS".

3. Select "Start" and press Enter.
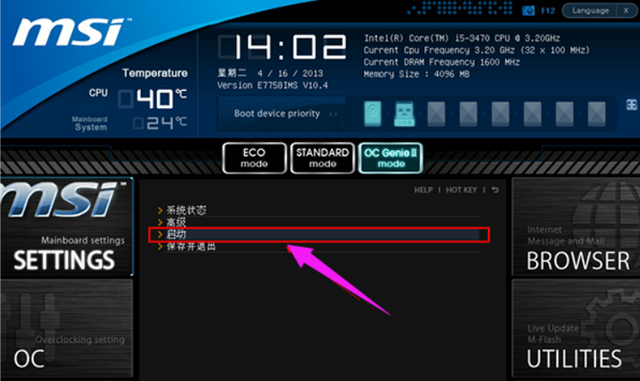
4. Select "1st boot device" to start the device first, and press Enter.
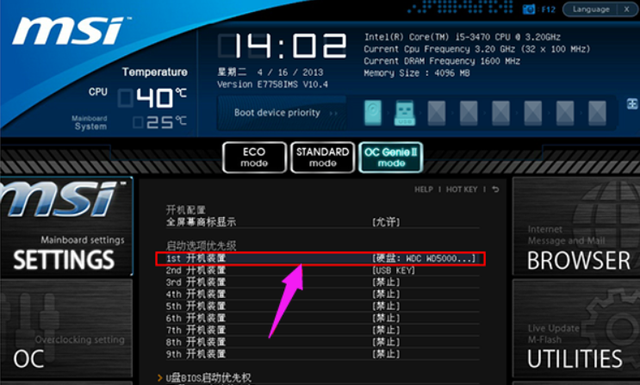
5. Then, select the recognized USB disk, such as kingstondata, and press Enter to confirm.
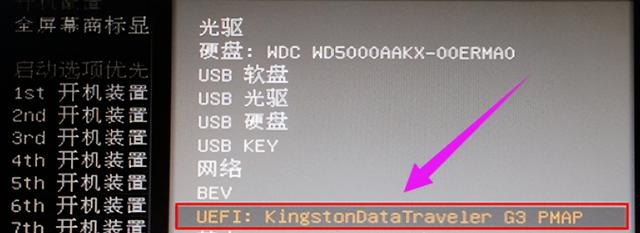
4. After setting the USB disk as the first startup item, press F10 to keep the settings and restart the computer.

Okay, the content of this issue is shared here. Note that depending on the motherboard of the computer, the page for setting up the USB disk boot will be slightly different, but the overall idea is the same. Friends who don’t understand can refer to the tutorial~
The above is the detailed content of usb boot disk into pe system. For more information, please follow other related articles on the PHP Chinese website!


