


In Linux systems, there are two main partition commands available: fdisk and parted. The fdisk command is widely used, but one limitation is that it does not support partitions larger than 2TB. If you need to create a partition larger than 2TB, then you need to use the parted command. Of course, the parted command can also be used to create smaller partitions. Now, let us take a look at how to use the fdisk command to partition.
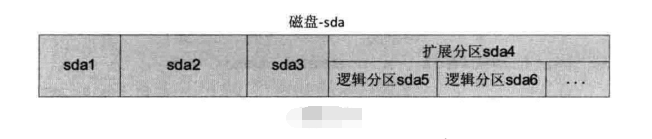
The traditional MBR (Master Boot Record) partitioning method limits a hard disk to be divided into up to four primary partitions. Even if the hard disk still has unallocated space, you cannot continue to create more primary partitions.
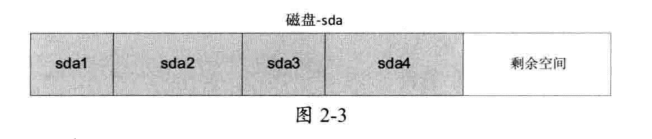
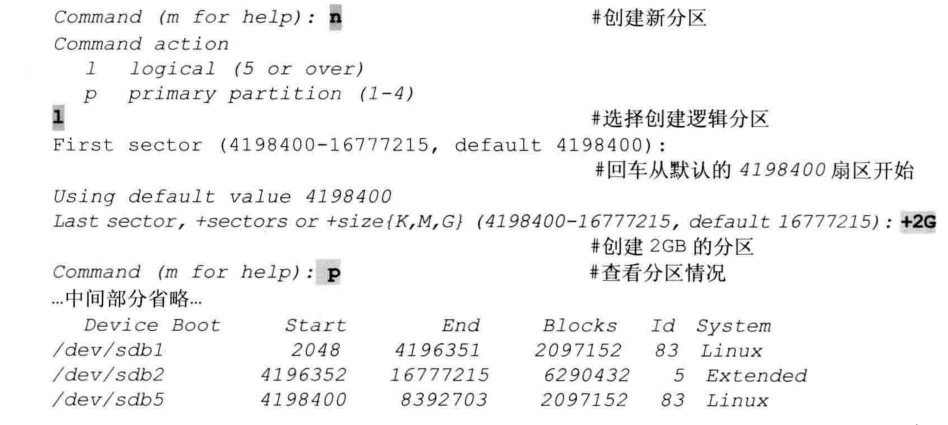
If you need more partitions, you need to create logical partitions in the extended partition. The solution is as follows
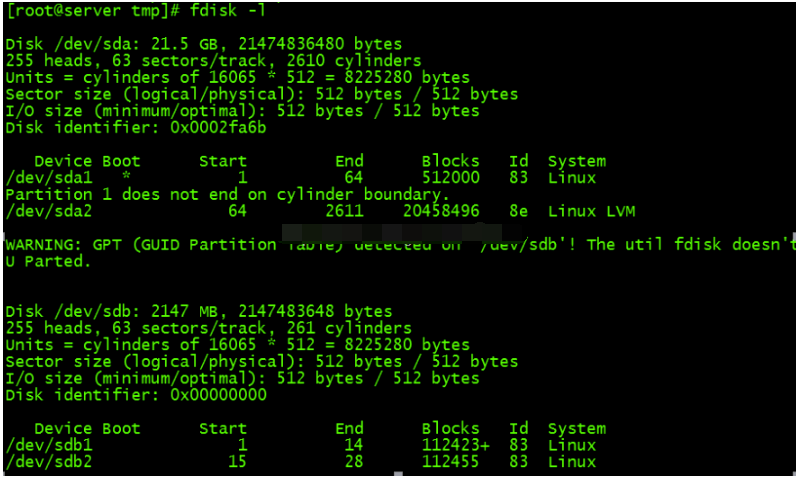
View new disk information
[root@localhost ~]# fdisk ~l
#列出系统分区
[root@localhost ~]# fdisk 设备文件名
#给硬盘分区
Note: Never try to use fdisk on the current hard disk. This will completely delete the entire system. Be sure to find another hard disk or use a virtual machine.
The lower part of the information is the partition information, with a total of 7 columns, the meaning is as follows:
Partition Command
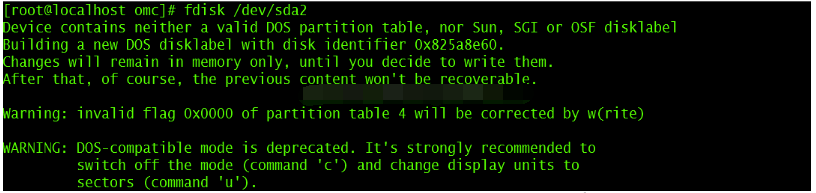
[root@localhost omc]# fdisk/dev/sda2
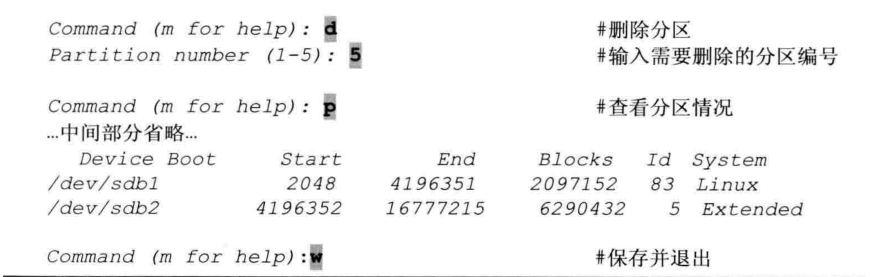
Enter p to list the current partition status of the disk

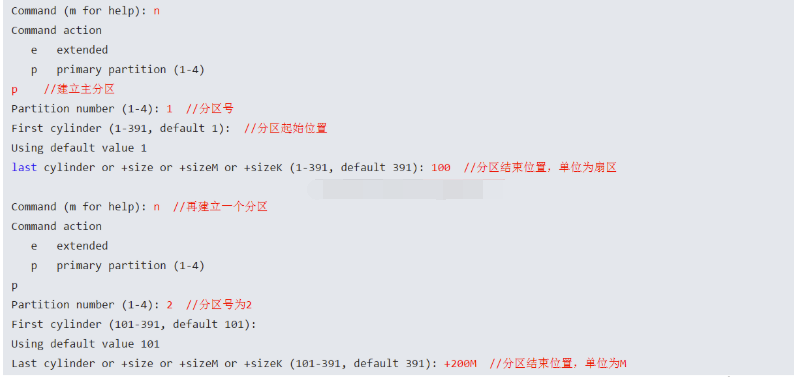
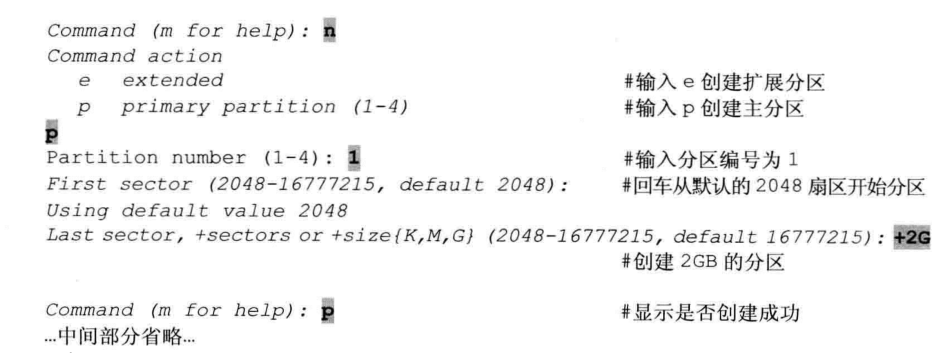
Enter n to create a new disk partition. First create two primary disk partitions:
‘
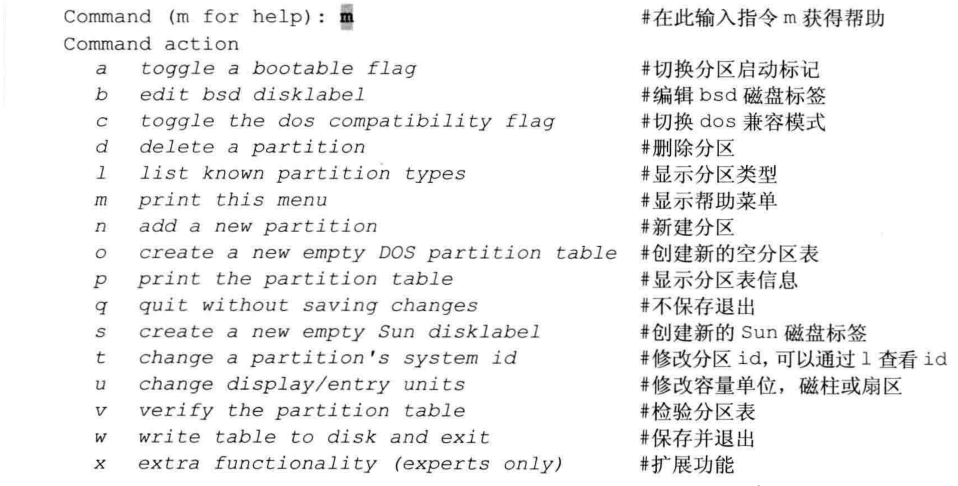
fdisk interactive command is as follows:

The partprobe command tells the kernel to read the new partition table immediately, so that the newly created partition can be recognized without restarting the system.
The parted partitioning tool belongs to the GPT partitioning method. It is different from the traditional MBR partitioning method. It is limited to a maximum of 4 primary partitions. GPT partitioning provides redundancy of the partition table to achieve backup and security of the partition table.
Command format
[root@localhost omc]# parted 【选项】 【硬盘 【命令】】
1. View system partition table information
[root@localhost omc]# parted /dev/sdc print

2. Create partition
[root@localhost omc]# parted 【硬盘】 mkpart 分区类型 文件系统类型 开始 结束
其中,mkpart指令为创建新的分区,分区类型有:primary,logical,extended三种,文件系统类型有:fat16,fat32,ext2,ext3,linux-swap等,开始与结束标记区分开始与结束的位置(默认单位为MB)
示例
[root@localhost omc]# parted /dev/sdc mkpart primary ext3 1 2G
ext3的主分区,从磁盘的第1MB开始分区,到2GB的位置,大小为2GB的主分区
[root@localhost omc]# parted /dev/sdc mkpart primary ext3 2G 4G创建
创建一个容量为2GB的分区,从硬盘的第2个GB位置开始分区,到第4个GB的位置结束。
3、修改分区表格式
[root@localhost omc]# parted /dev/sdc mklabel gpt

4、删除分区
[root@localhost omc]# parted /dev/sdc rm2使用
rm指令可以删除分区
利用pared命令除了基本的分区创建和删除外,还可以进行分区检查,调整分区大小,还原误删除分区等操作。
The above is the detailed content of Detailed explanation of Linux hard disk partition fdisk and parted commands. For more information, please follow other related articles on the PHP Chinese website!


![[Web front-end] Node.js quick start](https://img.php.cn/upload/course/000/000/067/662b5d34ba7c0227.png)


