Laptops produced today will all come with wireless network cards to ensure that the laptops are free from the constraints of the line and can freely surf the Internet. Many people are familiar with wireless connections to the Internet, but how about opening a network at home and installing a wireless router? Connect your laptop to the Internet wirelessly. Below, the editor will discuss with you how to connect your laptop to a wireless router.
Wireless is a new type of connection method due to its simplicity, convenience and freedom. It has become a trend and will definitely replace traditional wired connections in the future. After buying a wireless router, many friends don’t know how to connect a laptop to a wireless router. Below, the editor will share with you the experience of connecting a laptop to a wireless router.
How to connect a laptop to a wireless router
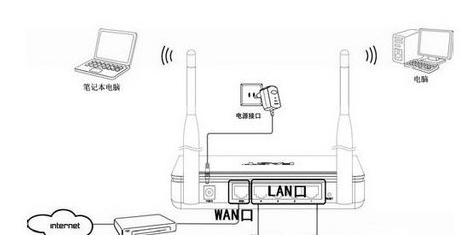
To connect a laptop to a wireless router, you must first ensure that the router is installed correctly. If the router has not been installed correctly, please follow the steps below Steps to install the router.

Connection network diagram-1
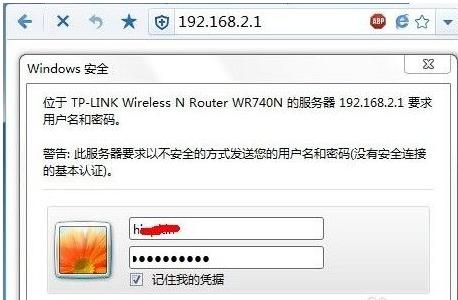
Enter the management IP on the nameplate at the bottom of the router in the browser and enter the router management interface.

Notebook Picture-2
Enter the setup wizard and follow the prompts to set up the broadband account, wireless SSID, wireless Password and other information.

Wireless Router Figure-3
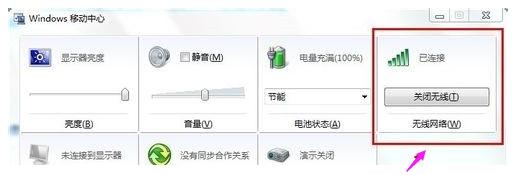
After the router is set up, you can connect it with your laptop. First press the Win

Wireless Router Picture-4
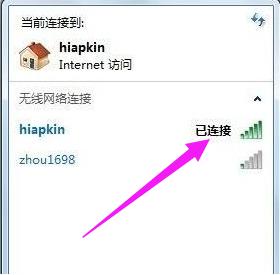
Then click the wireless icon in the tray area in the lower right corner of the system, and the computer will automatically search In the wireless network in the area, double-click your wireless router and enter the wireless password to connect.

Notebook Picture-5
The above is how to connect a notebook to a wireless router.
The above is the detailed content of How to connect a laptop to a wireless router How to connect a laptop to a wireless router. For more information, please follow other related articles on the PHP Chinese website!


