
Use VS Code in Ubuntu20.04.
The version of VS Code is 1.48.0.
The following content is limited to the above environment. Although the use in the Windows environment is similar, it can only be used for reference.
1.Preparation
a.Software installation
It can be installed through the software store or downloaded and installed.
The official website address for download and installation: https://code.visualstudio.com/.
You can download the installation software in deb and rpm formats.
b. Directory plan
In the process of writing a program, you need to decide in advance where to put the program you are writing, which requires a directory plan. Any software project also needs directory planning so that the written programs are stored in categories and are easy to find and use.
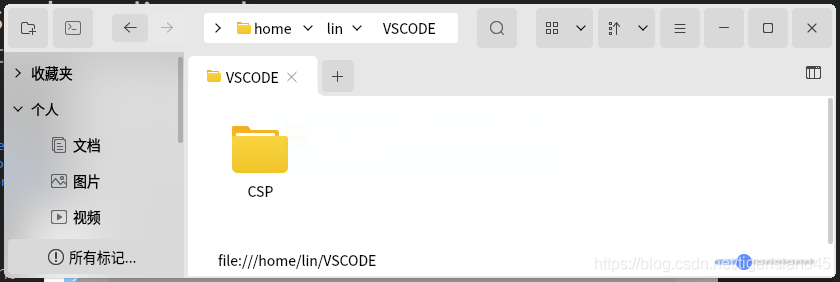
Create a VSCODE directory here to store the program code. For further classification, create a subdirectory CSP under the VSCODE directory, and write code in this subdirectory. As shown below:
2. Run VS Code and install the C/C plug-in
a. Run VS Code
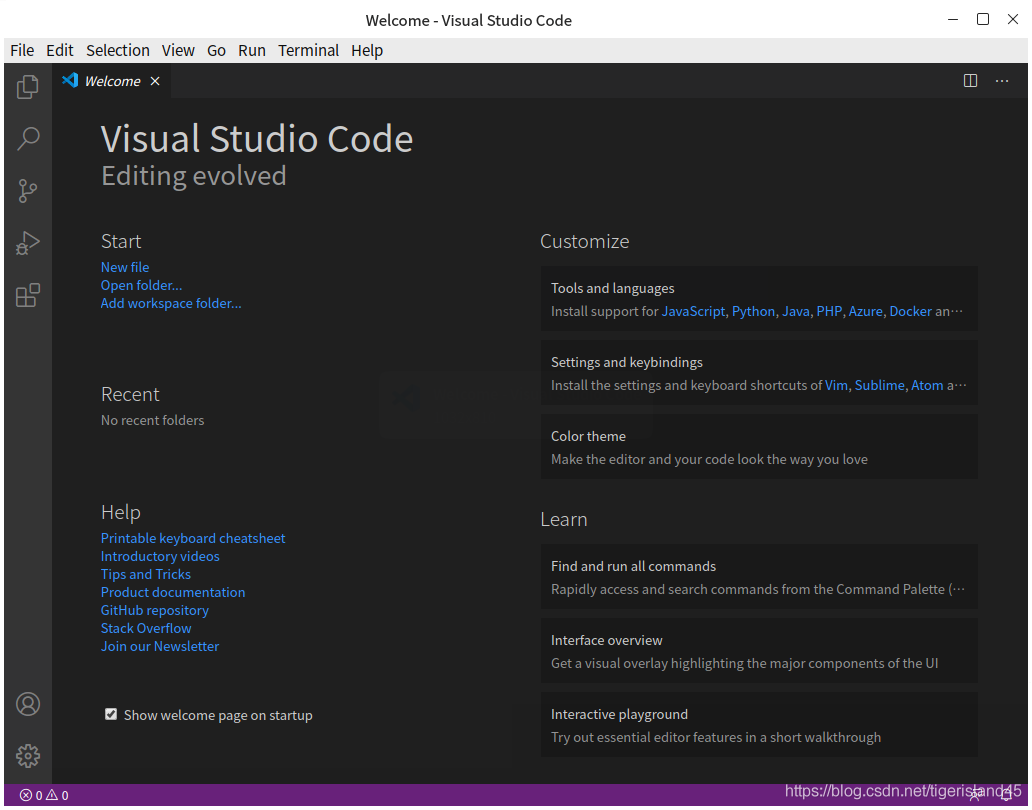
Run VS Code and the following interface will be displayed:
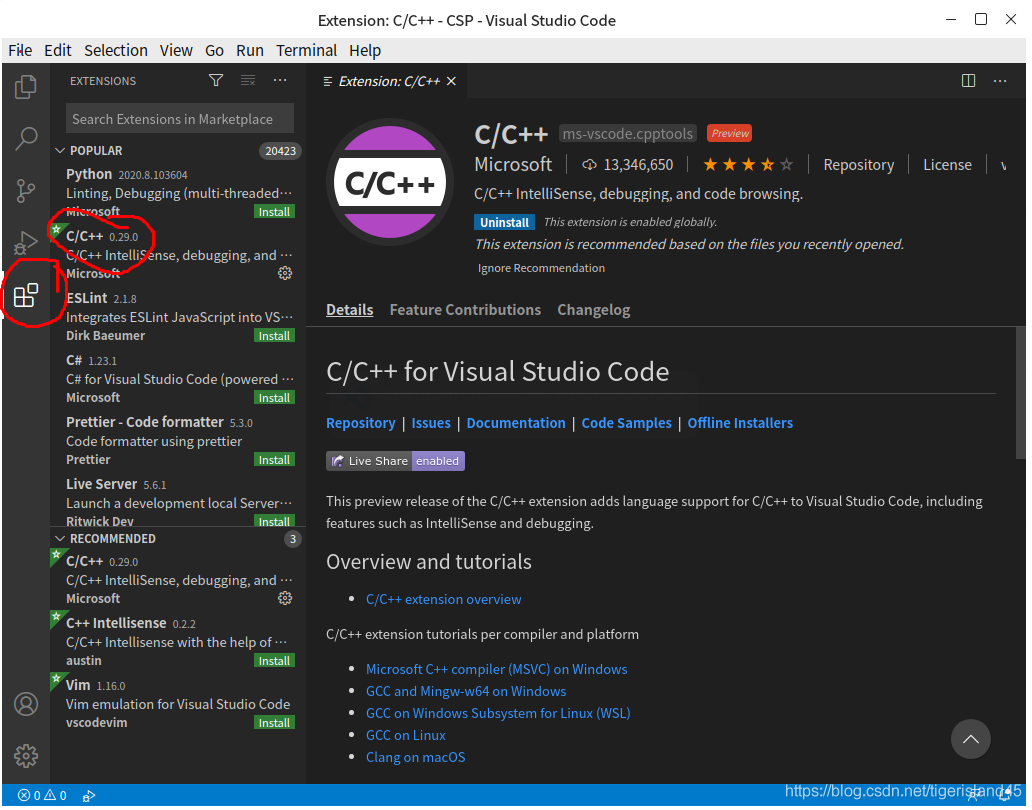
b. Install C/C plug-in
3.Write a program
a.Open the folder (directory)
Click the menu File-Open Folder... to display the following interface. Select the CSP directory in the interface:
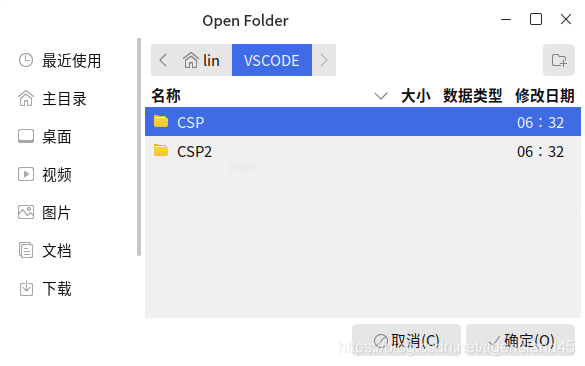
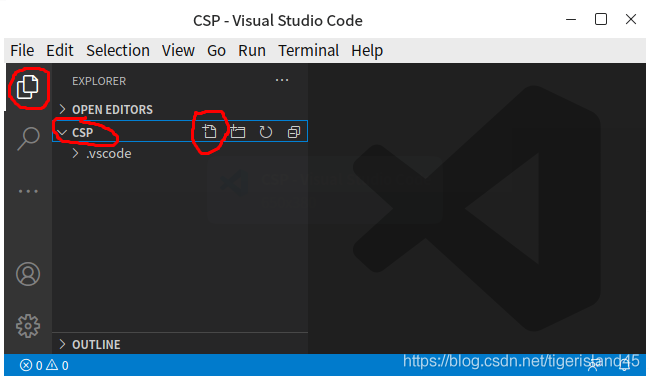
Click the "OK" button to return to the VS Code interface and click CSP:
b. Create C/C files and write programs
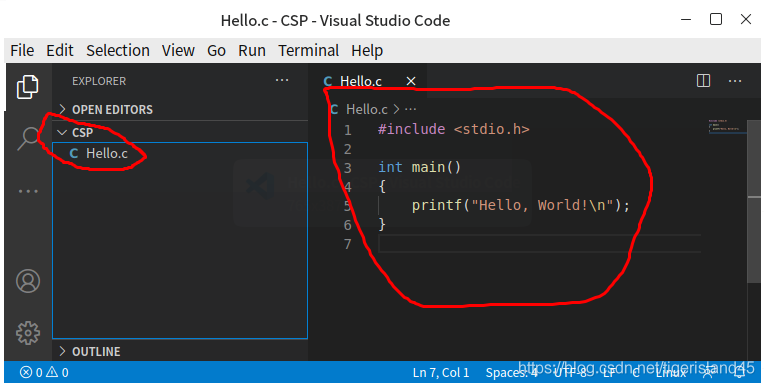
In the picture above, click the "New File" button on the right side of CSP and enter the file name "Hello.c" to create a blank file. After entering the program in the file and saving it, it will look like the following figure:
4. Run the program
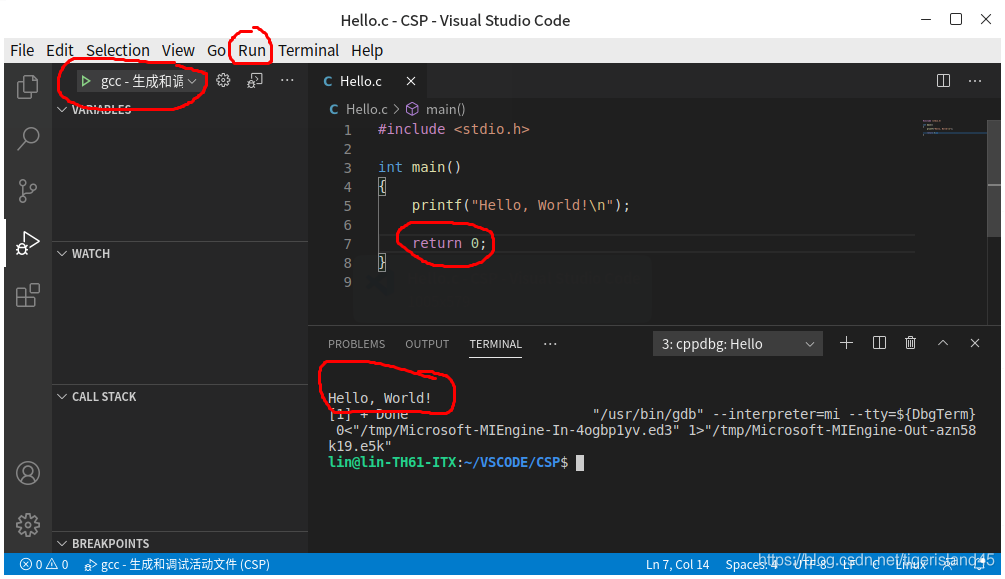
Click the menu Run-Run Without Debugging (shortcut key Ctrl F5) to run the program.
Click the menu Run-Start Debugging (shortcut key F5) to run the program in debugging mode (can be run in single-step mode, and can be run directly to the breakpoint).
At this time, you need to select the running environment. Here, select "C (GDB/LLDB)", and then continue to select "gcc - Generate debugging activity file". At this time, a "launch.json" file will be automatically generated (this file will be generated for the first time).
Close the file "launch.json" and run it again. The running results are as follows:
5. Debugging program
a. Set breakpoint
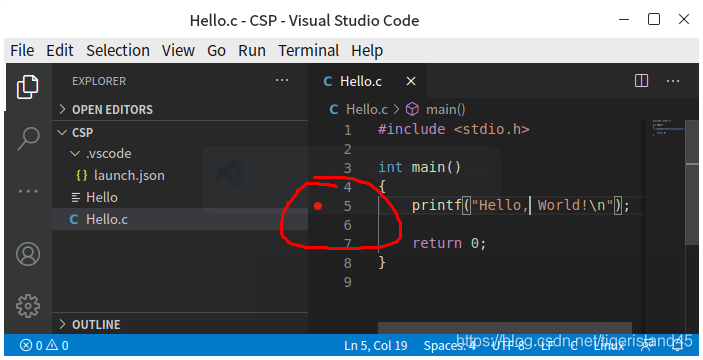
Click on the blank position before the line number of the source program to set a breakpoint.
Place the cursor on the line where a breakpoint needs to be set and press the F9 key to set/cancel the breakpoint for that line.
b. Debug operation
Use various commands in the menu Run for program debugging.
6. Others
VS Code can only be used reluctantly, and can be used reluctantly for exams and competitions.
Whether it is appropriate in engineering projects is worth exploring. Perhaps not many actual engineering projects will use this software.
The above is the detailed content of Method steps for using VSCode in Ubuntu20.04. For more information, please follow other related articles on the PHP Chinese website!


