
If we encounter the problem that the network cannot connect normally, we can try to solve it by modifying the DNS address. However, many users do not know how to modify the DNS in win11. In fact, just open the advanced network settings.
The first step is to open the system "Settings" through the bottom start menu

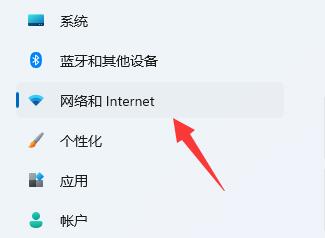
The second step is to click on "Network and internet" under the list on the left
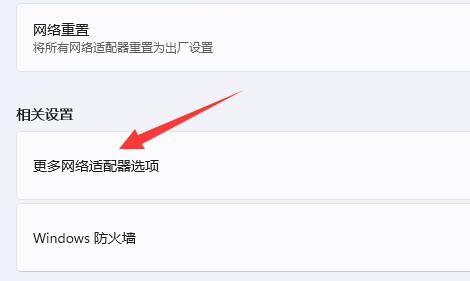
The third step, click "More network adapter options" in the relevant settings
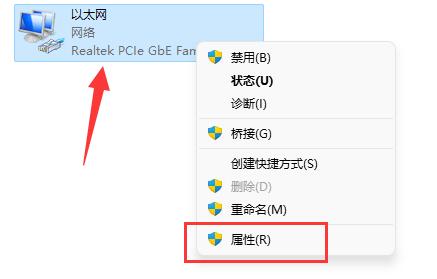
The fourth step, right-click "Ethernet" and open "Properties"
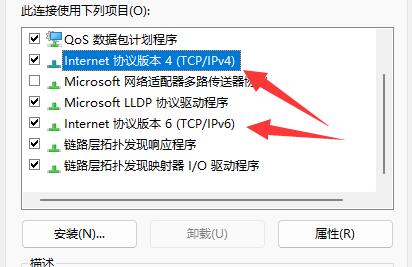
The fifth step, double-click to open "IPv4" or "IPv6"
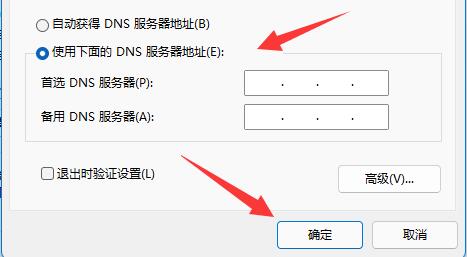
The sixth step is to check "Use the following dns server address" and enter the dns you want to use below, then click "OK" to save.
If you modify the unavailable dns, it may cause the Internet to fail. In this case, just change it back to the same location.
The above is the detailed content of Guide to changing DNS settings in Win11. For more information, please follow other related articles on the PHP Chinese website!


