Many friends feel uncomfortable after using the latest win10 version, and want to return to the previous win7 version. How to operate at this time? Generally, computers have backups of previous systems, and we only need to restore them. Today, the editor will teach you how to roll back. Let’s take a look below.
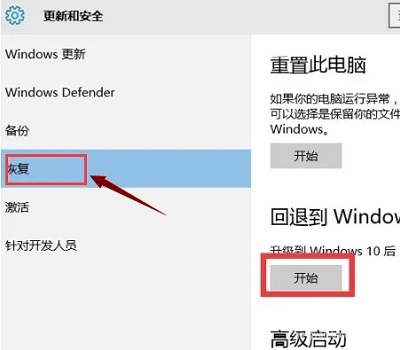
1. Open Settings - Update & Security - Recovery, find Rollback to Windows 7, and click Start.

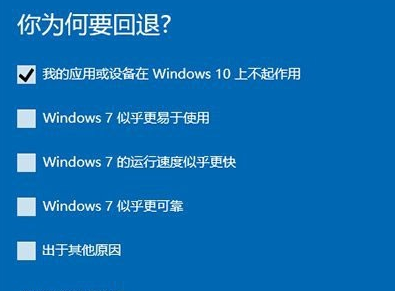
#2. Select the reason for "rollback" (multiple choices available), and then click "Next" to continue (you can cancel the "rollback" operation at any time in each of the following steps) .

#3. Read the precautions carefully. The whole process requires stable power supply support. That is to say, notebooks and tablets need to be connected to the power cord to perform rollback operations. , battery mode is not allowed;
In addition, the system also prompts some files and programs that may be affected.
After understanding and taking measures, click "Next" to continue.

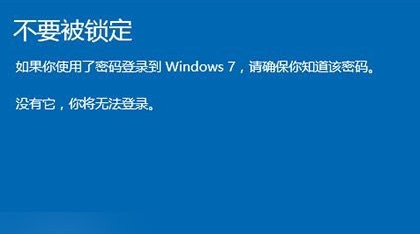
#4. For users who have set a login password, the password will be restored after rolling back, so you need to know the password to log in normally.
After confirming that the message will not affect your use, click "Next" to continue.

#5. The last step that requires confirmation is to remind Win7/Win8.1 users that they can upgrade to Win10 again at any time.
In the future, free installation of Win10 will no longer be subject to the time limit of "within 1 year of official version release", nor will it be restricted by the installation method. Pure installation will also be completely free.

6. After clicking "Return to Windows 7", the system automatically restarts and starts the rollback process. This process takes time and has a direct impact on the original system software installation and other usage conditions. relation. The Win7 system remains activated after the rollback.
The above is the detailed content of How to downgrade win10 to win7 system. For more information, please follow other related articles on the PHP Chinese website!


