
This article mainly introduces how to repair the boot file of Windows 10/8/7 under uefi. Many friends’ computers have damaged boot files and need to add new boot files. Today, the editor has compiled a tutorial on BOOTICE. Let’s do it together. Let's see.
First, make sure your computer is in uefi boot mode and open the diskgenius software. Look at 1 in the red box in the picture below to see if there are these two partitions: ESP and MSR. Look at 2 in the red box again to see if the partition table type is GPT. If so, make sure your computer is uefi bootable.

Tools/Materials:
Windows7/8/10 system computer
BOOTICE boot software, you can search and download it on Baidu (Chinese cabbage You can skip this step if you bring your own BOOTICE)
U disk uefi version pe startup tool, recommended Chinese cabbage, 5.2 two-in-one version. You can search, download and create
by yourself. After making the U disk boot disk, put the downloaded BOOTICE into the U disk. You can skip this step for the Chinese boot disk.
Start
1. We use the Chinese cabbage boot disk to demonstrate:
Plug the prepared boot U disk into the computer, start the computer and press F11 or F12, or Esc in some cases. key (Baidu's own computer model, it depends on which quick start hotkey is, usually F11 or F12) to select the U disk starting with UEFI to enter the system. Some computers do not display UEFI, directly select the U disk to boot into the system, and press the computer keyboard after booting Win key, click "BOOTICE".
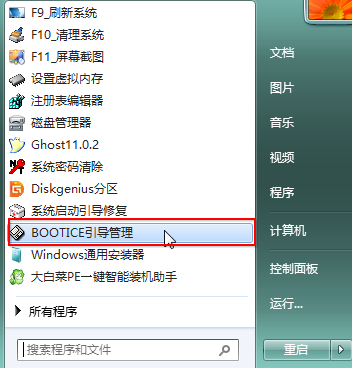
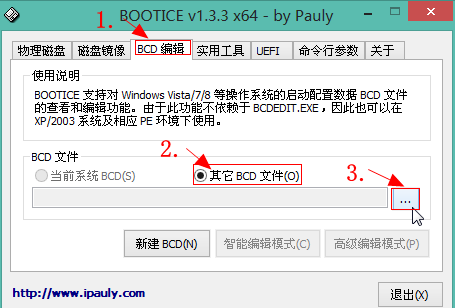
2. Look at the 123 numbers on the picture and click on
(1), select "BCD Edit",
(2) , click "Other BCD Files",
(3), select "..." within the quotation marks to open.
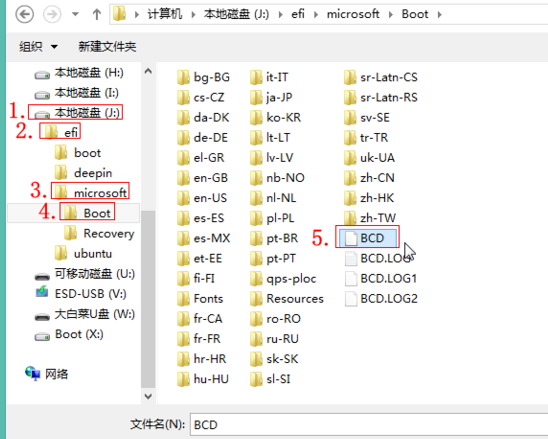
3. Find the ESP partition drive letter. There is an efi folder inside, click "efi>microsoft>boot>BCD" and open "BCD"
4. In the following interface, click "Smart Edit",
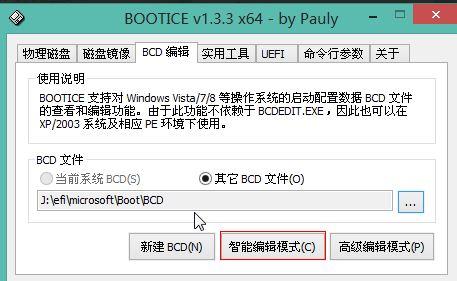
5. In the following interface, click "Start Disk", such as Red box area,
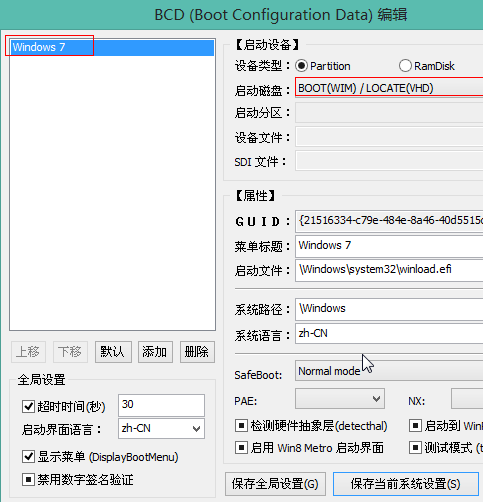
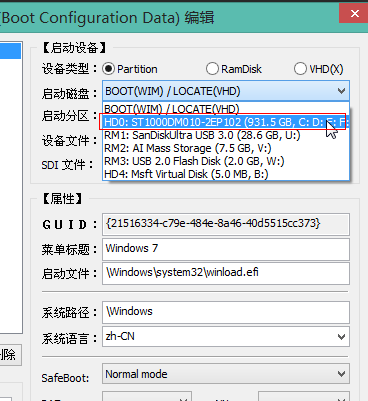
6. Select the hard drive where your system is located. Do not click mine. Select whichever hard drive your system is on.
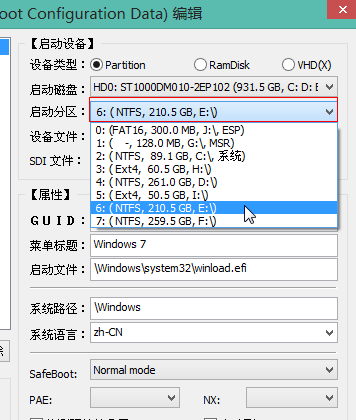
7. Then click "Start Partition" and select the drive letter where your system is installed. If you don't know, just look at the drive letter size and the partition where your system is located. After checking, it is usually the C drive. My win7 is on the E drive, so don’t follow my choice.
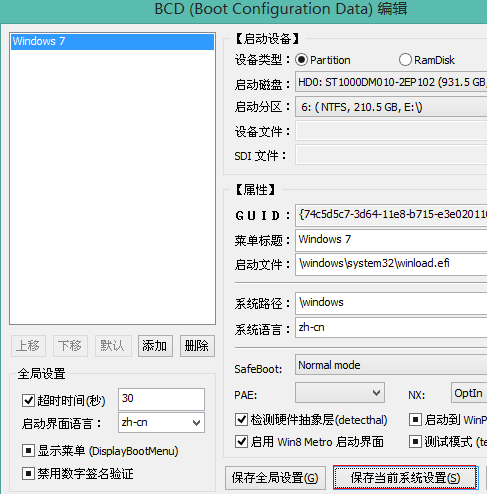
8. The following picture shows the interface after setting up. Select "Save current system settings" and then close the window.
9. Then click "UEFI", then click "Modify startup sequence",
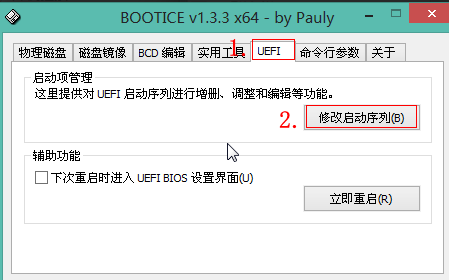
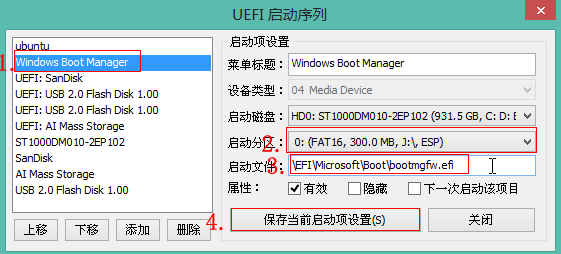
10. Generally, the above will be automatically set after the settings are completed. If not, press the figure below Settings:
a. Click "Windows boot manager".
b. Start the partition and select "ESP drive letter".
c. Open "\EFI\Microsoft\Boot\bootmgfw.efi". If not, copy this path to red box 3.
d. Save the current startup settings. It is best to check "Start this item next time".
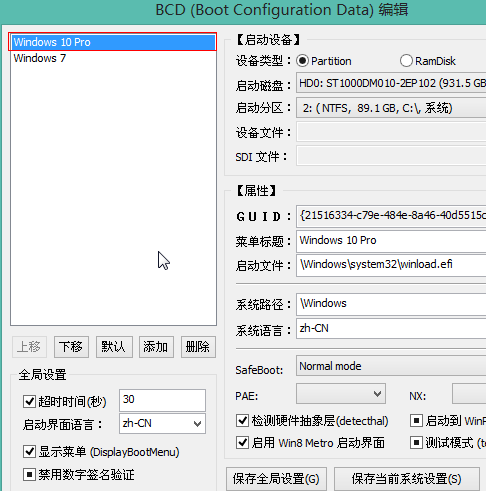
11. At this point, the uefi addition and repair startup items are set up. If it is a dual system, you need to add a startup item. Just follow the steps to add another one. The picture below shows my Windows 7 and 10 screenshots of dual system startup items,
Extended reading: Boot disk repair boot | Unable to boot into
The above is the detailed content of How to fix UEFI boot in Windows 10. For more information, please follow other related articles on the PHP Chinese website!


