
Grid/newspaper/magazine templates are becoming more and more dominant in the WordPress skin and theme community. They look elegant, but not knowing where to start can be daunting. In this tutorial, we use the power of jQuery to create a grid layout with reduced-size headers!
This tutorial assumes you have a WordPress engine running on your server and that you have permission to upload files, download files, and browse. If you want to run a local server on a computer with WordPress installed, there are tutorials for Windows here and tutorials for OS X here .

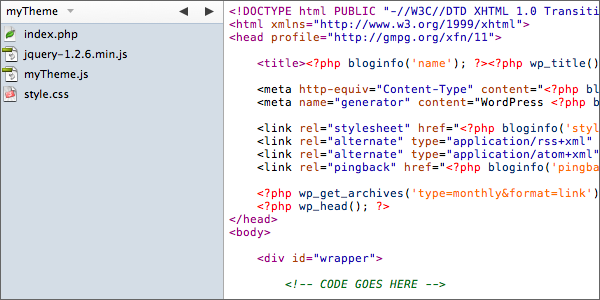
Create a new folder in the "wp-content/themes/" folder and name it whatever you want to name the skin we are about to make. Create 2 new files in this new folder, one named "index.php" and the other named "style.css". We'll start with some basic WordPress code. Every time I create a complete WordPress skin, I start with this "code base" because it contains most of the necessary information. I put it here because you may want to develop it into a full skin. I also use a default stylesheet for my theme, so copy this snippet into "style.css" and edit the contents separately. The style sheet is related to the following lines:
<link rel="stylesheet" href="<?php bloginfo('stylesheet_url'); ?>" type="text/css" media="screen" />
You will also need 2 JavaScript files, one of which is a copy of jQuery and the other is an empty .js file called myTheme.js. Don't forget to associate them with this in the head element:
<script type="text/javascript" src="<?php bloginfo('template_directory'); ?>/jquery-1.2.6.min.js"></script>
<script type="text/javascript" src="<?php bloginfo('template_directory'); ?>/myTheme.js"></script>
If you are using a different package than me (which you most likely are), don't forget to change the name of the jQuery rel. "myTheme.js" mustbelow the jQuery link, cannotbe above it.
Note: jQuery 1.2.6 is also packaged with WordPress 2.2 and above, so if you don't want to download it, you can find it in wp-includes/js/ jquery/jquery .js. To include this jQuery documentation, use this instead of the jQuery rel above. You still need myTheme.js, though!
<script type="text/javascript" src="<?php bloginfo('url'); ?>/wp-includes/js/jquery.js"></script>
After selecting and activating your new theme, open "index.php" using your favorite editor and start coding!
Here is all the XHTML/PHP/Wordpress code we need to set up the content and metadata for each post. Paste or type it between the html opening and closing tags. I will explain it bit by bit below!
<div id="wrapper">
	<?php if(have_posts()) : ?><?php while(have_posts()) : the_post(); ?>

		<div class="post">

			<div class="left">
				<p class="postmetadata">
					<strong>Post Details</strong><br />
					Posted: <em><?php the_time('l, jS F, Y'); ?></em>
					at <em><?php the_time('g:i a'); ?></em>.<br />
					Written by: <em><?php the_author(); ?>.</em><br />
					Number of comments: <em><?php the_comments_number('none', '1', '%'); ?></em>.<br />
					Posted in: <em><?php the_category(', '); ?></em>.
				</p>
			</div><!-- end div.left -->

			<div class="right">
				<h2><?php the_title(); ?></h2>
				<div class="entry">
					<?php the_content('more...'); ?>
				</div><<!-- end div.entry -->
			</div><!-- end div.right -->

		</div><!-- end div.post -->

	<?php endwhile; ?>
	<?php endif; ?>
</div><!-- end div#wrapper -->
<div id="wrapper">
The wrapping div basically wraps the entire content so that we can lay it out nicely later. All the divs are pretty self-explanatory and I've also commented them at the end of the divs so I'll skip them in my explanation. In short, I've packaged everything accordingly so it's easy to design. .left div is the left column, .right div is the right column, .entry div is the post entry, and so on. I'm using the class in a loop and as if there are multiple posts the ID's are backed up and create validation errors.
<?php if(have_posts()) : ?><?php while(have_posts()) : the_post(); ?>
If you don’t understand what this is, go back to WordPress School. It basically loops through the database information related to the calls made within the loop. If you ask for a title, the loop will look for the title in the database for you.
<p class="postmetadata">
	<strong>Post Details</strong><br />
	Posted: <em><?php the_time('l, jS F, Y'); ?></em> at <em><?php the_time('g:i a'); ?></em>.<br />
	Written by: <em><?php the_author(); ?>.</em><br />
	Number of comments: <em><?php comments_number('none', '1', '%'); ?></em>.<br />
	Posted in: <em><?php the_category(', '); ?></em>.
</p>
Now let’s talk about the specific content. Everything above contains the information we want to display about the post. In the corresponding order, we ask;
<h2><?php the_title(); ?></h2>
<div class="entry">
	<?php the_content('more...'); ?>
</div><<!-- end div.entry -->
它是否比这更不言自明?我们要求提供标题(包装在 h2 元素中,以便我们可以相应地设置其样式)和内容(包装在 .entry div 中,以便所有内容都嵌套在它有自己的 div,也可以轻松设置样式和访问。)。括号中的“more...”表示您在 WordPress 帖子编辑器中使用 标签时的情况。
<?php endwhile; ?>
<?php endif; ?>
编码兔子应该明白这个...这又是基本循环!它关闭循环,以便只反复执行循环中包含的“函数”。
唷!您已经掌握了本教程所需的所有 WordPress 代码!做得好!它看起来应该像这样丑陋:
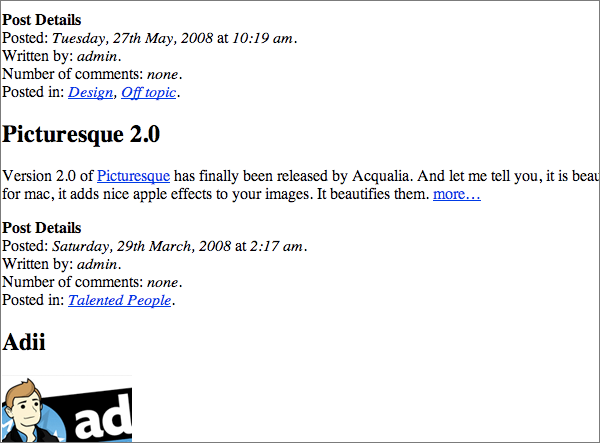
注意:我使用了来自我自己的本地服务器的内容(恰好来自我自己的博客)作为填充内容,因此您的内容不会反映我的内容。
现在我们已经解决了所有的 xhtml 和 php 函数,我们可以继续使用 css 让它看起来更漂亮!快乐!
使用您最喜欢的编辑器再次打开“style.css”,如果尚未打开,请将此代码粘贴到其中。但无论如何你都应该这样做,因为否则你将无法激活主题!
在本教程中,我利用 CSS 的“float”和“clear”的优点来浮动帖子详细信息(或元数据,无论您想如何称呼它),以及并排的内容,并且一篇接着一篇。 。这是基本的布局代码:(注意:这不会让您的页面变得漂亮。)
/*-----LAYOUT-----*/
#wrapper{
	width: 600px;
	margin: 0 auto;
}

.post{
	clear: both;
	width: 600px;
}

.post .left{
	width: 180px;
	float: left;
	padding-right: 20px;
}

.post .right{
	width: 400px;
	float: right;
	padding: 0 25px 20px;
}
简单:
我已经完成了数学计算,并确保总宽度总计为 600,因此两列都很好地适合父“.post”div:180px+20px(填充,因此我们有一些间距)+400px= 600 像素
耶!现在,让我们把它变得漂亮起来!
所以我们已经得到了骨架布局,但它看起来仍然有点难看:
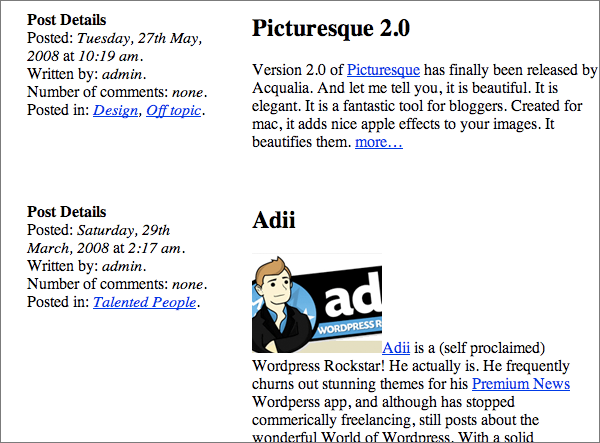
这是我们使用级联样式表真正威力的时候。将以下内容复制或输入到之前“布局”代码下方的 style.css 中:
/*-----STYLES-----*/

body{
	font: 75%/18px Georgia, "Times New Roman", Times, serif;
	background-color: #e4e4e4;
}

a{
	color: #006082;
	text-decoration: none;
}

.post .left{
	text-align: right;
	color: #898989;
}

.post .left p.postmetadata strong{
	display: block;
	text-transform: uppercase;
}

.right{
	background-color: #fff;
	min-height: 150px;
}

.entry{
	color: #3c3c3c;
}

.entry p img{
	padding: 0 10px 7px 0;
	float: left;
}

a.more-link{
	display: block;
	padding-top: 10px;
	text-transform: uppercase;
}
这是一些需要处理的代码,看起来可能令人畏惧,但实际上非常简单!因为你们中的大多数人可能都具备足够的 CSS 能力,所以我会快速而敏捷地完成这一部分。
CSS 应该使它看起来像这样:
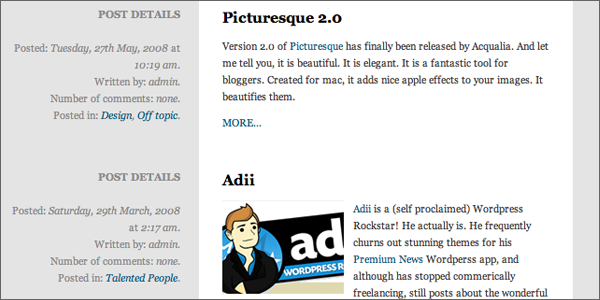
所以非常重要的是它在没有任何 JavaScript 的情况下看起来一切都很好 - 上面的内容补偿了我们。但要创建真正的报纸风格的降级标题,我们需要一些美味的 jQuery!打开“myTheme.js”,让我们开始破解吧!我们想要实现的目标是这样的(photoshop 模型):
注意到区别了吗?我们将增加第一个“英雄”帖子标题的大小,并更改颜色。
然后,第二个或“恶棍”帖子将呈浅灰色,尺寸更小,之后的连续帖子将保持统一的尺寸。
我们将通过分别向第一个和第二个“.post”div 添加类“hero”和“villain”来解决这个问题,然后我们将使用一些额外的 CSS 对其进行样式设置。我们将类添加到 '.post' div 而不是 h2 元素,因为我们也想更改一些包含的内容,例如内容的大小和更多的附加图标 - “英雄”帖子中的链接。你问为什么是英雄和恶棍?因为恶棍总是在英雄之后出现。这是一个容易掌握的概念。
听起来很复杂,但实际上只有 4 行(间隔的)代码。这一切都进入“myTheme.js”:
$(document).ready(function(){
	$(".post:first").addClass("hero");
	$(".post:nth-child(2)").addClass("villain");
});
太棒了!非侵入式 JavaScript!我喜欢它!它应该位于“myTheme.js”中。
我们刚刚使用了 jQuery 极其强大、有价值且多功能的选择器的一小部分。现在,我们已经悄悄地将类“.hero”添加到页面上的第一个“.post”div,并将类“.villain”添加到页面上的第二个“.post”div。让我解释一下如何。
$(document).ready(function(){
这是 jQuery 的超级特殊函数,用于启动此行之后定义的 JavaScript 函数。当 $(document) 为 .ready() 时,启动我们即将定义的 function(){}。使用 $(document).ready(function(){ 比使用 'default': window.onload() 函数快得多,因为window.onload()函数等待整个文档加载。这包括所有图像、iframe等。我们只需要等待核心 XHTML 文档已完成加载以运行我们的脚本 - 因此我们使用 jQuery 的特殊 $(document).ready(function(){ 来加快速度,并减少初始浏览之间的延迟时间和 JavaScript 启动。有点令人困惑吧?为了简单起见,jQuery 的方法更快。记住这一点。
$(".post:first").addClass("hero");
强大的选择器太棒了! jQuery 有一系列令人惊叹的选择器,其中一些来自 CSS3,但我们现在就可以使用它们。这一行告诉我们获取:$() 第一个 '.post' 元素:.post:first 并添加英雄类:.addClass("英雄”) 。我们现在可以在 CSS 中设置样式,但我们仍然没有以任何方式触及或更改“.post”div 的 XHTML 代码。
$(".post:nth-child(2)").addClass("villain");
更多超强选择器! jQuery 不仅让我们选择一种元素的第一个元素,还让我们选择任意数量的元素!使用:nth-child(#)我们可以选择页面上我们想要的任何元素类型。如果我们想要页面上的第 30 个
,标记将为 $("p:nth-child(30)")。简单易懂吗?
jQuery 的选择器并不限于数字!还有更多选择器可让您选择所需的确切元素。您可以通过访问 jQuery 文档上的选择器部分来查看它们。
/*-----jQUERY-----*/

.hero .left p.postmetadata{
margin-top: 30px;
}

.hero .left p.postmetadata strong{
margin-bottom: 20px;
}

.hero .right h2{
font-size: 46px;
font-style: italic;
font-weight: normal;
margin-bottom: 0.5em;
}

.hero .right p{
font-size: 14px;
}

.hero a.more-link{
background: url(images/arrow_right.png) no-repeat right bottom;
float: left;
padding-right: 20px;
}

.villain .left p.postmetadata{
margin-top: 20px;
}

.villain .left p.postmetadata strong{
margin-bottom: 15px;
}

.villain .right h2{
font-size: 32px;
font-weight: normal;
color: #747474;
}

.villain .right p img{
float: right;
padding: 0 0 7px 10px;
}
现在你们应该已经足够熟悉 CSS 了,所以我将非常快速浏览一下这个新的 CSS。
这是更改“.hero”帖子外观的 CSS。
还有更改“.villain”帖子的 CSS。
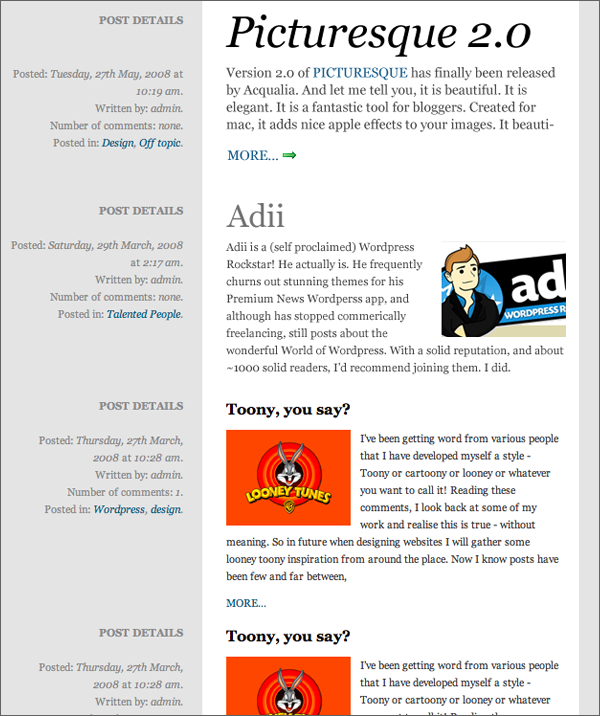
干得好!在本教程中,我们介绍了使用 jQuery 选择器美化 WordPress 内容的基本方法!然而它们并不是 jQuery 独有的。您将在 CSS3 中找到所有这些选择器(当所有浏览器都支持时!)。我们只是喜欢 jQuery,因为他们现在将它们带给我们。这是我们的最终产品。

The above is the detailed content of Build a basic newspaper style layout using Wordpress and jQuery. For more information, please follow other related articles on the PHP Chinese website!


