异步编程
javascript异步编程, web2.0时代比较热门的编程方式,我们平时码的时候也或多或少用到,最典型的就是异步ajax,发送异步请求,绑定回调函数,请求响应之后调用指定的回调函数,没有阻塞其他代码的执行。还有像setTimeout方法同样也是异步执行回调的方法。
如果对异步编程还不太熟悉的话,直接戳 阮一峰大牛的教程 ,这篇文章介绍了四种异步编程的方式:
这几种方式的可维护性逐级递增,理解难度也逐级递增。这篇总结也是针对promise模式的。
promise模式
那么多中异步编程的方式,为什么选择promise, 因为前面几种方式不够灵活,用起来不够痛快,不优雅。为了降低异步编程的复杂性,所以promise。
promise的核心是有一个promise对象,这个对象有一个重要的then()方法, 它用于指定回调函数,如:
f1().then(f2);
promise模式在任何时刻都有三种状态:已完成(resolved),未完成(unfulfilled),那么then()方法就是为状态变化指定不同的回调函数,并总是返回一个promise对象,方便链式调用。
那promise模式下,返回的数据如何在各个回调函数之间传播呢,通过resolve方法,你可以将一个函数的返回值作为参数传递给另一个函数,并且将另一个函数的返回值作为参数再传递给下一个函数……像一条“链”一样无限的这么做下去。
代码实现
通过创建一个Promise构造函数来实现promise模式:
//constructor
var Promise = function() {
 this.callbacks = [];
}
Promise.prototype = {
 construct: Promise,
 resolve: function(result) {
  this.complete("resolve", result);
 },
 reject: function(result) {
  this.complete("reject", result);
 },
 complete: function(type, result) {
  while (this.callbacks[0]) {
   this.callbacks.shift()[type](result);
  }
 },
 then: function(successHandler, failedHandler) {
  this.callbacks.push({
   resolve: successHandler,
   reject: failedHandler
  });
  return this;
 }
}
// test
var promise = new Promise();
var delay1 = function() {
 setTimeout(function() {
  promise.resolve('数据1');
 }, 1000);
 return promise;
};
var callback1 = function(re) {
 re = re + '数据2';
 console.log(re);
};
delay1().then(callback1)
代码分析
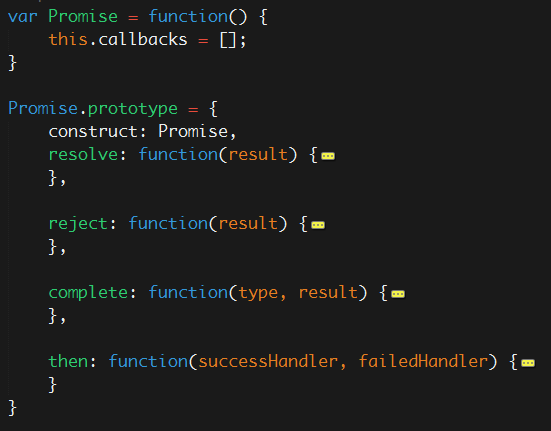
我们可看到一个简单的promise对象的构造函数的结构:

测试:
var promise = new Promise();
var delay1 = function() {
 setTimeout(function() {
  promise.resolve('数据1');
 }, 1000);
 return promise;
};
var callback1 = function(re) {
 re = re + '数据2';
 console.log(re);
 promise.resolve(re);
};
var callback2 = function(re) {
 console.log(re + '数据3');
};
delay1().then(callback1).then(callback2);
结果:
一秒之后输出:

分析:
//第一步
var delay1 = function() {
 setTimeout(function() {
  promise.resolve('数据1');
 }, 1000);
 return promise;
};这个函数通过setTimeout方法,异步传递一个数据1,并返回一个promise对象(必须)。
//第二步
var callback1 = function(re) {

 re = re + '数据2';
 console.log(re);
 promise.resolve(re);
};
callback1和callback2都是要通过then方法注册的回调函数,其中callback1通过resolve方法把数据往下传递。
//第三步
delay1().then(callback1).then(callback2);
delay1()方法执行完,因为返回了一个promise对象,所以可以再调用then()方法为delay1()的setTimeout异步执行操作指定回调函数, 又因为then()方法也返回的是promise对象,所以还可以再调用then方法
//第四步
setTimeout(function() {
 promise.resolve('数据1');
}, 1000);一秒之后,当其他代码执行完成,开始执行异步代码promise.resolve('数据1');,这里调用promise的resolve()方法,指定了一个成功状态,并把数据1作为参数。
//第五步
resolve: function(result) {
 this.complete("resolve", result);
},
//第六步:循环执行回调,将上一个回调的结果传递给下一个回调
complete: function(type, result) {
 while (this.callbacks[0]) {
  this.callbacks.shift()[type](result);
 }
},
这其中比较难理解的就是第五,六步。
以上就是本文的全部内容,希望对大家的学习有所帮助。


