Nacos is committed to helping you discover, configure and manage microservices. Nacos provides a series of easy-to-use functions to help you quickly implement dynamic service discovery, configuration, metadata and traffic management.
Nacos helps you build, deliver and manage microservices platforms more agilely and easily. Nacos is the infrastructure used to build service-centric modern application architecture (such as microservice paradigm and cloud native paradigm)
First create a maven project, the parent project pom is as follows:
<?xml version="1.0" encoding="UTF-8"?>
<project xmlns="http://maven.apache.org/POM/4.0.0"
         xmlns:xsi="http://www.w3.org/2001/XMLSchema-instance"
         xsi:schemaLocation="http://maven.apache.org/POM/4.0.0 http://maven.apache.org/xsd/maven-4.0.0.xsd">
    <modelVersion>4.0.0</modelVersion>
    <groupId>org.example</groupId>
    <artifactId>configDemo</artifactId>
    <version>1.0-SNAPSHOT</version>
    <parent>
        <groupId>org.springframework.boot</groupId>
        <artifactId>spring-boot-starter-parent</artifactId>
        <version>2.3.2.RELEASE</version>
    </parent>
    <dependencies>
        <dependency>
            <groupId>com.alibaba.cloud</groupId>
            <artifactId>spring-cloud-starter-alibaba-nacos-config</artifactId>
        </dependency>
        <dependency>
            <groupId>org.springframework.boot</groupId>
            <artifactId>spring-boot-starter-web</artifactId>
        </dependency>
    </dependencies>
    <dependencyManagement>
        <dependencies>
            <dependency>
                <groupId>com.alibaba.cloud</groupId>
                <artifactId>spring-cloud-alibaba-dependencies</artifactId>
                <version>2.2.5.RELEASE</version>
                <type>pom</type>
                <scope>import</scope>
            </dependency>
        </dependencies>
    </dependencyManagement>
</project>The accessed url is: http://localhost:8848/nacos/ The default port is 8848, the account password is: nacos/nocos
import org.springframework.beans.factory.annotation.Value;
import org.springframework.cloud.context.config.annotation.RefreshScope;
import org.springframework.web.bind.annotation.GetMapping;
import org.springframework.web.bind.annotation.RestController;
/**
 * @author yhq
 * @version 1.0
 * @date 2022/7/15 19:07
 */
@RestController
@RefreshScope  //@RefreshScope:需要配置这个才能动态更新配置。
public class TestController {
    @Value("${name}")
    private String name;
    @GetMapping("/getName")
    public String test(){
        return name;
    }
}springboot default loading configuration file sequence:
bootstrap.properties -> ; bootstrap.yml -> application.properties -> application.yml Among them, bootstrap.properties is configured as the highest priority. The one loaded first will be overwritten by the one loaded later. Therefore, when .properties and .yml exist at the same time, .properties will be invalid. ,.yml will work. ”
#Port
server:
port: 8888
#Configuration project name
spring:
application:
#configdemo default is the DateId of nacos Name
name: configdemo
#Specify the test configuration file
profiles:
active: test
cloud:
nacos:
config:
server-addr: localhost :8848
#Load the nacos file of yaml
file-extension: yaml
You can see that the file is loaded during startup as follows:

Configured configdemo and configdemo-test.yaml
Note: Its loading rules are: # 1.DataId
- The complete format of the specific configuration file used to read the remote configuration center is as follows:
- ${prefix}-${spring.profile.active}.${file-extension}
a. prefix defaults to the value of spring.application.name, and can also be configured through the configuration item spring.cloud.nacos.config.prefix.
b. spring.profile.active is the profile corresponding to the current environment , please refer to the Spring Boot documentation for details. Note: When spring.profile.active is empty, the corresponding connector - will not exist, and the splicing format of dataId becomes ${prefix}.${file-extension}
c. file-exetension is the data format of configuration content, which can be configured through the configuration item spring.cloud.nacos.config.file-extension. Currently only properties and yaml types are supported.
If configdemo and The configuration of name exists in configdemo-test.yaml. Priority is given to configdemo-test.yaml
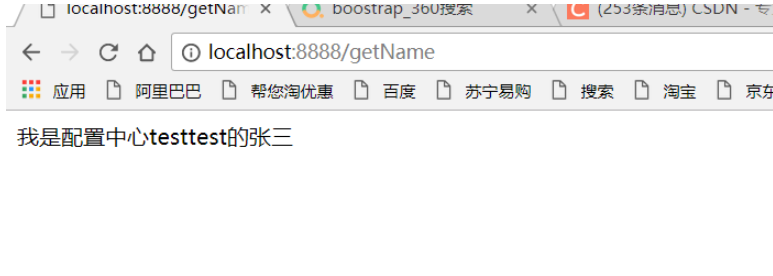
. The access results are as follows:

The above is the detailed content of How to integrate and use Springboot's nocos. For more information, please follow other related articles on the PHP Chinese website!


