Create a Controller package and write a test class for Send message
package com.my.kafka.controller;

import org.springframework.beans.factory.annotation.Autowired;
import org.springframework.kafka.core.KafkaTemplate;
import org.springframework.web.bind.annotation.GetMapping;
import org.springframework.web.bind.annotation.RestController;

@RestController
public class HelloController {
    @Autowired
    private KafkaTemplate<String,String> kafkaTemplate;

    @GetMapping("hello")
    public String helloProducer(){
        kafkaTemplate.send("my-topic","Hello~");
        return "ok";
    }
}Write a test class to receive messages:
package com.my.kafka.listener;

import org.junit.platform.commons.util.StringUtils;
import org.springframework.kafka.annotation.KafkaListener;
import org.springframework.stereotype.Component;

@Component
public class HelloListener {
    @KafkaListener(topics = "my-topic")
    public void helloListener(String message) {
        if(StringUtils.isNotBlank(message)) {
            System.out.println(message);
        }
    }
}Open browser input localhost:9991/hello, and then go to the console to view the message. You can see that the successful message has been monitored and consumed.

Currently springboot integrated kafka, because the serializer is StringSerializer, if you need to pass objects at this time, there are two ways Method:
Method 1: You can customize the serializer with many object types. This method is not very versatile and will not be introduced here.
Method 2: You can convert the object to be transferred into a json string, and then convert it into an object after receiving the message. This method is used in this project.
@GetMapping("hello")
public String helloProducer(){
    User user = new User();
    user.setName("赵四");
    user.setAge(20);
    kafkaTemplate.send("my-topic", JSON.toJSONString(user));
    return "ok";
}
You can see that all object parameters are successfully received, later To use this object, you only need to convert it into a User object.
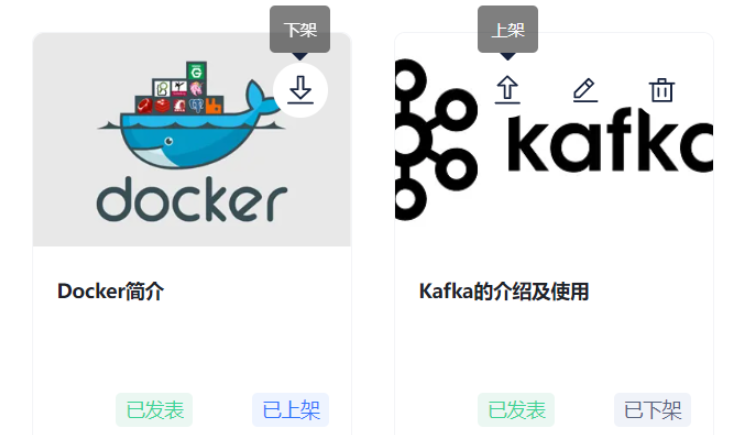
After publishing an article, there may be some errors or other reasons in the article. We will implement the article on the article management side. The upload and delist function (see the picture below), that is, when the management terminal removes an article from the shelves, the mobile terminal will no longer display the article. Only after the article is re-listed can the article information be seen on the mobile terminal.


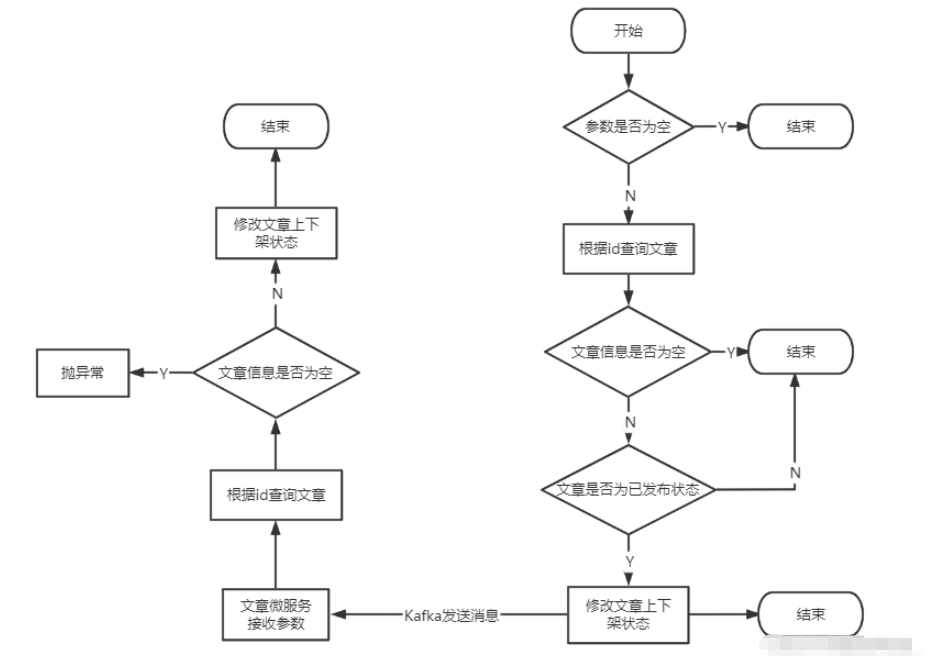
#After the back-end receives the parameters passed by the front-end, it must first do a verification , the parameter is not empty before the execution can continue. First, the article information of the self-media database should be queried based on the article id passed from the front end (self-media end article id) and judge whether the article has been published, because only if the review is successful and successful Only published articles can be uploaded or removed. After the self-media side microservice modifies the article uploading and delisting status, it can send a message to Kafka. The message is a Map object. The data stored in it is the article id of the mobile terminal and the uploading and delisting parameter enable passed from the front end. Of course, this message must be The Map object can be sent after it is converted into a JSON string.
The article microservice listens to the message sent by Kafka, converts the JSON string into a Map object, and then obtains the relevant parameters to modify the up and down status of the mobile article.
<!-- kafkfa -->
<dependency>
    <groupId>org.springframework.kafka</groupId>
    <artifactId>spring-kafka</artifactId>
</dependency>
<dependency>
    <groupId>org.apache.kafka</groupId>
    <artifactId>kafka-clients</artifactId>
</dependency>package com.my.common.constans;
public class WmNewsMessageConstants {
public static final String WM_NEWS_UP_OR_DOWN_TOPIC="wm.news.up.or.down.topic";
}Because I use Nacos as the registration center, so the configuration information can be placed on Nacos.
(1) Self-media terminal configuration
spring:
  kafka:
    bootstrap-servers: 4.234.52.122:9092
    producer:
      retries: 10
      key-serializer: org.apache.kafka.common.serialization.StringSerializer
value-serializer: org.apache.kafka.common.serialization.StringSerializer(2) Mobile terminal configuration
spring:
  kafka:
    bootstrap-servers: 4.234.52.122:9092
    consumer:
      group-id: ${spring.application.name}-test
      key-deserializer: org.apache.kafka.common.serialization.StringDeserializer
value-deserializer: org.apache.kafka.common.serialization.StringDeserializer@Autowired
private KafkaTemplate<String,String> kafkaTemplate;
/**
* 文章下架或上架
* @param id
* @param enable
* @return
*/
@Override
public ResponseResult downOrUp(Integer id,Integer enable) {
log.info("执行文章上下架操作...");
if(id == null || enable == null) {
return ResponseResult.errorResult(AppHttpCodeEnum.PARAM_INVALID);
}
//根据id获取文章
WmNews news = getById(id);
if(news == null) {
return ResponseResult.errorResult(AppHttpCodeEnum.DATA_NOT_EXIST,"文章信息不存在");
}
//获取当前文章状态
Short status = news.getStatus();
if(!status.equals(WmNews.Status.PUBLISHED.getCode())) {
return ResponseResult.errorResult(AppHttpCodeEnum.PARAM_INVALID,"文章非发布状态,不能上下架");
}
//更改文章状态
news.setEnable(enable.shortValue());
updateById(news);
log.info("更改文章上架状态{}-->{}",status,news.getEnable());
//发送消息到Kafka
Map<String, Object> map = new HashMap<>();
map.put("articleId",news.getArticleId());
map.put("enable",enable.shortValue());
kafkaTemplate.send(WmNewsMessageConstants.WM_NEWS_UP_OR_DOWN_TOPIC,JSON.toJSONString(map));
log.info("发送消息到Kafka...");
return ResponseResult.okResult(AppHttpCodeEnum.SUCCESS);
}(1) Set up the listener
package com.my.article.listener;

import com.baomidou.mybatisplus.core.toolkit.StringUtils;
import com.my.article.service.ApArticleService;
import com.my.common.constans.WmNewsMessageConstants;
import lombok.extern.slf4j.Slf4j;
import org.springframework.beans.factory.annotation.Autowired;
import org.springframework.stereotype.Component;
import org.springframework.kafka.annotation.KafkaListener;


@Slf4j
@Component
public class EnableListener {
    @Autowired
    private ApArticleService apArticleService;

    @KafkaListener(topics = WmNewsMessageConstants.WM_NEWS_UP_OR_DOWN_TOPIC)
    public void downOrUp(String message) {
        if(StringUtils.isNotBlank(message)) {
            log.info("监听到消息{}",message);
            apArticleService.downOrUp(message);
        }
    }
}(2) Get the message and modify the article status
/**
* 文章上下架
* @param message
* @return
*/
@Override
public ResponseResult downOrUp(String message) {
    Map map = JSON.parseObject(message, Map.class);
    //获取文章id
    Long articleId = (Long) map.get("articleId");
    //获取文章待修改状态
    Integer enable = (Integer) map.get("enable");
    //查询文章配置
    ApArticleConfig apArticleConfig = apArticleConfigMapper.selectOne
            (Wrappers.<ApArticleConfig>lambdaQuery().eq(ApArticleConfig::getArticleId, articleId));
    if(apArticleConfig != null) {
        //上架
        if(enable == 1) {
            log.info("文章重新上架");
            apArticleConfig.setIsDown(false);
            apArticleConfigMapper.updateById(apArticleConfig);
        }
        //下架
        if(enable == 0) {
            log.info("文章下架");
            apArticleConfig.setIsDown(true);
            apArticleConfigMapper.updateById(apArticleConfig);
        }
    }
    else {
        throw new RuntimeException("文章信息不存在");
    }
    return ResponseResult.okResult(AppHttpCodeEnum.SUCCESS);
}The above is the detailed content of How Springboot microservice project integrates Kafka to implement article uploading and delisting functions. For more information, please follow other related articles on the PHP Chinese website!
 SpringBoot project building steps
 What is the role of kafka consumer group
 What is the role of kafka consumer group
 What is the difference between rabbitmq and kafka
 What is the difference between j2ee and springboot
 virtual digital currency
 What software is autocad?
 java regular expression matching string


