


Enter the command to replace the Ubuntu download source
sudo nano /etc/apt/sources.list
Replace all the following with the original file, What I use here is Alibaba’s source, you can also change it to other sources.
deb http://mirrors.aliyun.com/ubuntu/ bionic main restricted
deb http://mirrors.aliyun.com/ubuntu/ bionic-updates main restricted
deb http://mirrors.aliyun.com/ubuntu/ bionic universe
deb http://mirrors.aliyun.com/ubuntu/ bionic-updates universe
deb http://mirrors.aliyun.com/ubuntu/ bionic multiverse
deb http://mirrors.aliyun.com/ubuntu/ bionic-updates multiverse
deb http://mirrors.aliyun.com/ubuntu/ bionic-backports main restricted universe multiverse
deb http://mirrors.aliyun.com/ubuntu/ bionic-security main restricted
deb http://mirrors.aliyun.com/ubuntu/ bionic-security universe
deb [arch=amd64] https://mirrors.aliyun.com/docker-ce/linux/ubuntu bionic stable
分别输入以下命令,更新源
sudo apt update
sudo apt upgrade
# 安装python3
sudo apt install python3
# 查看python安装路径:
which python
# 查看python版本:建议使用3.6之后的版本,因为其他的笔者没试过,笔者用的是3.6.9版本
python
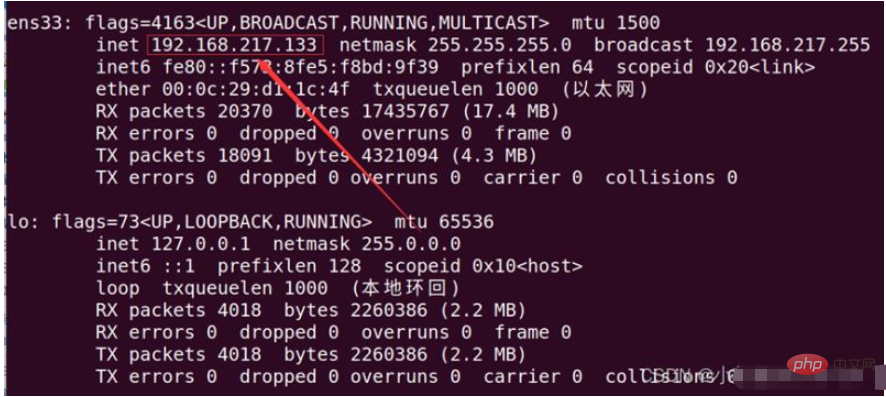
# 安装 openssh-server
sudo apt install openssh-server
#开启:
sudo service ssh start

# 安装net-tools
sudo apt install net-tools
# 查看虚拟机ip:
ifconfig
as shown below As shown, it is our virtual machine IP
Install the running environment of django
#安装django运行环境:
sudo apt install virtualenv
# 创建环境
virtualenv --python=/usr/bin/python3 myblog
# 进入环境:
cd myblog
# 激活环境:
source bin/activate
Install django:pip3 install Django
Create project:django-admin.py startproject blog
After activating and creating the project, it will basically look like the picture below

# 进入到blog中安装 uwsgi:
pip3 install uwsgi
After installation, we will write a test file to test us The way the project is run is the same as the actual project. Here I use the nano editing and writing method. You can also use vim. The method is not limited. If you can create and write, you can write the command:
sudo nano test.py
Required The written file content is:
def application(env,start_response):
        start_response('200 ok',[('Content-Type','text/html')])
return [b"Hello World"]The test command is: uwsgi --http :8000 --wsgi-file test.py
After pressing Enter, we enter the IP and port number in the browser. Mine is 192.168.217.133:8000. When I opened it in the browser, I found the following error.
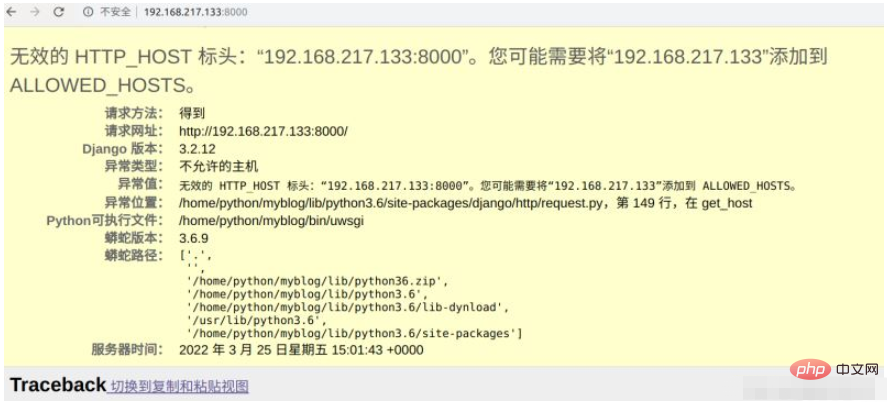
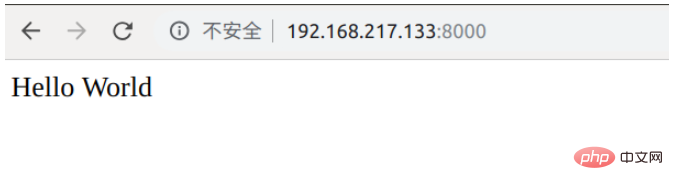
For this error, we only need to open the settings.py file of the project file, add the address of our virtual machine in ALLOWED_HOSTS, and it will be ok, and then we will test and run , found to be normal, the web page outputs hello world. This shows that uwsgi can run the test file normally.
But we are not running the test.py file, we are running our own django project. Here we need to modify the previous command to: uwsgi - -http :8000 --module blog.wsgi
In order to avoid not entering the port number when entering the ip It can also be used normally. We introduce lightweight nginx. Here we use the command line to install and start nginx
Installation: sudo apt install nginx
Start: sudo service nginx start
Enter the command: sudo nano /etc/nginx/sites-available/blog_nginx.conf
Create a new conf file and write the following content. Change all the paths involved in it to the path of your own project:
upstream django {
    # server unix:///home/python/myblog/blog/blog.sock; # 这里的路径改为你自己项目路径
    server 127.0.0.1:8001; # for a web port socket (we'll use this first)
}
server {
    listen      8000;
    server_name 192.168.217.133; # 将这里的ip地址改为你自己的虚拟机或者服务器地址
    charset     utf-8;
    client_max_body_size 75M;   # adjust to taste
    location /media  {
        alias /home/python/myblog/blog/media;  # your Django project's media files - amend as required
    }
    location /static {
        alias /home/python/myblog/blog/static; # your Django project's static files - amend as required
    }
    location / {
        uwsgi_pass  django;
        include     /home/python/myblog/blog/uwsgi_params; # the uwsgi_params file you installed
    }
}After creating the file, we need to create the file A soft link, you need to enter the following command:
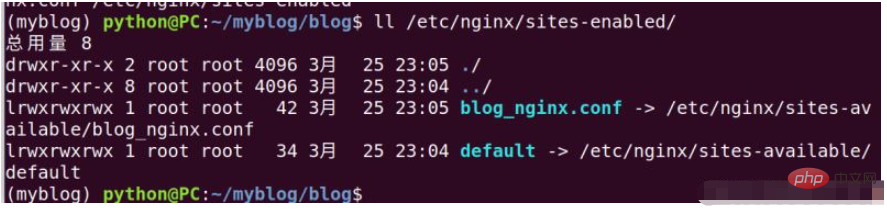
sudo ln -s /etc/nginx/sites-available/blog_nginx.conf /etc/nginx/sites-enabled
After completion, we can use the command ll /etc/nginx/sites-enabled/ to check whether the settings are correct. Refer to the figure below
sudo nano uwsgi_params
uwsgi_param  QUERY_STRING       $query_string;
uwsgi_param  REQUEST_METHOD     $request_method;
uwsgi_param  CONTENT_TYPE       $content_type;
uwsgi_param  CONTENT_LENGTH     $content_length;
uwsgi_param  REQUEST_URI        $request_uri;
uwsgi_param  PATH_INFO          $document_uri;
uwsgi_param  DOCUMENT_ROOT      $document_root;
uwsgi_param  SERVER_PROTOCOL    $server_protocol;
uwsgi_param  REQUEST_SCHEME     $scheme;
uwsgi_param  HTTPS              $https if_not_empty;
uwsgi_param  REMOTE_ADDR        $remote_addr;
uwsgi_param  REMOTE_PORT        $remote_port;
uwsgi_param  SERVER_PORT        $server_port;
uwsgi_param  SERVER_NAME        $server_name;
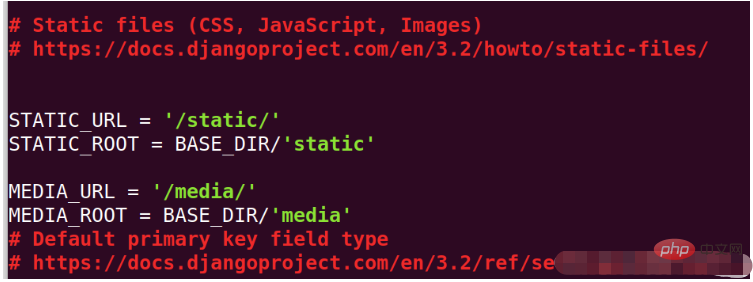
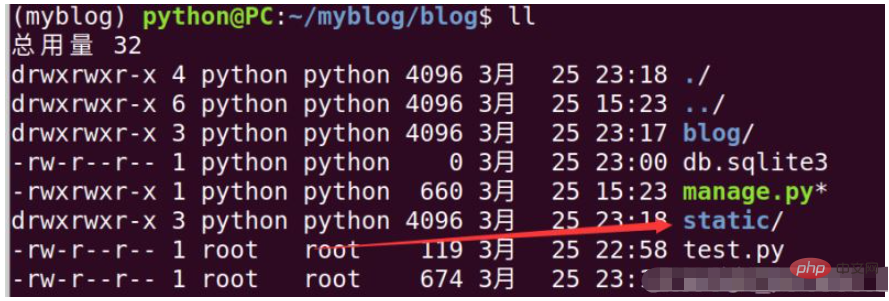
python manage. py collectstatic
mkdir media
server unix:///home/python/myblog/blog.sock; # for a file socket
# server 127.0.0.1:8001; # for a web port socket (we'll use this first)
保存退出,重启nginx:sudo service nginx restart
将uwsgi参数套节字改为blog.sock
uwsgi --socket blog.sock --wsgi-file test.py
回到浏览器输入:192.168.217.133:8000得到502:如图
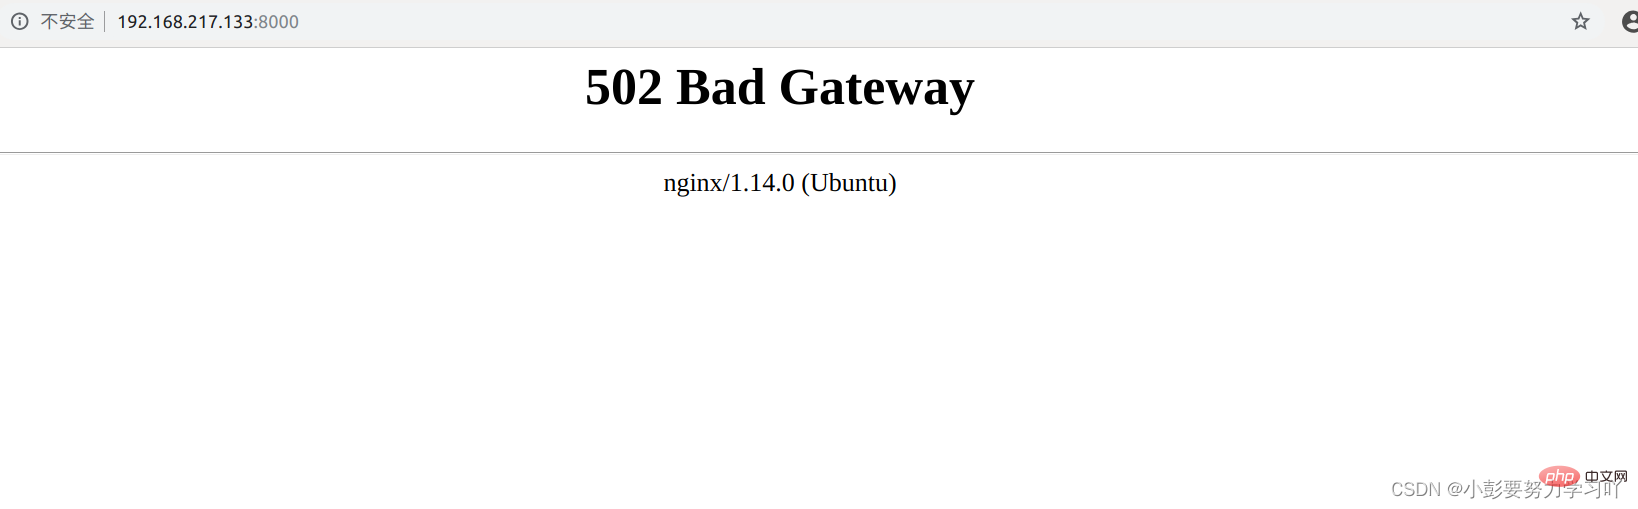
我们查看一下错误日志,发现是因为权限问题,解决办法,在命令行后面加入--chmod=666
uwsgi --socket blog.sock --wsgi-file test.py --chmod=666
运行之后发现没有问题,并且正常显示Hello World界面。
现在我们运行django项目,命令为:uwsgi --socket blog.sock --module blog.wsgi --chmod=666
刷新192.168.217.133:8000得到django的基础页面。
目前可以说明nginx和uwsgi管道通信正常。
创建一个uwsgi的配置文件:sudo nano blog_uwsgi.ini
写入一下内容,将其中的路径改为自己的项目路径
# mysite_uwsgi.ini file
[uwsgi]
# Django-related settings
# the base directory (full path)
chdir = /home/python/myblog/blog
# Django's wsgi file
module = blog.wsgi
# the virtualenv (full path)
home = /home/python/myblog
# process-related settings
# master
master = true
# maximum number of worker processes
processes = 10
# the socket (use the full path to be safe
socket = /home/python/myblog/blog/mysite.sock
# ... with appropriate permissions - may be needed
chmod-socket = 664
# clear environment on exit
vacuum = true
# daemonize uwsgi and write messages into given log
daemonize = /home/python/myblog/blog/uwsgi.log
保存退出并且启动配置文件,命令为:uwsgi --ini blog_uwsgi.ini
我们可以查看一下后台进程,是否正常启动,输入:ps aux
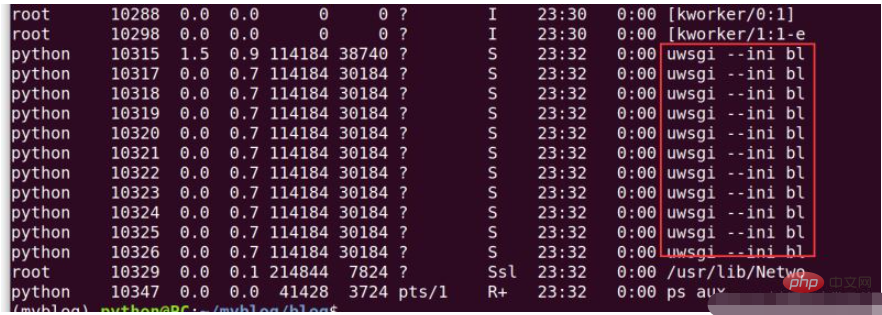
最后回到nginx配置文件中,将监听端口改为80,重启nginx即可。在浏览器中输192.168.217.133得到django页面结果,表示项目运行正常。
The above is the detailed content of How to deploy your own django project with nginx+uwsgi. For more information, please follow other related articles on the PHP Chinese website!


![[Web front-end] Node.js quick start](https://img.php.cn/upload/course/000/000/067/662b5d34ba7c0227.png)


