
In this tutorial, we'll walk you through the process of packaging your ML model as a Docker container and deploying it on the serverless computing service AWS Lambda.
At the end of this tutorial, you will have a working ML model that can be called through the API, and you will have a deeper understanding of how to deploy ML models on the cloud. Whether you're a machine learning engineer, data scientist, or developer, this tutorial is designed to be accessible to anyone with a basic understanding of ML and Docker. So, let’s get started!
Docker is a tool designed to make it easier to create, deploy, and run applications using containers. Containers allow developers to package an application together with all the parts it needs, such as libraries and other dependencies, and send it out as one package. By using containers, developers can ensure that their applications will run on any other machine, regardless of any custom settings the machine may have that may differ from the machine used to write and test the code. Docker provides a way to package applications and their dependencies into lightweight, portable containers that can be easily moved from one environment to another. This makes it easier to create consistent development, test, and production environments and deploy applications faster and more reliably. Install Docker from here: https://docs.docker.com/get-docker/.
Amazon Web Services (AWS) Lambda is a serverless computing platform that runs code in response to events and automatically manages underlying computing resources for you. It is a service provided by AWS that allows developers to run their code in the cloud without having to worry about the infrastructure required to run the code. AWS Lambda automatically scales your application in response to incoming request traffic, and you only pay for the compute time you consume. This makes it an attractive choice for building and running microservices, real-time data processing, and event-driven applications.
Amazon Web Services (AWS) Elastic Container Registry (ECR) is a fully managed Docker container registry that allows developers to easily store, manage, and deploy Docker container images. It is a secure and scalable service that enables developers to store and manage Docker images in the AWS cloud and easily deploy them to Amazon Elastic Container Service (ECS) or other cloud-based container orchestration platforms. ECR integrates with other AWS services, such as Amazon ECS and Amazon EKS, and provides native support for the Docker command line interface (CLI). This makes it easy to use familiar Docker commands to push and pull Docker images from ECR and automate the process of building, testing, and deploying containerized applications.
Use this to install the AWS CLI on your system. Obtain the AWS access key ID and AWS secret access key by creating an IAM user in your AWS account. After installation, run the following command to configure your AWS CLI and insert the required fields.
aws configure
We will deploy the OpenAI clip model to vectorize input text in this tutorial. The Lambda function requires amazon Linux 2 in a Docker container, so we use
public.ecr.aws/lambda/python:3.8. Additionally, since Lambda has a read-only file system, it does not allow us to download models internally, so we need to download and copy them when creating the image.
Get the working code from here and extract it.
Change the working directory where the Dockerfile is located and run the following command:
docker build -t lambda_image .
Now we have the image ready to be deployed on Lambda. To check it locally, run the command:
docker run -p 9000:8080 lambda_image
To check it, send it a curl request and it should return a vector of input text:
curl -XPOST "http://localhost:9000/2015-03-31/functions/function/invocations" -d '{"text": "This is a test for text encoding"}' 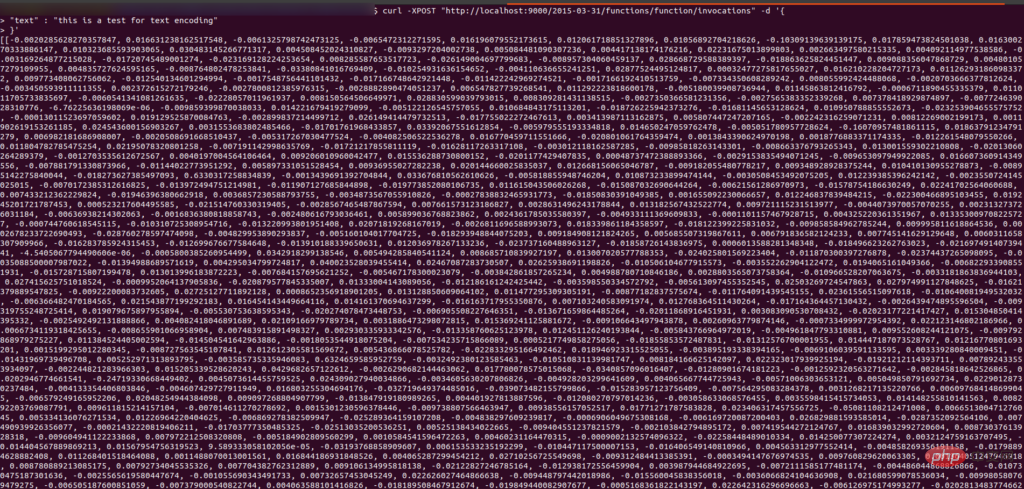
First deploy the image to Lambda, we need to push it to ECR, so log in to the AWS account and create the warehouse lambda_image in ECR. After creating the repository, go to the created repository and you will see the view push command option click on it and you will get the command to push the image to the repository.
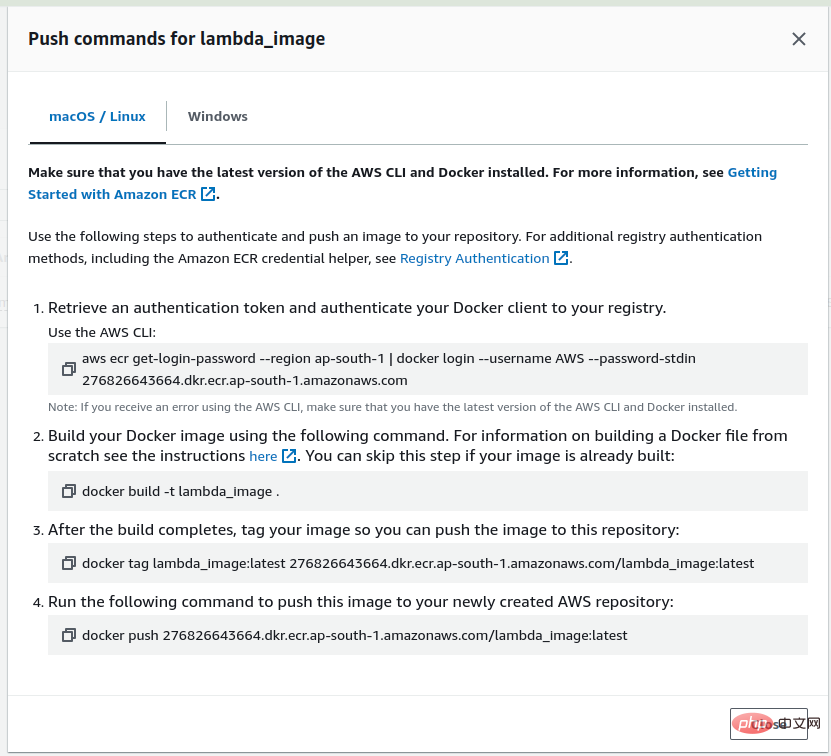
Now run the first command to authenticate your Docker client using the AWS CLI.
We have already created the Docker image, so skip the second step and run the third command to mark the created image.
运行最后一条命令将镜像推送到 ECR 中。运行后你会看到界面是这样的:

推送完成后,您将在 ECR 的存储库中看到带有“:latest”标签的图像。

复制图像的 URI。我们在创建 Lambda 函数时需要它。
现在转到 Lambda 函数并单击“创建函数”选项。我们正在从图像创建一个函数,因此选择容器图像的选项。添加函数名称并粘贴我们从 ECR 复制的 URI,或者您也可以浏览图像。选择architecture x84_64,最后点击create_image选项。
构建 Lambda 函数可能需要一些时间,请耐心等待。执行成功后,你会看到如下界面:

Lambda 函数默认有 3 秒的超时限制和 128 MB 的 RAM,所以我们需要增加它,否则它会抛出错误。为此,请转到配置选项卡并单击“编辑”。

现在将超时设置为 5-10 分钟(最大限制为 15 分钟)并将 RAM 设置为 2-3 GB,然后单击保存按钮。更新 Lambda 函数的配置需要一些时间。
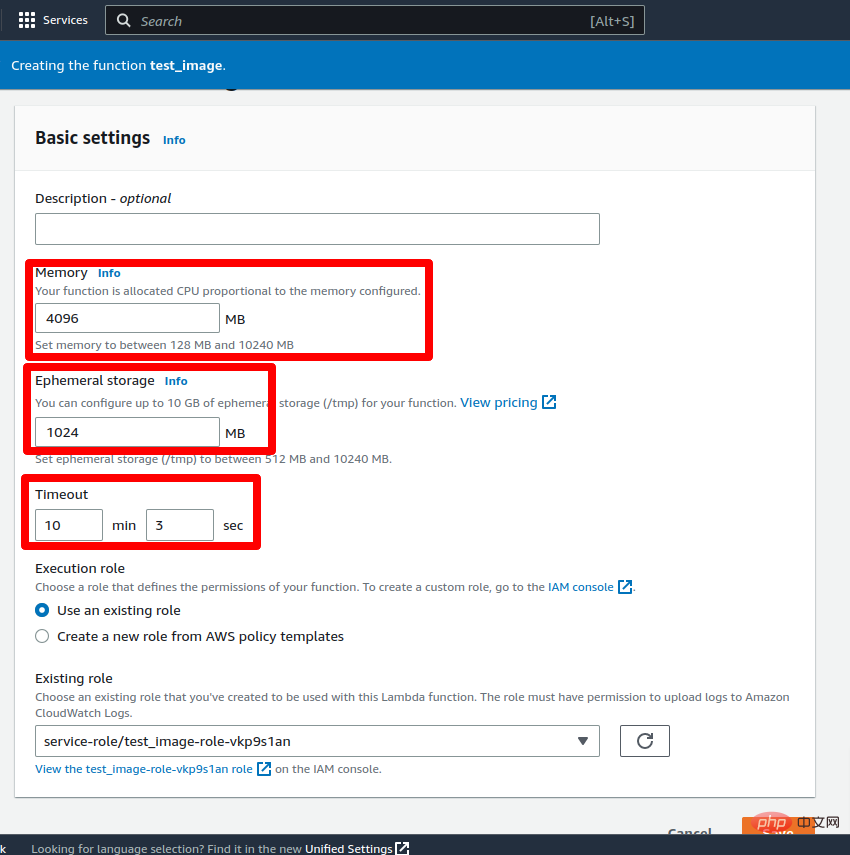
更新更改后,该功能就可以进行测试了。要测试 lambda 函数,请转到“测试”选项卡并将键值添加到事件 JSON 中作为文本:“这是文本编码测试。” 然后点击测试按钮。
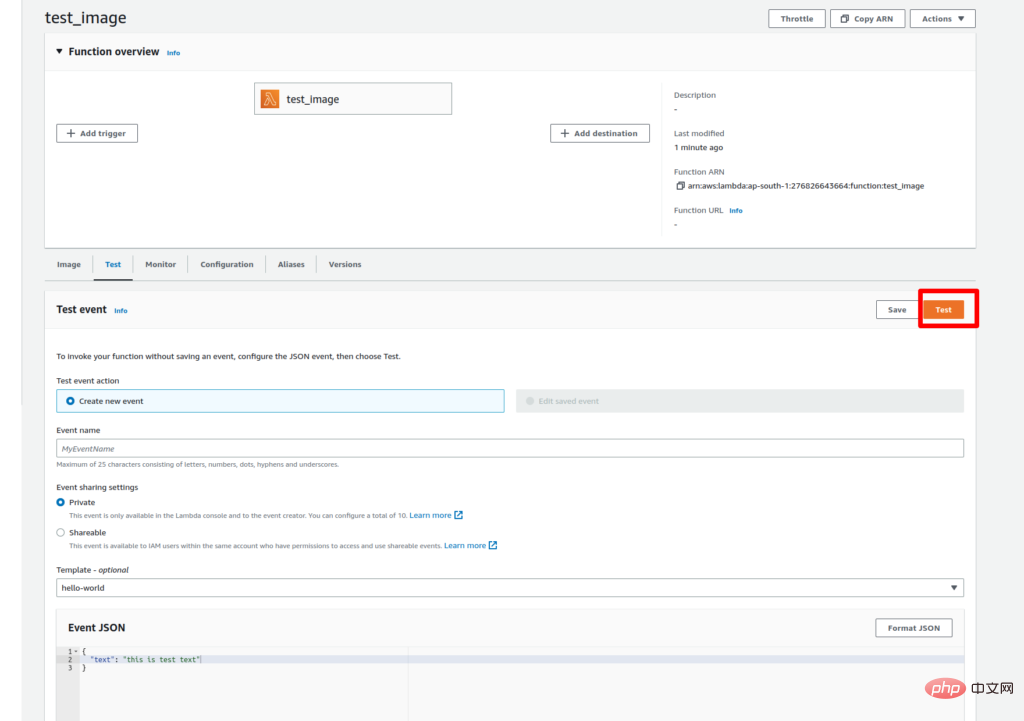
由于我们是第一次执行 Lambda 函数,因此执行可能需要一些时间。成功执行后,您将在执行日志中看到输入文本的向量。
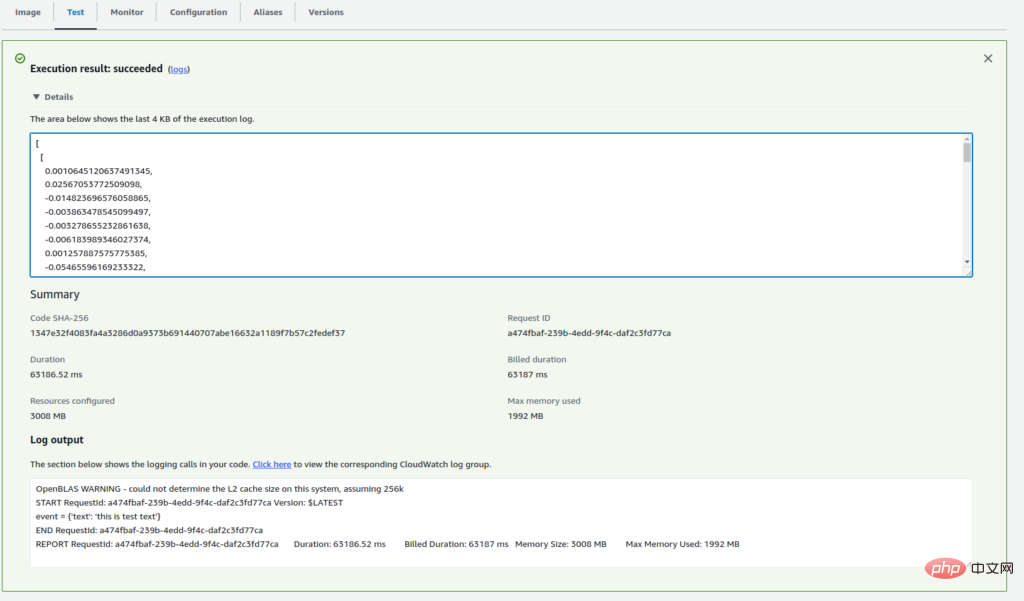
现在我们的 Lambda 函数已部署并正常工作。要通过 API 访问它,我们需要创建一个函数 URL。
要为 Lambda 函数创建 URL,请转到 Configuration 选项卡并选择 Function URL 选项。然后单击创建函数 URL 选项。

现在,保留身份验证 None 并单击 Save。
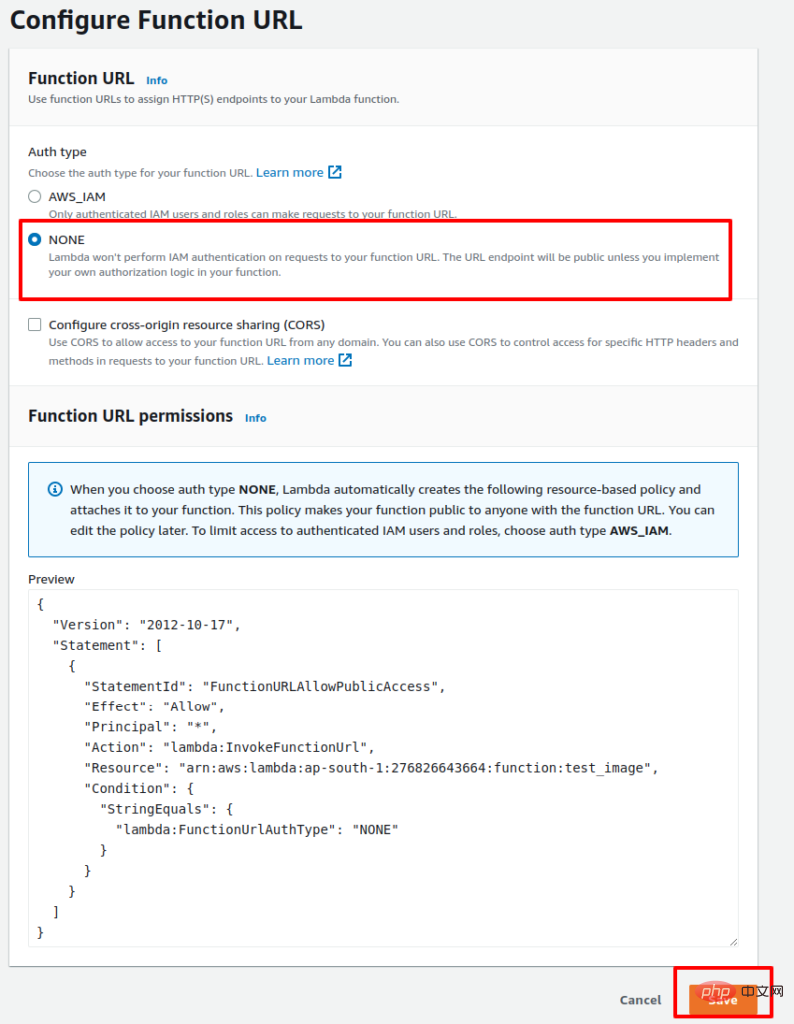
该过程完成后,您将获得用于通过 API 访问 Lambda 函数的 URL。以下是使用 API 访问 Lambda 函数的示例 Python 代码:
import requests function_url = ""url = f"{function_url}?text=this is test text" payload={}headers = {} response = requests.request("GET", url, headers=headers, data=payload) print(response.text)成功执行代码后,您将获得输入文本的向量。
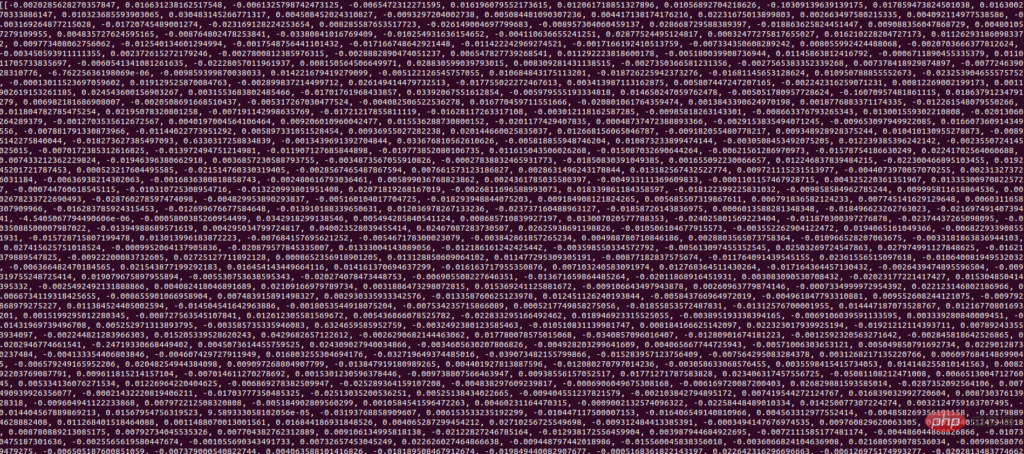
所以这是一个如何使用 Docker 在 AWS Lambda 上部署 ML 模型的示例。如果您有任何疑问,请告诉我们。
The above is the detailed content of How to deploy machine learning models on AWS Lambda using Docker. For more information, please follow other related articles on the PHP Chinese website!
 The difference between k8s and docker
 What are the methods for docker to enter the container?
 What should I do if the docker container cannot access the external network?
 What is the use of docker image?
 vscode Chinese setting method
 How to solve garbled characters in PHP
 what does usb interface mean
 How to export excel files from Kingsoft Documents


