


This article brings you relevant knowledge about JavaScript. It mainly talks about how to use js to implement waterfall flow layout. There are code examples. Friends who are interested can take a look below. I hope it will be helpful to everyone. helpful.
Take you step by step to conquer the waterfall flow layout
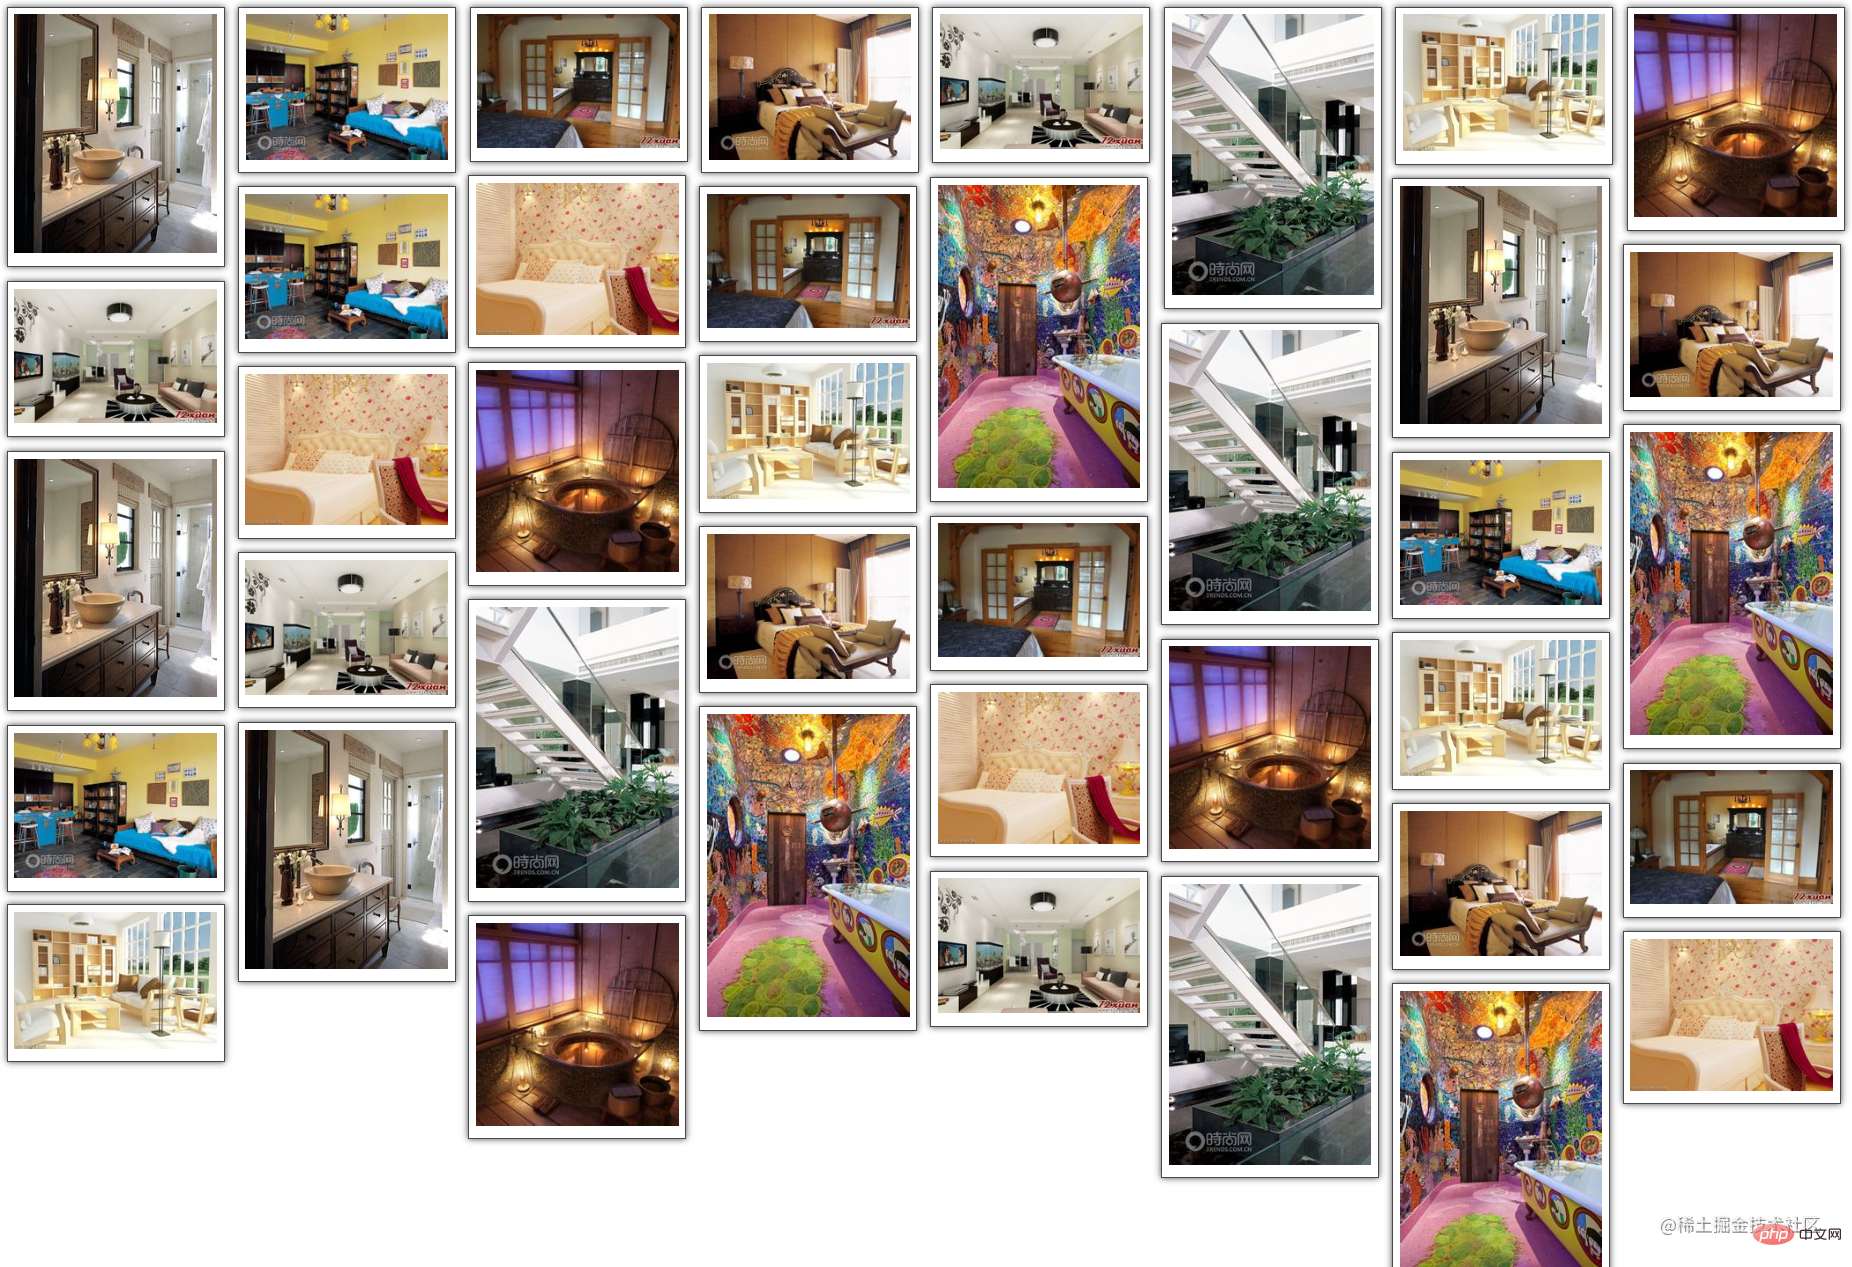
It can effectively reduce the complexity of the page and save a lot of space; moreover, the uneven arrangement of the waterfall flow can display multiple pieces of data to the user through the interface, and allow the user to There is an urge to browse down, providing a great user experience! For example, Taobao's page adopts this layout method. Let me show you the renderings ofThe waterfall flow layout is more popular now A page layout method, that is,
multiple lines of equal widthelements are arranged,equal width and unequal height, and the following elementsare added to the end of theprevious line in turn Shortelementsbelow.
Taobao's waterfall flow layout (mobile version) and the renderings we want to achieve (PC version) )~

 Thought preparationBy understanding the waterfall flow layout, let’s sort out the steps to implement it to facilitate our code writing. 1. First, we need to prepare
 many pictures (I prepared 40 pictures), and vscode development tools.
2. Write thefront-end code and add a style to the image so that the image is of equal width and displayed in the same row .
3. Writejs code, you need to know the number of pictures in the first line, the serial number of the next picture and the previous line The sequence number of the shortest element, and the position .
Text1. Front-end code writing1. First, we define acontainer container to hold all images, use box container to load box-img container and then load each picture in this container, which will facilitate the writing of styles later.
2. Make the picture3. Let the imageappear in the same row - use the float:left; attribute for the box container.
be displayed with equal width - setpadding, border and shadowwidth:150px; to the box-img container, and set the img tag width:100%;Inherits 100% of the height of the parent container box-img.
4. In order to make the effect better-looking, we set the
effects to the container holding the image.2. JS code writing1. First, use window.onload=function(){} to load the page Function to be executed immediately after completion In this function, we call theThe complete front-end code is attached:
waterFall /*.......后面接39个box,此处省略*/ Copy after login
The parent container 'container' and the child container 'box' that holds the image.
window.onload=function() {
    imgLocation('container','box')
}中Use document.getElementById(parent) to get the parent container; getChildElement(cparent,content) method
, in this method, first getAll tags of the parent container, traverse all tags and use the if conditional statementto get the container with the class name box (a container that holds pictures), and save it Enter into a array that we built ourselves, and the return value is this array, which makes it easier to manipulate the position of the image through traversal later.
function imgLocation(parent,content){
    var cparent=document.getElementById(parent)
    //cparent下的所有的第一层的子容器 box
    var ccontent=getChildElement(cparent,content)//数组,40个div
}

//取到父容器中的某一层子容器
function getChildElement(parent,content){
    var contentArr=[]
    var allContent=parent.getElementsByTagName('*')//通过标签来选中得到一个数组
    //遍历allContent把其中类名为content的容器都存到contentArr数组中
for(var i=0;iCopy after login is the that needs to be placed in the position We use the following method: window
andthe width of each picture, divide the twoand Rounding down can get the number of pictures that can be placed in the first row. Naturally, we also know the serial number of the picture that we need tooperate .
    //从谁开始是需要被摆放位置的
    var winWidth=document.documentElement.clientWidth;//视窗宽度
    var imgWidth=ccontent[0].offsetWidth;//图片宽度

var num=Math.floor(winWidth/imgWidth)//第一行能放几张图被摆放位置的图片序号后,确定其摆放位置我们自己定义一个存储高度的数组,对前一行元素的高度进行遍历并存入数组,当遍历到需要被摆放位置的图片时,用Math.min()方法获取前一行高度最矮的元素高度,并用indexOf()方法获取到其下标。
再对我们所操作的这个图片容器的样式调整:
position:absolute;绝对定位,top值设置为前一行高度最矮的图片高度minHeight,left值设置为单张图片宽度乘这张图片的下标minIndex。
最后,不要忘啦,摆放好图片后,还要更新摆放的那一列的高度哟~
    //操作num+1张图
    var BoxHeightArr=[]
    for(var i=0;iCopy after login
最终整合一下就可以实现瀑布流的布局效果啦!
以上就是瀑布流布局的实现过程,看完本文如果觉得有用,记得点个赞支持,收藏起来说不定哪天就用上啦~
文章可能有一些错误,欢迎评论指出,也欢迎一起讨论。
推荐学习:《JavaScript视频教程》
The above is the detailed content of Teach you step by step how to implement waterfall flow layout using js. For more information, please follow other related articles on the PHP Chinese website!


![Practical development of imitation Meituan APP [A must-have JavaScript project for front-end programmers]](https://img.php.cn/upload/course/000/000/068/6242bebc05ca9210.png)
![JavaScript basic syntax [dom|bom|es6 new syntax|jQuery|data visualization echarts]](https://img.php.cn/upload/course/000/000/068/6242bb730fb11708.png)


![[Web front-end] Node.js quick start](https://img.php.cn/upload/course/000/000/067/662b5d34ba7c0227.png)


