
This article brings you relevant knowledge about thinkPHP, which mainly introduces the related issues of building back-end api interface. The main contents include downloading tp6, hiding entry files, and solving cross-domain problems. Wait, I hope it helps everyone.

Recommended learning: "PHP Video Tutorial"
I use What is the integrated environment phpstuday, composer is installed, tp6 is installed through composer, thinkphp official website no longer supports direct download.
composer create-project topthink/think tp6
You can also directly follow the steps of tp6 to read the cloud documentation to install tp6
Enter in the downloaded tp6 directory through the cmd command window
php think run
Enter in the browser 127.0.0.1:8000, access the following page and the installation is successful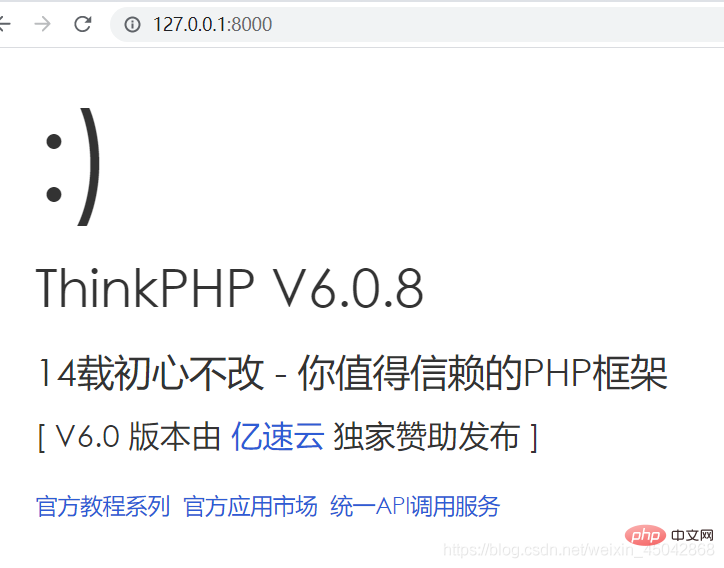
Before starting, we first turn on the error debugging of tp6
1. Find show_error_msg under config/app.php and change it to true
2. Find the .example.env file in the root directory below, rename this file and delete .example 
If you look at the code here, you will find that it has turned on app_debug 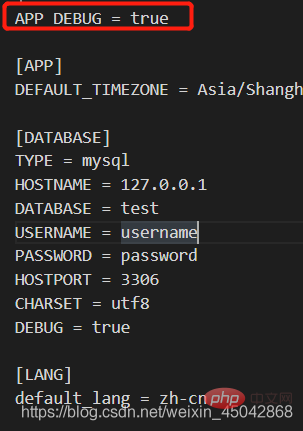
so that we can see the complete error message, for example: 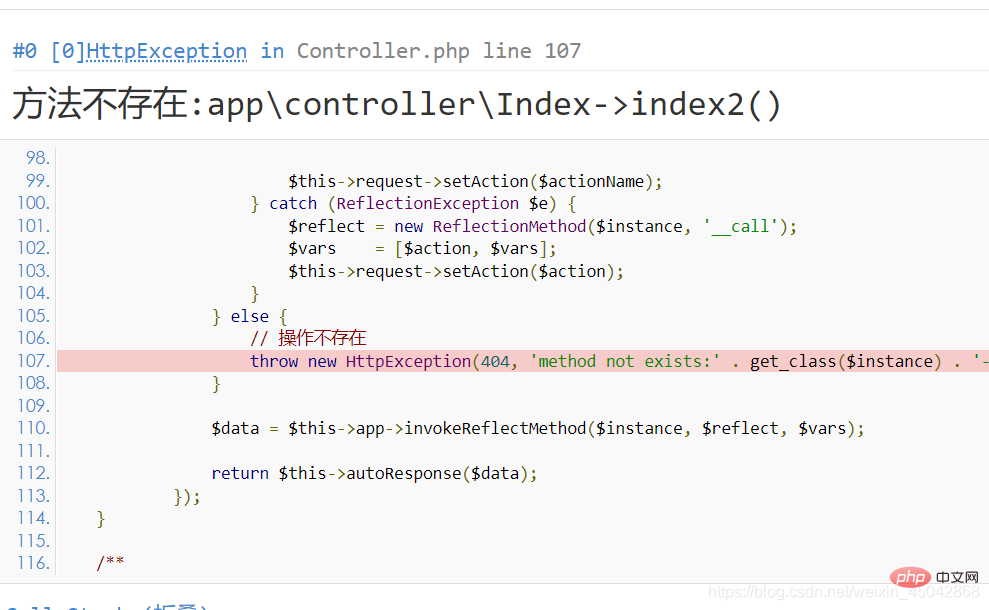
In Section 1, we visit
http://127.0.0.1:8000
The actual access is
http://127.0.0.1:8000/index.php/index/index
You can also use this method Visit
http://127.0.0.1:8000/index/index
If you fill in nothing, the index controller will be accessed by default, in config/app There is such a definition in the .php file. You can also modify the default controller 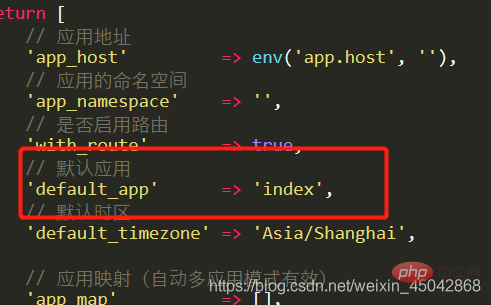
Also, no matter which controller is accessed, if there is no fill-in method, it will access the index method in the controller. If the index method does not exist, an error message will be prompted - the method does not exist.
Through the web service started by php think run running in the project root directory, tp6 helps us hide the entry file, so you can access it through the third method. But what we are going to talk about in this section is to hide the entrance. How can we use the web service that comes with tp6. So do it yourself.
When we are developing, we often build a set of web solutions such as WNMP locally, which requires us to hide the entry file index.php ourselves
Why should we hide it? Entry file?
Because I am using the integrated environment here, I chose the apache server, so I only looked for the hidden entry file of apache. Method, nginx needs to be searched by yourself.
Now I enable the apache server and the port opened is 4321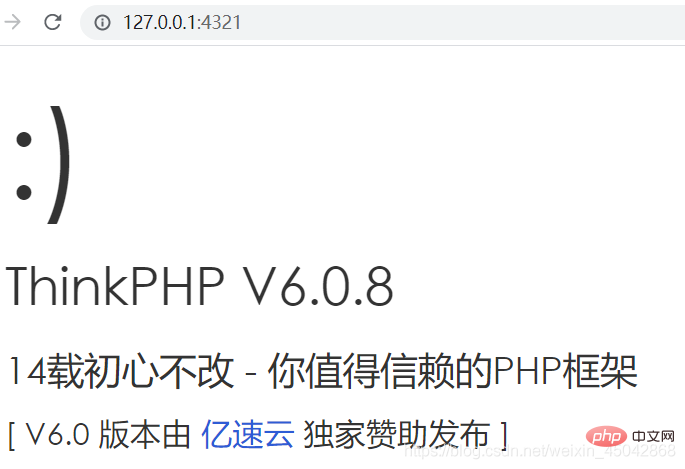
When I want to pass
http://127.0.0.1:4321/index /index
When I access the method, the access fails
But when I add the entry file to access, the access is successful
http:/ /127.0.0.1:4321/index.php/index/index
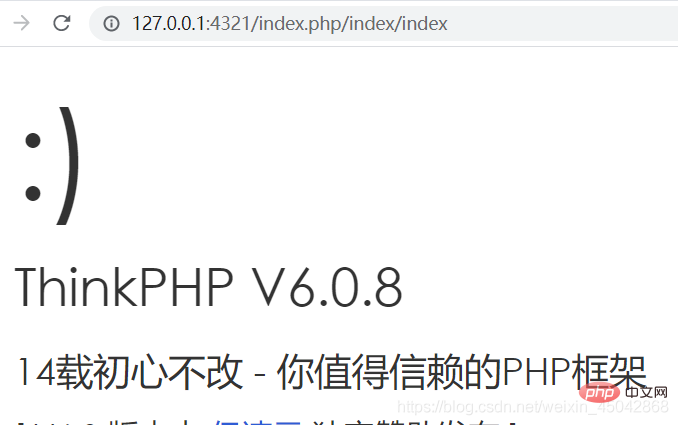
It is very simple to hide index.php. You only need to find the .htaccess file in the public directory and add the following The code will do.
<ifmodule> #如果mode_rewrite.c模块存在 则执行以下命令
  Options +FollowSymlinks -Multiviews
  RewriteEngine On #开启 rewriteEngine
  # !-d 不是目录或目录不存在
  RewriteCond %{REQUEST_FILENAME} !-d
  # !-f 不是文件或文件不存在
  RewriteCond %{REQUEST_FILENAME} !-f

  RewriteRule ^(.*)$ index.php [QSA,PT,L]
  # 参数解释
  # ^(.*)$: 匹配所有的路口映射
  # QSA: (Query String Appending)表示保留参数入get传值?xxx==xx;
  # PT: 把这个URL交给Apache处理;
# L: 作为最后一条,遇到这条将不再匹配这条之后的规则</ifmodule>Visit now
http://127.0.0.1:4321/index/index
Access successful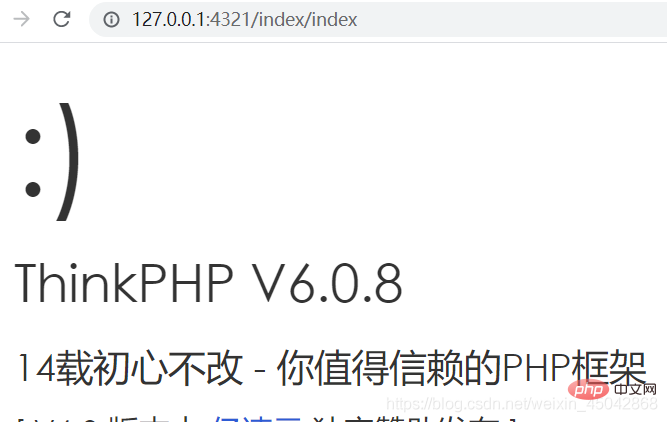
需要注意,在第一节中我们看到,运行了php think run 后,我们的项目目录访问的是public目录
官方文档中也说在项目中应该只有public目录是可以被外界访问的,所以如果有什么需要访问的图片、视频等资源,应该放在此目录下
在应用开发中,前后端都是分开独立开发的,而前后端通常都会自己搭建一个web服务,运行在不同的端口上,在前端访问后端的接口时,会报跨域的错误。而这种跨域问题通常是要有后端来处理的,tp6有专门的中间件来做这个事情,真是太方便了,只需要在app目录下的middleware.php中添加该中间件,就实现了跨域访问。
<?php // 全局中间件定义文件return [
    // 全局请求缓存
    // \think\middleware\CheckRequestCache::class,
    // 多语言加载
    // \think\middleware\LoadLangPack::class,
    // Session初始化
    // \think\middleware\SessionInit::class
    // 跨域解决
\think\middleware\AllowCrossDomain::class,];在app目录中的container控制器中新建两个文件夹v1,v2,在其中都创建User.php文件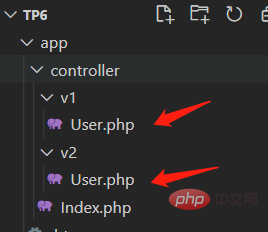
v1/User.php
<?phpnamespace app\controller\v1;use app\BaseController;class User extends BaseController{
public function login()
{
return '我是v1';
}}v2/User.php
<?phpnamespace app\controller\v2;use app\BaseController;class User extends BaseController{
public function login()
{
return '我是v2';
}}注意上面两个文件的命名空间,就第一行代码,在哪个文件夹下,就写到哪里。
现在方法有了,我们还无法访问,需要使用路由,让路由帮我们找对应的方法。
至于路由的概念去文档自己看。我这里主要用路由组的方式,我觉得这个比资源路由好用,灵活。
在根目录下的route目录下的app.php文件代码如下:
<?php // +----------------------------------------------------------------------// | ThinkPHP [ WE CAN DO IT JUST THINK ]// +----------------------------------------------------------------------// | Copyright (c) 2006~2018 http://thinkphp.cn All rights reserved.// +----------------------------------------------------------------------// | Licensed ( http://www.apache.org/licenses/LICENSE-2.0 )// +----------------------------------------------------------------------// | Author: liu21st <liu21st@gmail.com>// +----------------------------------------------------------------------use think\facade\Route;// api版本控制$v = request()->header('Api-Version');// 默认api版本为v1if ($v == null) $v = "v1";// 用户Route::group('user', function () {
Route::post('login', 'login');})->prefix($v.'.user/')->pattern(['id' => '\d+']);以上代码进行控制api版本的方式是,请求发起者在header中传递要访问的api的版本,这里获取到对应的版本,访问对应的方法。
鉴于以上我使用的是post请求,且要传递header,所以使用postman进行测试。
访问v1版本的接口时: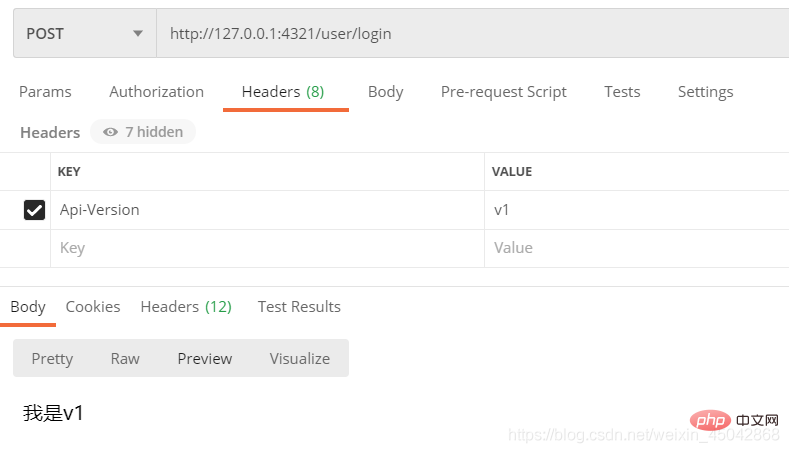
访问v12版本的接口时: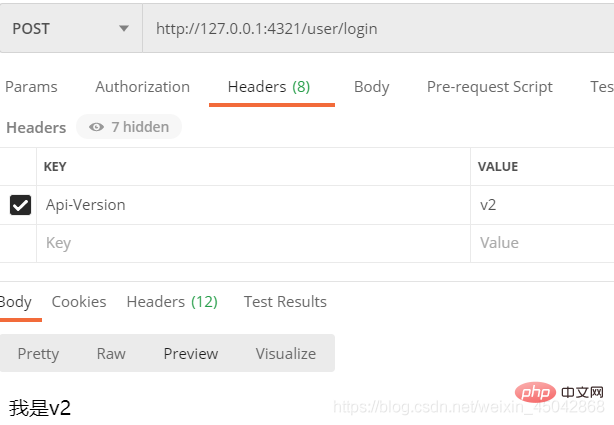
我用的是tp6看云文档收录的插件
composer require thans/tp-jwt-auth
该插件的github地址-文档
在开始之前可以看看文档里是怎么操作的,我也是按照文档来的
安装完成后,该插件所在的位置在根目录下的vendor/thans/tp-jwt-auth
还会在根目录下的config目录下生成jwt.php文件来记录一些配置信息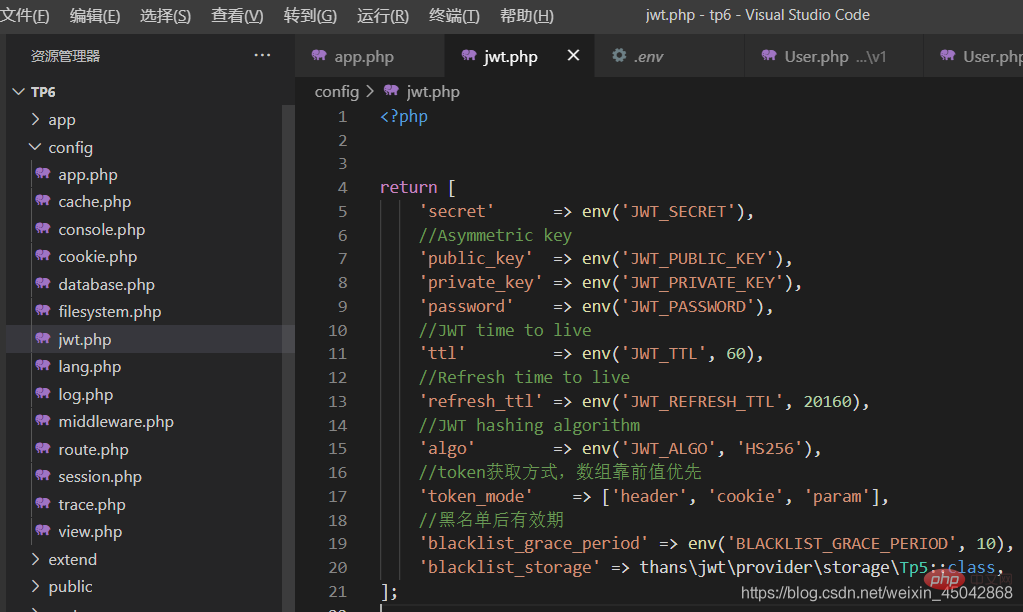
看这里都是读取的env中的参数,所以咱也在根目录下的.env文件中配置参数。
在根目录下打开cmd窗口,执行
php think jwt:create
会帮你在.env文件中生成密钥secret,红色框中的是新增的内容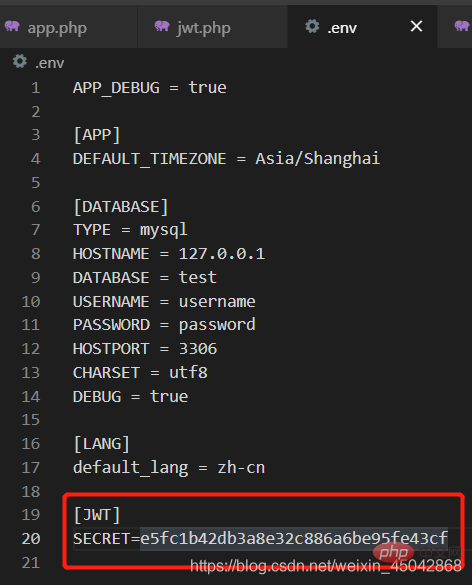
token的有效期为60秒,为了方便我们测试,我就不改了,如果你要改,可以在.env中添加,这样就改成了1小时
这个插件有三种方式【header,token,param】传递token,我就使用其中一个,也是最常用的一种,就是在【header】中传递token信息,这个插件默认验证header中的token信息需要传递的参数名为authorization,而在header中直接传递该参数tp6是获取不到的,需要做一些设置,
在根目录中的public目录下的.htacccess文件中添加
SetEnvIf Authorization .+ HTTP_AUTHORIZATION=$0
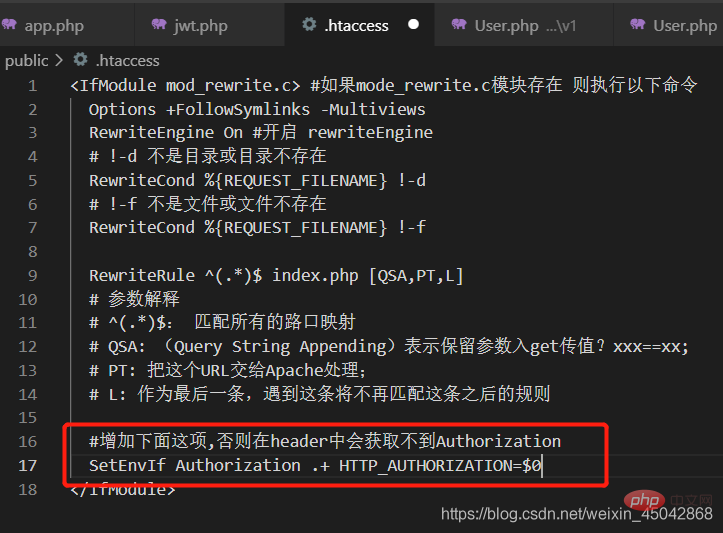
那么现在开始测试:
我就在之前创建的v1/User.php控制器中写了
<?phpnamespace app\controller\v1;use app\BaseController;// 引入jwt插件use thans\jwt\facade\JWTAuth;class User extends BaseController{
public function login()
{
// 生成token
$token = JWTAuth::builder(['uid' => 1,'name'=>'ceshi']);
return $token;
}}在postman中测试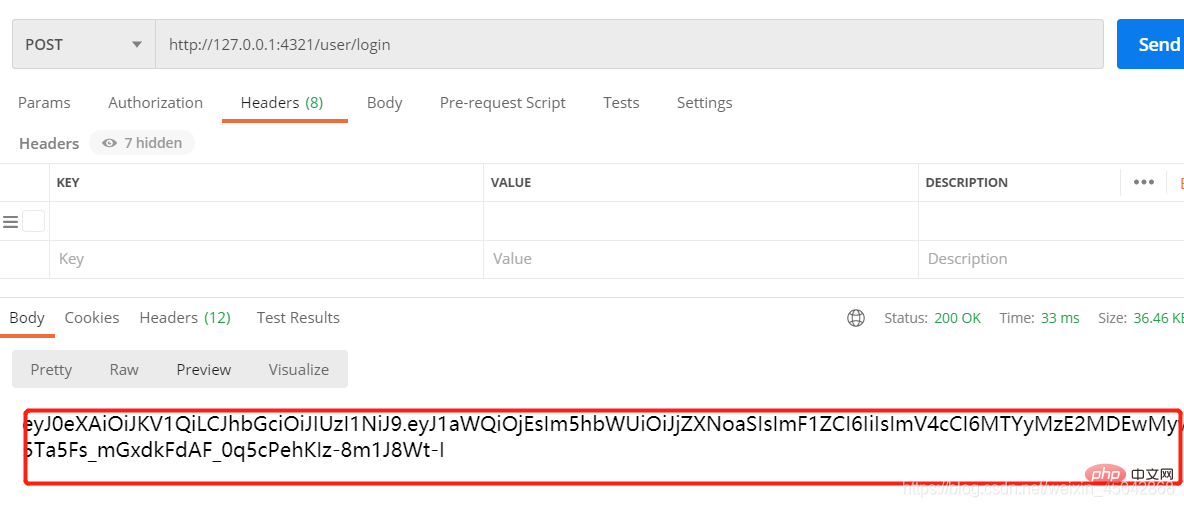
我使用的是路由中间件的方式验证token,
在根目录下的app目录中创建middleware目录,在其下创建CheckToken.php文件
app/middleware/CheckToken.php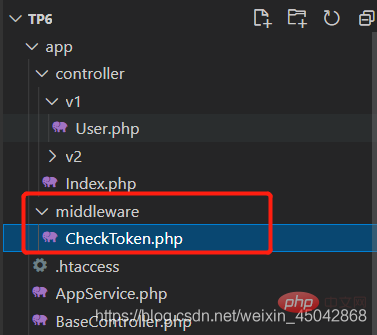
文件内容
<?phpnamespace  app\middleware;use thans\jwt\facade\JWTAuth;use thans\jwt\exception\JWTException;class CheckToken{
    public function handle($request, \Closure $next)
    {
    	// OPTIONS请求直接返回
        if ($request->isOptions()) {
            return response();
        }
    	try {
            JWTAuth::auth();
        }catch (JWTException $e) {
        	return json($e->getMessage());
        }
        return $next($request);
}}给该中间件起个别名,在根目录下的config/middleware.php文件中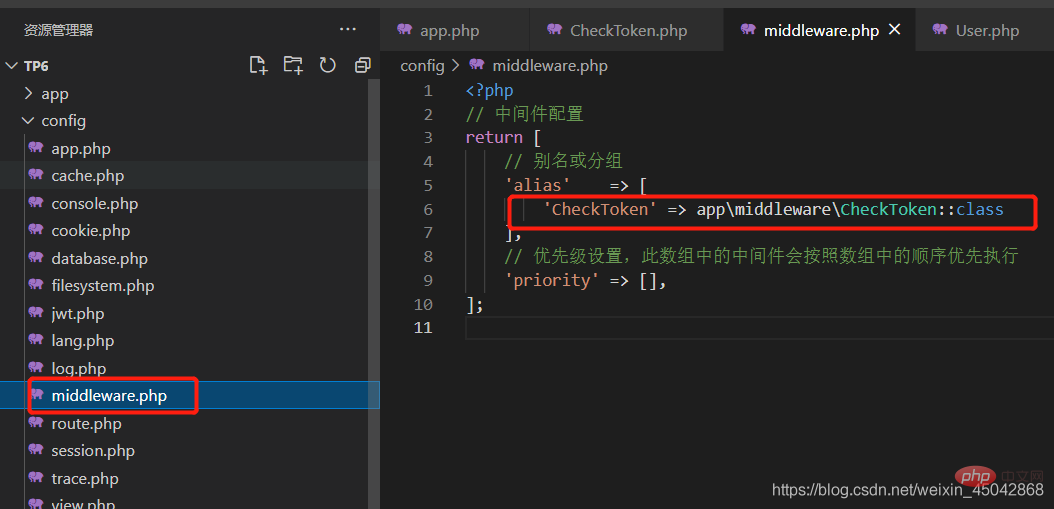
在路由文件中使用中间件
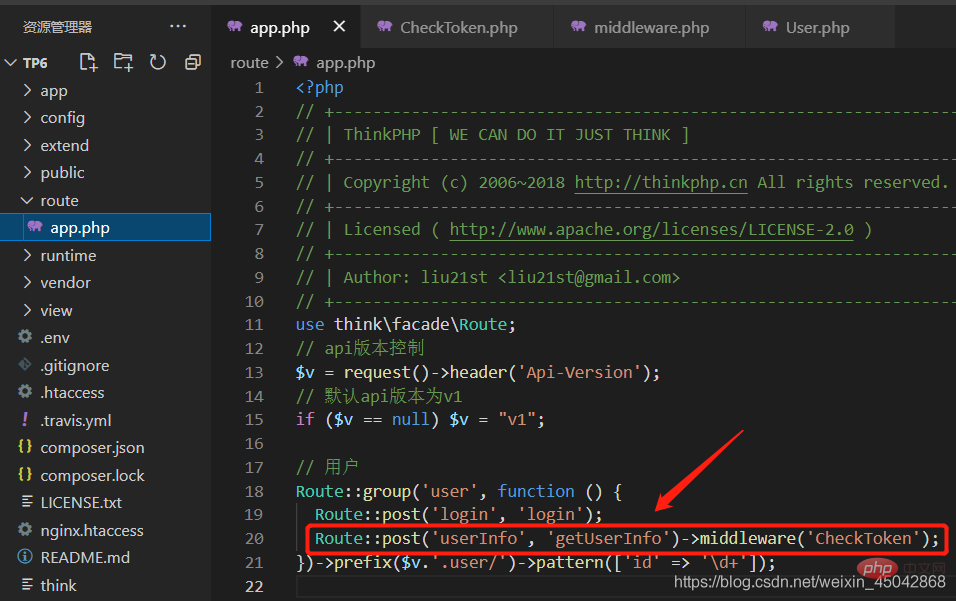
在第三步中我们创建了一个getUserInfo()方法,现在在User.php文件中创建
public function getUserInfo() {
   return json(['id'=>1, 'name'=> '啦啦啦']);}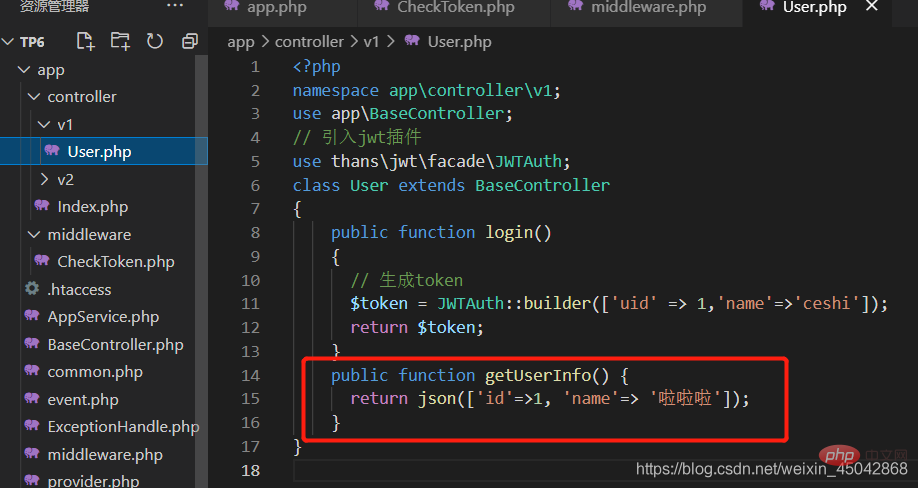
刚刚创建的token必然过期了,咱重新获取一条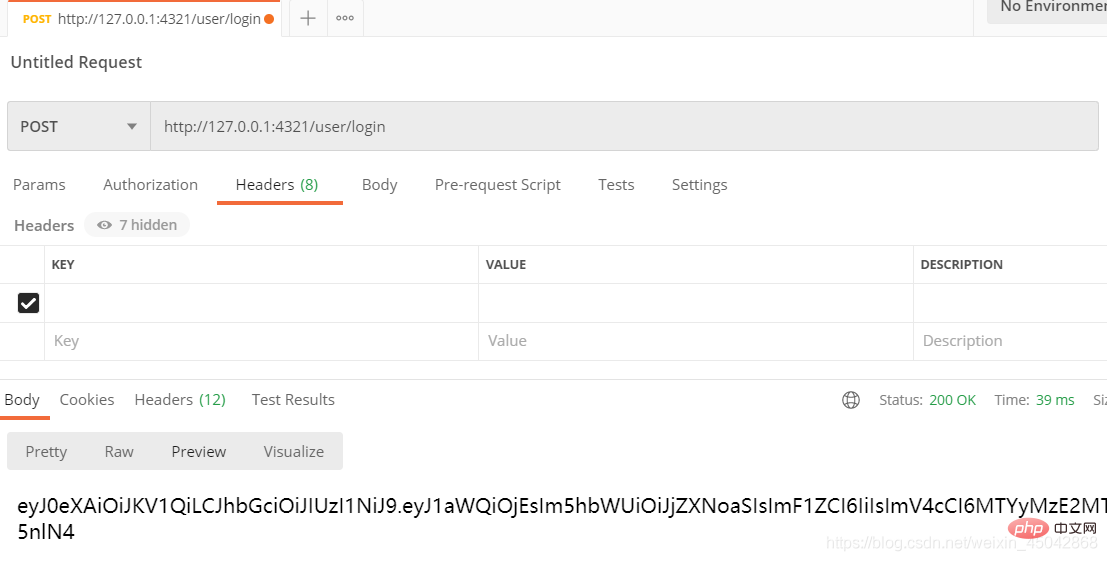
现在验证一下,请求userinfo方法,并在header中添加参数Authorization,
注意:token值需要加上bearer ,bearer后的空格也要的。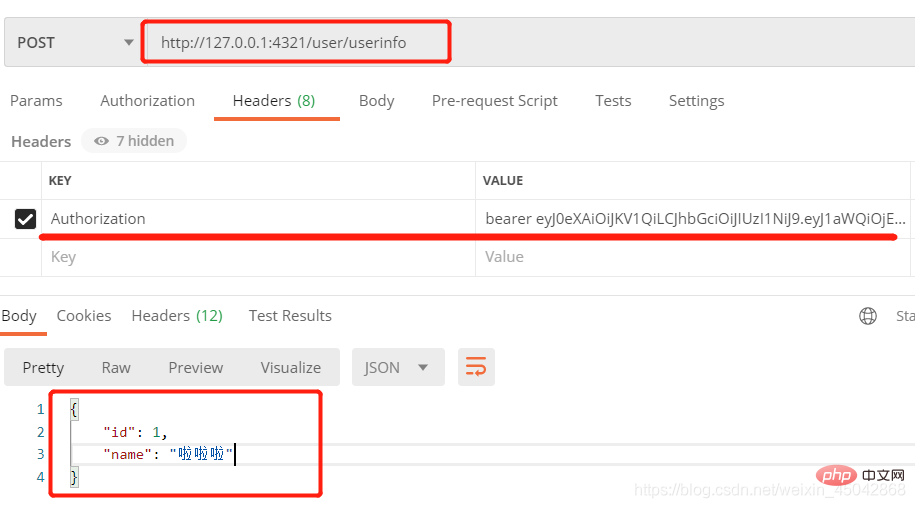
过了一分钟后,我们再来试一试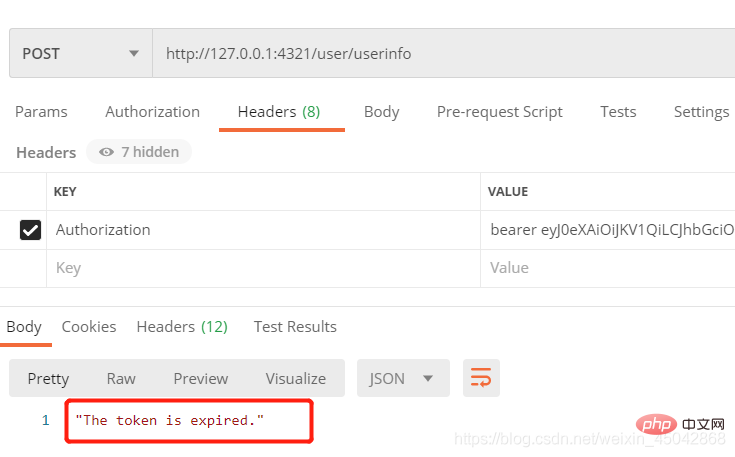
可以看到token验证提示,该通过过期了,这个插件成功了,并没有继续往下走,把之前的信息返回。
这个插件在github中的文档中没有说到怎么注销或删除token,只有一个刷新refresh和拉黑invalidate,我看了一下它的代码,刷新方法中会调用拉黑方法,看到这个注释,让我激动了一下,鸡儿!原来拉黑就是注销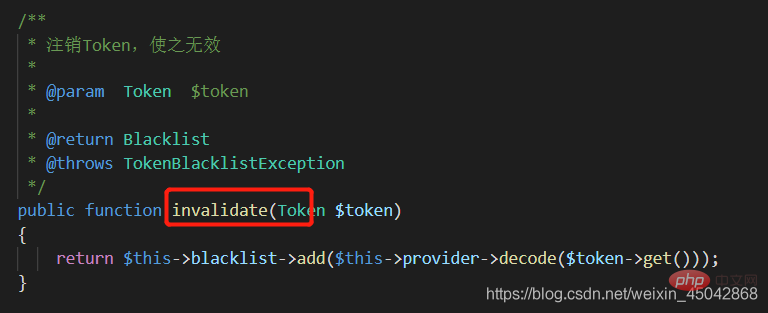
这个拉黑的具体操作就是把你要注销的token保存在本地的cookie中,默认的保存时间是14天,14天后cookie会自己删除的,你可以在根目录下的runtime目录下的cache目录中找到对应的文件,我就不测试这个方法了,我感觉这个操作好像没什么必要。
文件内容形似这样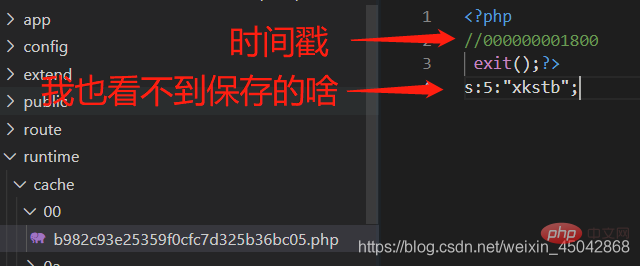
至此token这节就结束了。
什么?
你想改默认的token名称?那你可得好好研究这个插件了,看看怎么改,改完了记得踢我一脚,让我也看看,虽然我觉得一个Authorization已经够用了。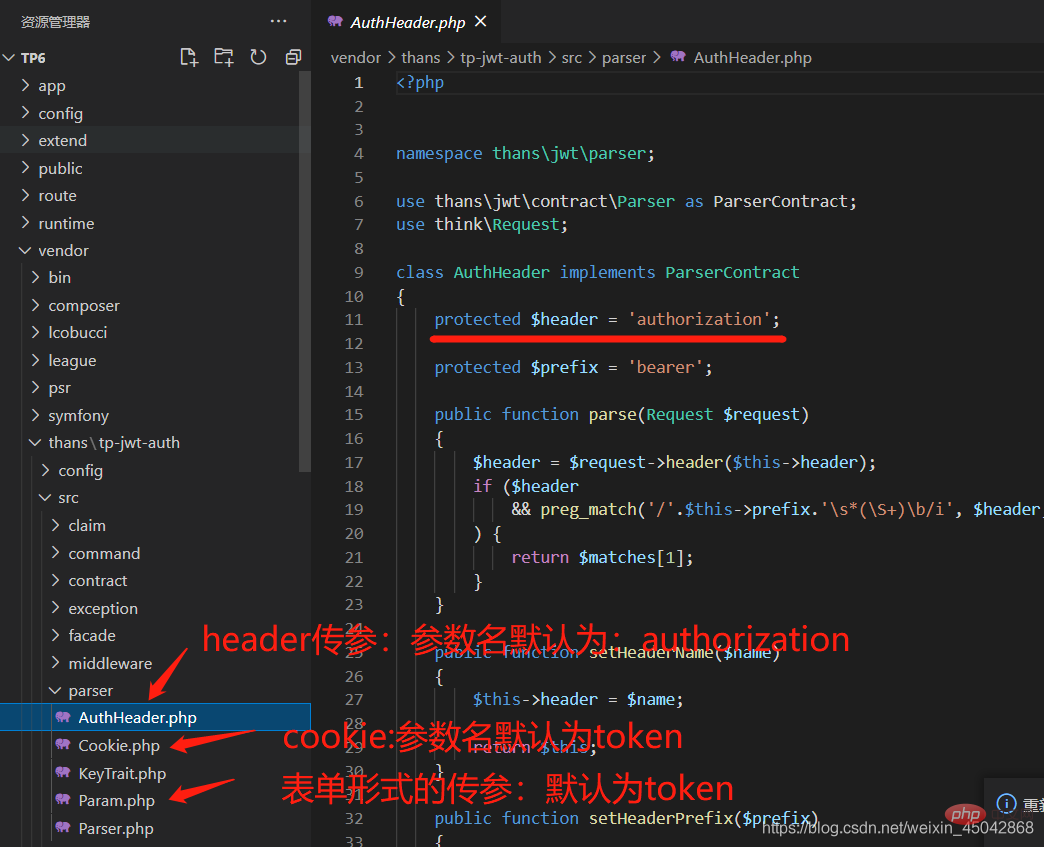
实际开发中,后端返回给前端的参数往往都是这样的。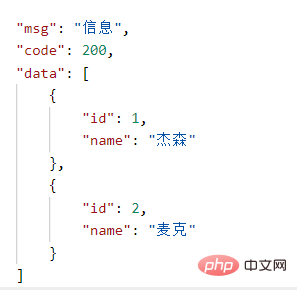
所以我们需要对参数返回形式做个统一的处理
在app目录下的common.php中定义的方法全局都可调用,所以在这个文件中定义此方法。
<?phpuse think\Response;// 应用公共文件// 统一返回数据格式function result($data = [], string $msg = 'error', int $code = 200, string $type = 'json'):Response {
$result = [
"code" => $code,
"msg" => $msg,
"data" => $data
];
// 调用Response的create方法,指定code可以改变请求的返回状态码
return Response::create($result, $type)->code($code);}唉,这个时候,经验的重要性就体现出来,我是个前端,而且在我自己看来,还算是个没有工作经验的前端,
调用就很简单了,可以直接使用
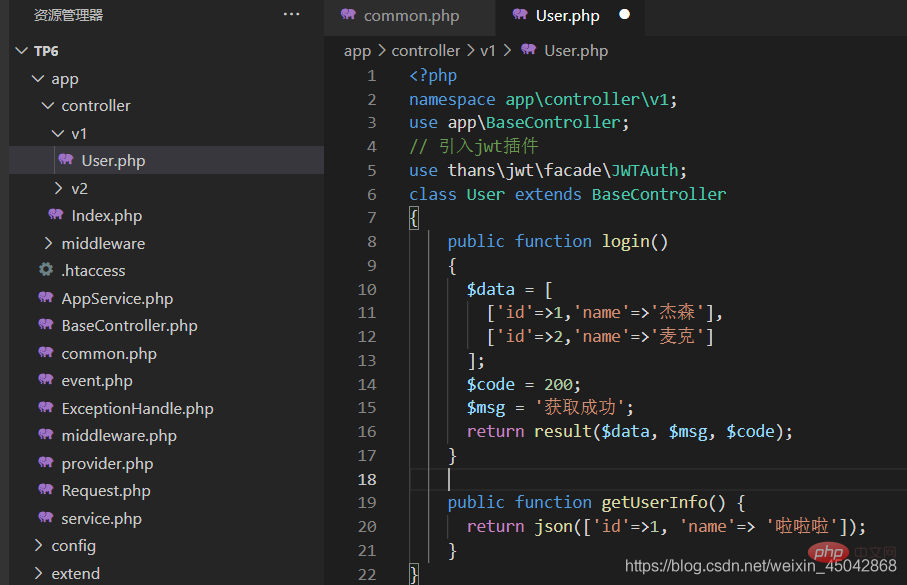
我们还是改一下login方法
public function login(){
   $data = [
     ['id'=>1,'name'=>'杰森'],
     ['id'=>2,'name'=>'麦克']
   ];
   $code = 200;
   $msg = '获取成功';
   return result($data, $msg, $code);
 }
返回结果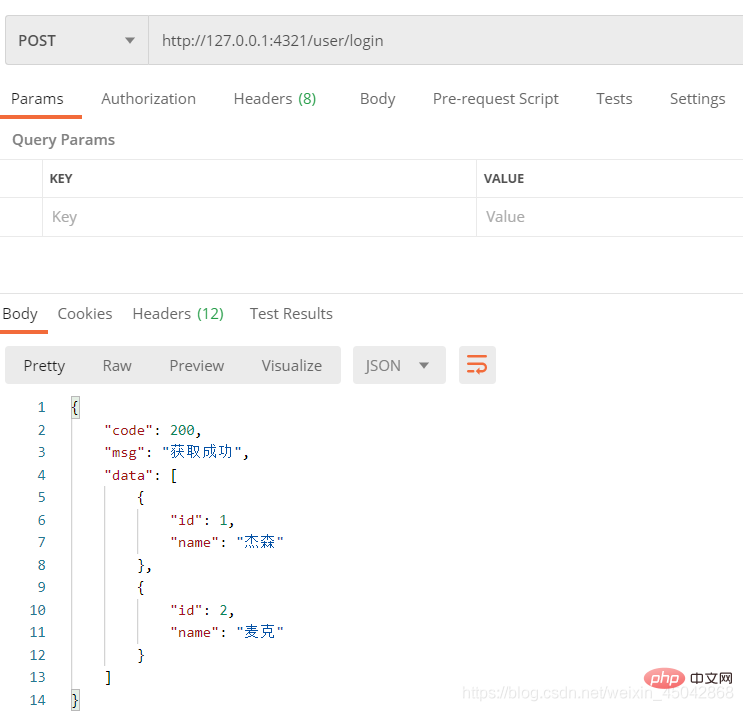
这样好像没有体现我们修改的请求的状态码,那我们把$code改成500,再来看看结果如何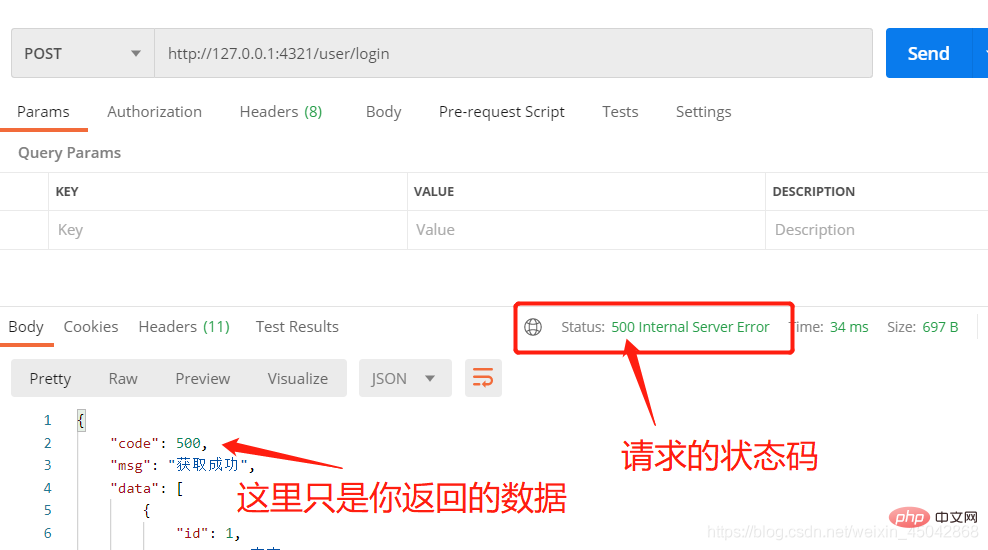
咱已经成功的将改请求状态变成了500
得嘞,现在再来回头看看我们之前写的检查jwt的中间件,把返回的结果封装一下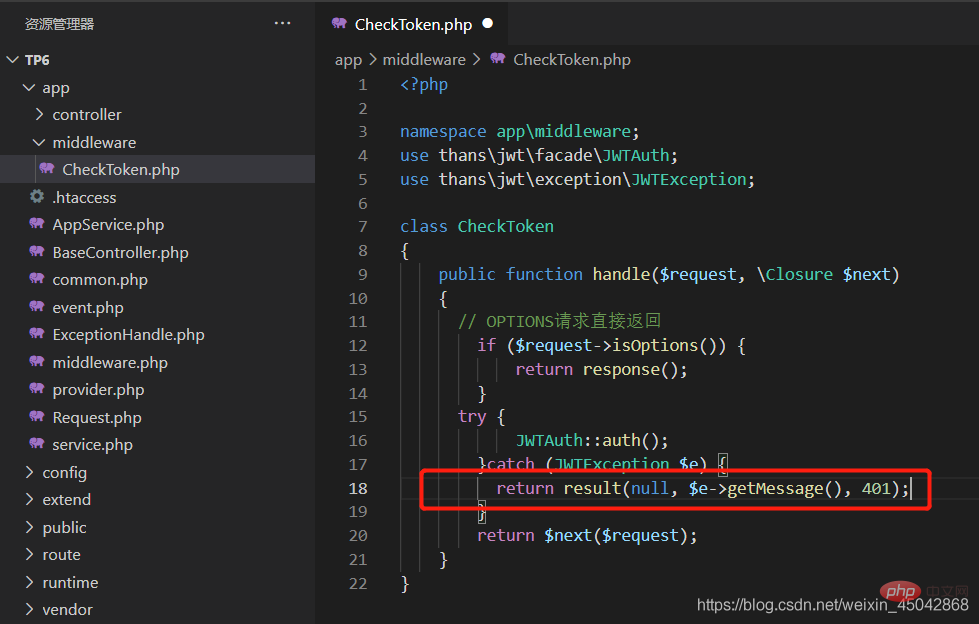
再去验证一下看看,看着返回的结果就舒服多了,这特么才是后端给前端返回的结果。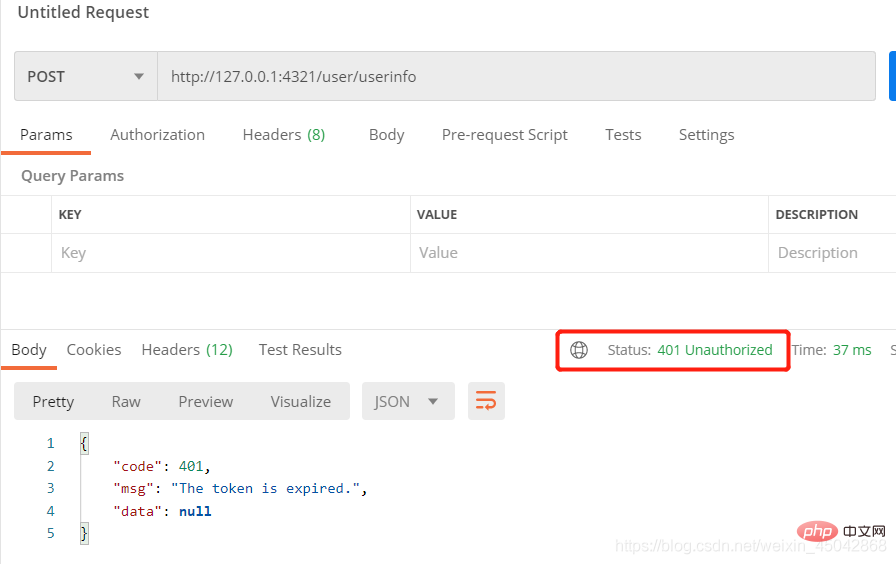
本小节结束,记录一下一些常见的状态码,我在自己写的时候就只用到了这些状态码
| 状态码 | 描述 |
|---|---|
| 200 | 请求成功 |
| 204 | 请求成功,未返回实体,比如option请求,这玩意儿用不着呀 |
| 400 | 错误的请求 |
| 401 | 认证失败,这个一般在token验证那里 |
| 403 | 拒绝访问 |
| 404 | 请求的资源不存在 |
| 422 | 参数验证错误 |
| 500 | 服务器错误 |
异常捕捉(看云文档)内容挺多的,自己去百度吧,我就把我遇到过的常见的错误进行捕捉,其它的异常我也爱莫能助,不懂啊 !>_>!
我也就不自定义类了,直接在它给的默认的异常处理文件里写了。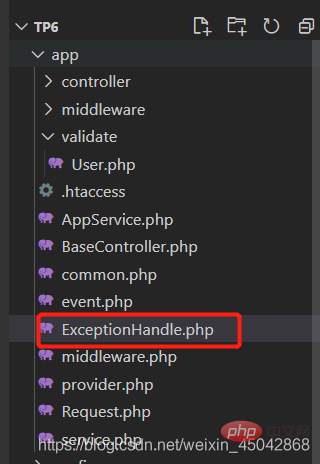
我们先写一个参数验证的类,在app目录下创建validate目录,创建User.php文件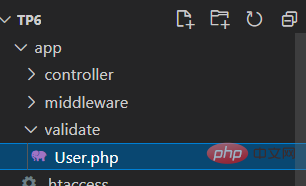
app/validate/User.php
<?phpnamespace app\validate;use think\Validate;class User extends Validate{
protected $rule = [
'name' => 'require|max:25',
'age' => 'number|between:1,120',
'email' => 'email',
];
protected $message = [
'name.require' => '名称必须',
'name.max' => '名称最多不能超过25个字符',
'age.number' => '年龄必须是数字',
'age.between' => '年龄只能在1-120之间',
'email' => '邮箱格式错误',
];
}tp6的异常捕捉分为两种,自动和手动的,手动的就是通过try{}catch{}捕捉。tp6的异常捕捉大多是自动的,不过,比如我们现在要操作的参数验证错误就需要自己去捕捉来抛出异常,我们此节的目的是统一捕捉这个错误,我就不用手动的了。
我们就在异常处理类的render方法中添加这个捕捉抛出就可以了。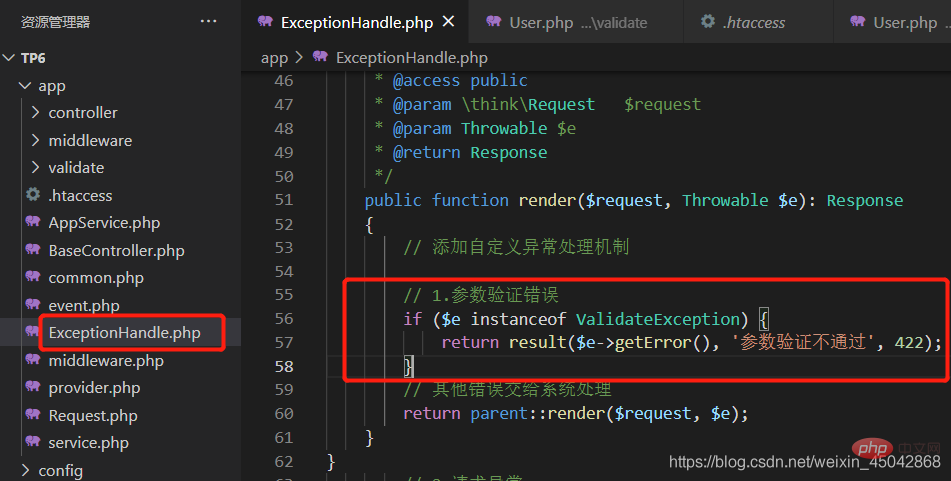
// 1.参数验证错误
 if ($e instanceof ValidateException) {
     return result($e->getError(), '参数验证不通过', 422);
}现在在方法中一下,看看能否捕获。
app/controller/v1/User.php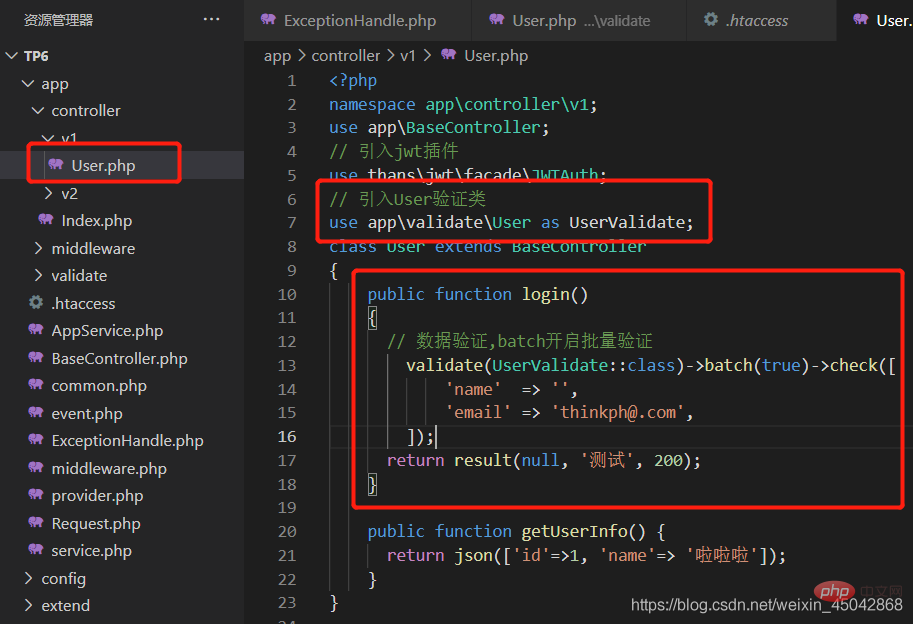
查看结果,成功被捕获到了,并抛出了错误内容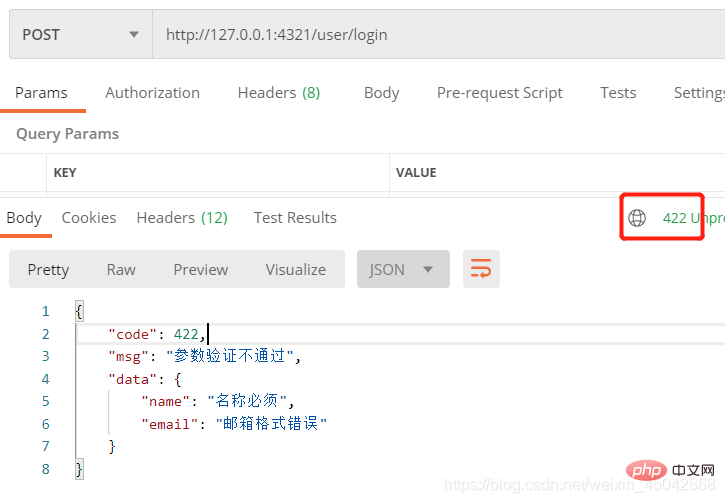
如果验证通过了,就会正常的走下去,则会显示我return的测试内容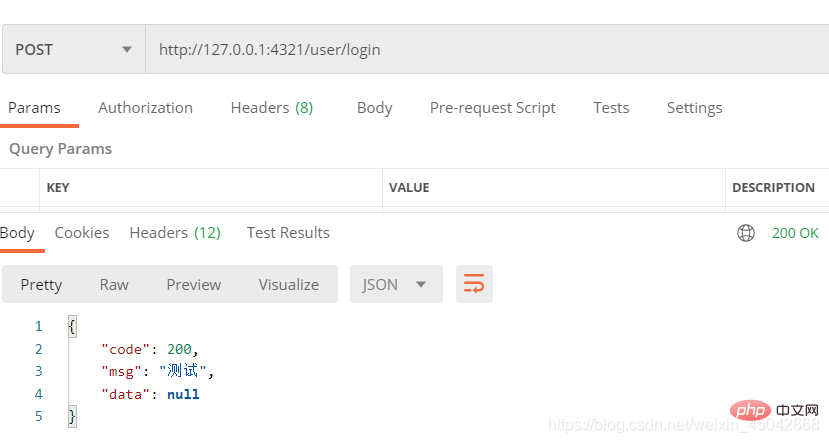
我还没找到方法,在我的预想中这个应该要做到能够准确的反应未匹配到的原因。
// 2.方法(控制器、路由、http请求)、资源(多媒体文件,如视频、文件)未匹配到,// 一旦在定义的路由规则中匹配不到,它就会直接去匹配控制器,但是因为在控制器中做了版本控制v1,v2这样的,所以它是无法获取对应控制器的// 所以都会直接走了HttpException的错误// 感觉好像也无所谓,反正是做api接口的,只不过这样就不好准确的提示信息了// 到底这个请求时控制器找不到呢?还是方法找不到?还是请求类型(get,post)不对?if(($e instanceof ClassNotFoundException || $e instanceof RouteNotFoundException) || ($e instanceof HttpException && $e->getStatusCode()==404)){
  $data = [
    'err_msg' => $e -> getMessage(),
    'tips_1' => '请检查路径是否是否填写正确',
    'tips_2' => '请检查请求类型是否正确',
  ];
return result($data, '方法或资源未找到,请检查', 404);}<?phpnamespace app;use ParseError; // 语法错误use TypeError;use InvalidArgumentException; // 参数错误use think\db\exception\DataNotFoundException;use think\db\exception\ModelNotFoundException;use think\db\exception\PDOException; // 数据库连接错误use think\db\exception\DbException; // 数据库模型访问错误,比如方法不存在use think\exception\RouteNotFoundException;use think\exception\ClassNotFoundException;use think\exception\FuncNotFoundException;use think\exception\FileException;use think\exception\Handle;use think\exception\HttpException;use think\exception\HttpResponseException;use think\exception\ValidateException;use think\exception\ErrorException;use think\Response;use Throwable;/**
* 应用异常处理类
*/class ExceptionHandle extends Handle{
/**
* 不需要记录信息(日志)的异常类列表
* @var array
*/
protected $ignoreReport = [
HttpException::class,
HttpResponseException::class,
ModelNotFoundException::class,
DataNotFoundException::class,
ValidateException::class,
];
/**
* 记录异常信息(包括日志或者其它方式记录)
*
* @access public
* @param Throwable $exception
* @return void
*/
public function report(Throwable $exception): void
{
// 使用内置的方式记录异常日志
parent::report($exception);
}
/**
* Render an exception into an HTTP response.
*
* @access public
* @param \think\Request $request
* @param Throwable $e
* @return Response
*/
public function render($request, Throwable $e): Response
{
// 添加自定义异常处理机制
// 请求异常
if ($e instanceof HttpException && $request->isAjax()) {
return response($e->getMessage(), $e->getStatusCode());
}
// 使用了错误的数据类型 或 缺失参数
if ($e instanceof InvalidArgumentException || $e instanceof ErrorException) {
$fileUrlArr = explode(DIRECTORY_SEPARATOR, $e->getFile());
$data = [
'err_msg' => $e->getMessage(),
'file' => $fileUrlArr[count($fileUrlArr) - 1],
'line' => $e->getLine()
];
return result($data, '参数错误', 413);
}
// 1.参数验证错误
if ($e instanceof ValidateException) {
return result($e->getError(), '参数验证不通过', 422);
}
// 2.方法(控制器、路由、http请求)、资源(多媒体文件,如视频、文件)未匹配到,
// 一旦在定义的路由规则中匹配不到,它就会直接去匹配控制器,但是因为在控制器中做了版本控制v1,v2这样的,所以它是无法获取对应控制器的
// 所以都会直接走了HttpException的错误
// 感觉好像也无所谓,反正是做api接口的,只不过这样就不好准确的提示信息了
// 到底这个请求时控制器找不到呢?还是方法找不到?还是请求类型(get,post)不对?
if(($e instanceof ClassNotFoundException || $e instanceof RouteNotFoundException) || ($e instanceof HttpException && $e->getStatusCode()==404)){
$data = [
'err_msg' => $e -> getMessage(),
'tip_1' => '请检查路径是否是否填写正确',
'tips_2' => '请检查请求类型是否正确',
];
return result($data, '方法或资源未找到,请检查', 404);
}
// 3.语法错误
if ($e instanceof ParseError) {
$fileUrlArr = explode(DIRECTORY_SEPARATOR, $e->getFile());
$data = [
'err_msg' => $e->getMessage(),
'file' => $fileUrlArr[count($fileUrlArr) - 1],
'line' => $e->getLine()
];
return result($data, '服务器异常-语法错误', 411);
}
// 4.数据库错误
if ($e instanceof PDOException || $e instanceof DbException) {
$fileUrlArr = explode(DIRECTORY_SEPARATOR, $e->getFile());
$data = [
'err_msg' => $e->getMessage(),
'file' => $fileUrlArr[count($fileUrlArr) - 1],
'line' => $e->getLine()
];
return result($data, '服务器异常-数据库错误', 412);
}
// 其他错误交给系统处理
return parent::render($request, $e);
}}本节结束,这里面用的错误处理都是我在平常练习中遇到的错误,至于其他的没有处理是因为我还没碰到,碰到再说吧。为了给前端好的反馈,我们应该处理所有的异常的返回形式,不然,tp6默认返回页面形式的,前端等于得不到相应了。至于这个自定义异常捕获,应该有相应的插件的吧,你要是感兴趣可以去找找。
之前我还很好奇,后端是怎么搞出接口文档的,都是自己录入数据套模板的吗?原来他么的都是插件做的,真他么方便!!!
composer require hg/apidoc// 文档// https://hgthecode.github.io/thinkphp-apidoc/guide/install/
你就照着插件的文档来就好了,不用跟着我。
下载最新的,放在public目录下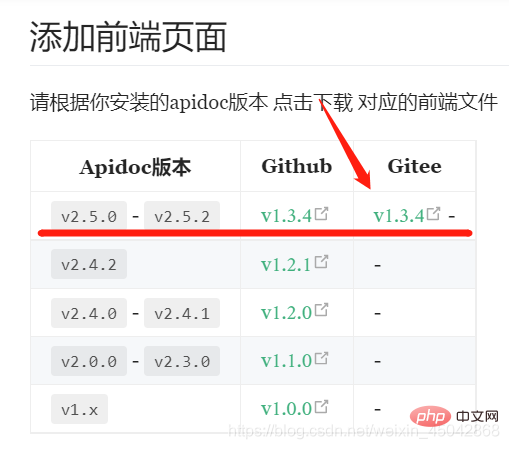
具体配置你还得看文档,我就直接照着最简单的做了,
我就试一个,将app/controller/v1/User.php写了注释,它会读注释生成接口文档
app/controller/v1/User.php
<?phpnamespace app\controller\v1;use app\BaseController;// 添加这句,注释写法为 @Apidoc\参数名(...)use hg\apidoc\annotation as Apidoc;/**
* @Apidoc\Title("V1")
* @Apidoc\Group("base")
*/class User extends BaseController{
/**
* @Apidoc\Title("登录")
* @Apidoc\Url("v1.user/login")
* @Apidoc\Tag("测试 基础")
* @Apidoc\Param("username", type="string",require=true, desc="用户名" )
* @Apidoc\Param("password", type="string",require=true, desc="密码" )
* @Apidoc\Returned("id", type="int", desc="新增用户的id")
*/
public function login()
{
return result(null, '成功', 200);
}}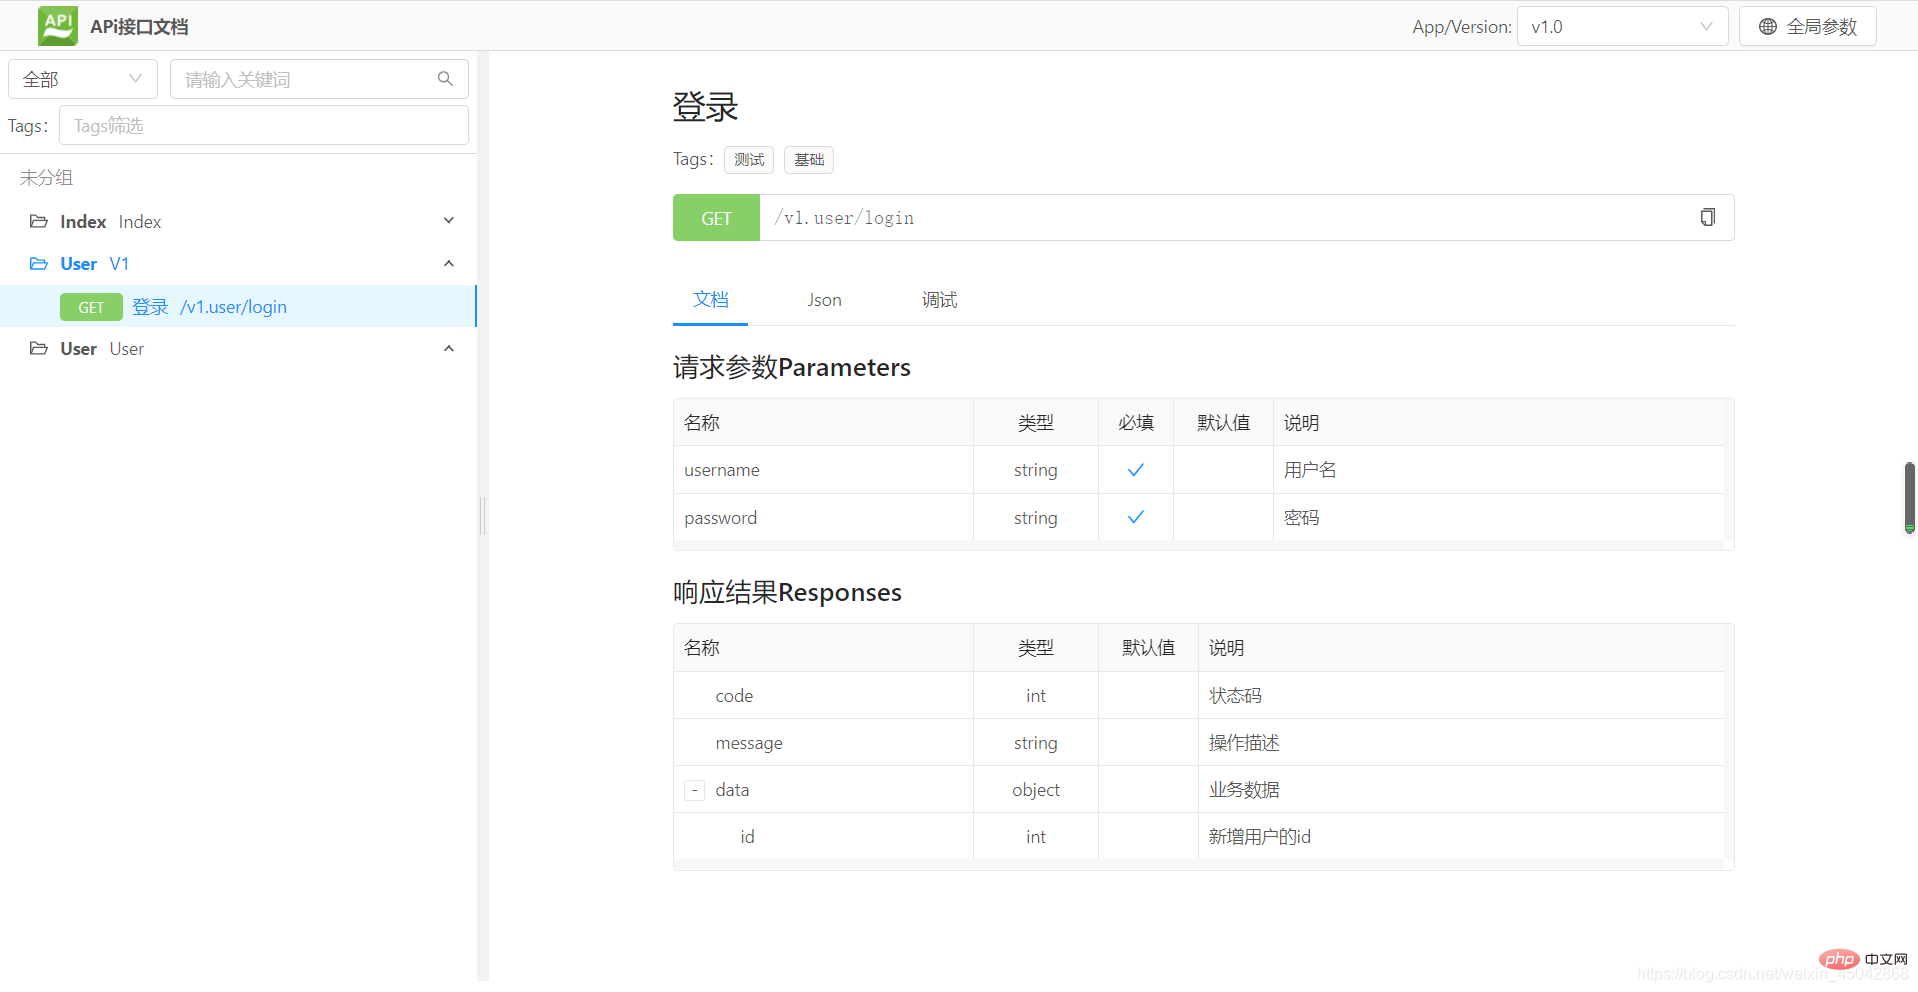
这个接口文档这里有点小问题,因为我们前面使用在header中添加api版本的方式控制请求的api版本,所以如果直接用/user/login是无法访问到控制器的,也就访问不到方法,必须得加上控制器所在位置的信息,就在前面加上了v1,变成了v1.user/login。这种形式是通过控制器去访问的方法,显然不理想,我想要达到的目标是不需要再里面加上v1,这个还得好好研究研究,不然前面定义的路由不是跟这个接口文档对不上了吗?你们要是研究到了,记得踢我一脚哈 >_>!
#后记:当时只是练习一下我,我也没深究,but其实这个apidoc它的官方文档里有设置项的,关于这个多应用/多版本的配置项,去apidoc的文档去看吧,在config/apidoc.php修改apps的配置就可以了,然后就可以通过右上角的选择框切换版本了
    // 设置应用/版本(必须设置)
    'apps'           => [
        [
            'title'=>'演示示例',
            'path'=>'app',
            'folder'=>'controller',
            'items'=>[
                ['title'=>'V1.0','path'=>'app\controller\v1','folder'=>'v1'],
                ['title'=>'V2.0','path'=>'app\controller\v2','folder'=>'v2']
            ]
        ],
    ],
推荐学习:《PHP视频教程》
The above is the detailed content of Detailed example of how thinkphp6 builds back-end API interface. For more information, please follow other related articles on the PHP Chinese website!