Preface
I wrote a simple asynchronous chat room before, and then I thought about it, let’s also do the coroutine, so I have this article. In fact, all the functions They are all pretty much the same, with just a few differences, and they are all simple.
Blog address: Using webSocket and Swoole to create a small chat room (asynchronous)
This time there are no additional functions, just one added Heartbeat, send a ping regularly from the front end, the server does not respond, that's all.
Front-end page code:
<!DOCTYPE html>
<html lang="en">
<head>
<meta charset="UTF-8">
<title>打工人聊天室</title>
<!--需要引入jq 文件--></head><style>
.content {
height: 400px;
max-width: 400px;
overflow: auto;
border-radius: 5px;
border: 1px solid #f0f0f0;
}</style>
<body>
<div id="content" class="content">
<p>聊天区域</p>
</div>
你好打工人:<samp id="nickname">昵称</samp> <br>
本次连接FD: <samp id="fd-samp"></samp> <br>
<input type="text" id="msg">
<input type="hidden" id="fd" value="">
<button id="send" onclick="send()">发送</button>
</body>
</html>JS code:
When the server information is received, there will be a receipt for the first connection, or a receipt for the message sent by the server. The status difference is distinguished by msgType. If it is a receipt message for the first connection, the FD will be saved on a page and will not be displayed in the chat message area. If a message receipt is received, it will be displayed directly in the chat message area.
Also, the things sent by the front-end and back-end communication are all of the best string nature. My front-end processing method is to first combine it into an object and then convert it into a JSON string.
<script>
//滚动条最底部
function scrolltest() {
var div = document.getElementById("content");
div.scrollTop = div.scrollHeight; }
var wsServer = 'ws://127.0.0.1:9502/websocket';
var websocket = new WebSocket(wsServer);
var nickname = Math.random().toString(36).substr(2);
thisFd = ''; $('#nickname').html(nickname);
//点击发送
function send() {
var msg = $('#msg').val();
var data = {
'nickname': nickname,
'fd': thisFd,
'data': msg }
//生成json 方便后台接收以及使用
var data = JSON.stringify(data);
websocket.send(data);
//然后清空
$('#msg').val(''); }
//链接成功
websocket.onopen = function (evt) {
var data = {
'msgType': 'open' }
var data = JSON.stringify(data);
$("#content >p:last-child").after('<p> 服务器已连接,开始聊天吧 </p>');
websocket.send(data); };
//链接断开
websocket.onclose = function (evt) {
$("#content >p:last-child").after('<p> 服务器已断开,请重新连接 </p>'); };
//收到服务器消息
websocket.onmessage = function (evt) {
//握手成功后,会接受到服务端返回的fd ,msgType = 1
//字符串格式化成json
var data = eval('(' + evt.data + ')');
// console.log(evt.data);
switch (data.msgType) {
case 1:
thisFd = data.fd;
$('#fd-samp').html(thisFd);
$('#fd').val(thisFd);
break; case 2:
if (data.nickname == nickname) {
data.nickname = '我'; }
$("#content >p:last-child").after('<p>' + data.nickname + ' 在 ' + data.time + ' 说:<br>' + data.data + '</p>');
//接收到消息自动触底
scrolltest();
break; } };
//服务器异常
websocket.onerror = function (evt, e) {
$("#content >p:last-child").after('<p> 服务器异常 </p>'); };
//心跳,本次新增
function heartbeat() { var data = {
'msgType': 'ping', }
//生成json 方便后台接收以及使用
var data = JSON.stringify(data);
websocket.send(data); }
//30 秒一次
setInterval(heartbeat, 30000);</script>Server-side code
Coroutines need to be in Co\run(function () {}).
<?php
//定义获取当前的id函数
function getObjectId(\Swoole\Http\Response $response) {
if (PHP_VERSION_ID < 70200) {
$id = spl_object_hash($response);
} else {
$id = spl_object_id($response); }
return $id; }
Co\run(function () {
$server = new Co\Http\Server('127.0.0.1', 9502, false);
$server->set([
'heartbeat_idle_time' => 600,
// 表示一个连接如果600秒内未向服务器发送任何数据,此连接将被强制关闭
'heartbeat_check_interval' => 60,
// 表示每60秒遍历一次
]);
$server->handle('/websocket', function ($request, $ws) {
$ws->upgrade();
global $wsObjects;
$objectId = getObjectId($ws);
$wsObjects[$objectId] = $ws;
while (true) {
$frame = $ws->recv();
if ($frame === '') {
unset($wsObjects[$objectId]);
$ws->close();
break;
} else if ($frame === false) {
echo 'error : ' . swoole_last_error() . "\n";
break; }
else {
if ($frame->data == 'close' || get_class($frame) === Swoole\WebSocket\CloseFrame::class)
{
unset($wsObjects[$objectId]);
$ws->close();
return;
}
//格式化接收到json
$data = json_decode($frame->data);
switch ($data->msgType){
case 'open':
//链接第一次
$data = json_encode([
'fd' => $objectId,
'msgType' => 1
//代表第一次连接,前端处理fd
]);
$ws->push($data);
break;
case 'ping':
//接收到心跳 不作回复
//
echo $data->msgType;
break;
default :
// 原基础上不动,增加一些自定义
$data->msgType = 2;
//代表服务器端回复
$data->time = date('Y-m-d H-i-s');
$data = json_encode($data);
foreach ($wsObjects as $obj) {
$obj->push($data);
}
}
} }
});
$server->start();
});After the code is complete, you only need to execute the following PHP file on the console. 
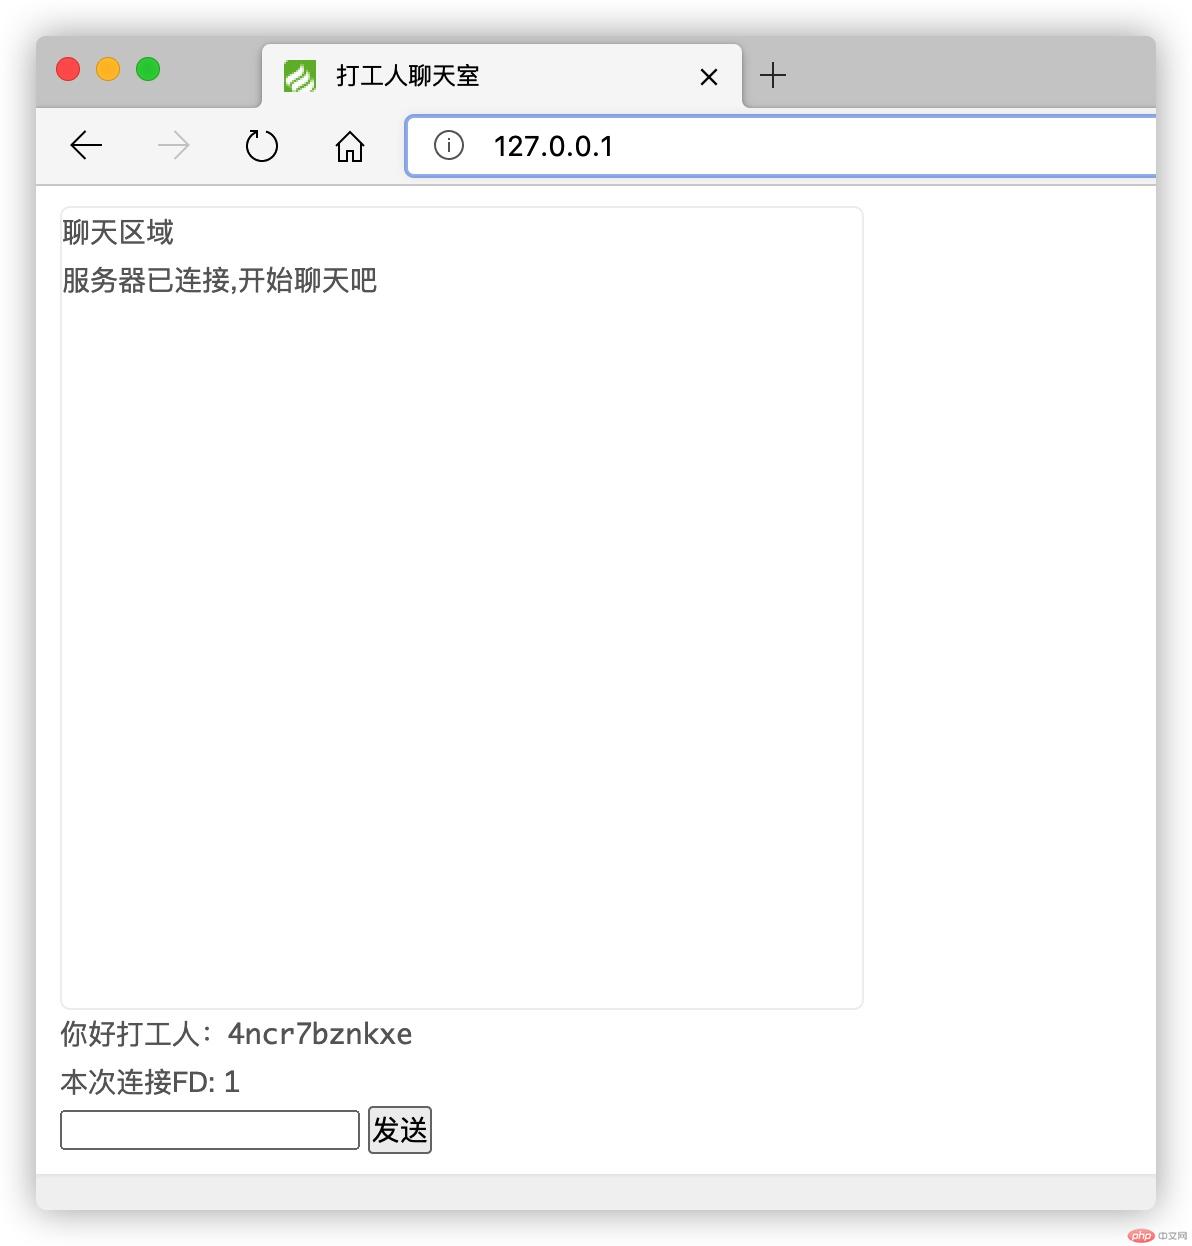
Then the front desk directly accesses your website address, mine is local 127.0.0.1
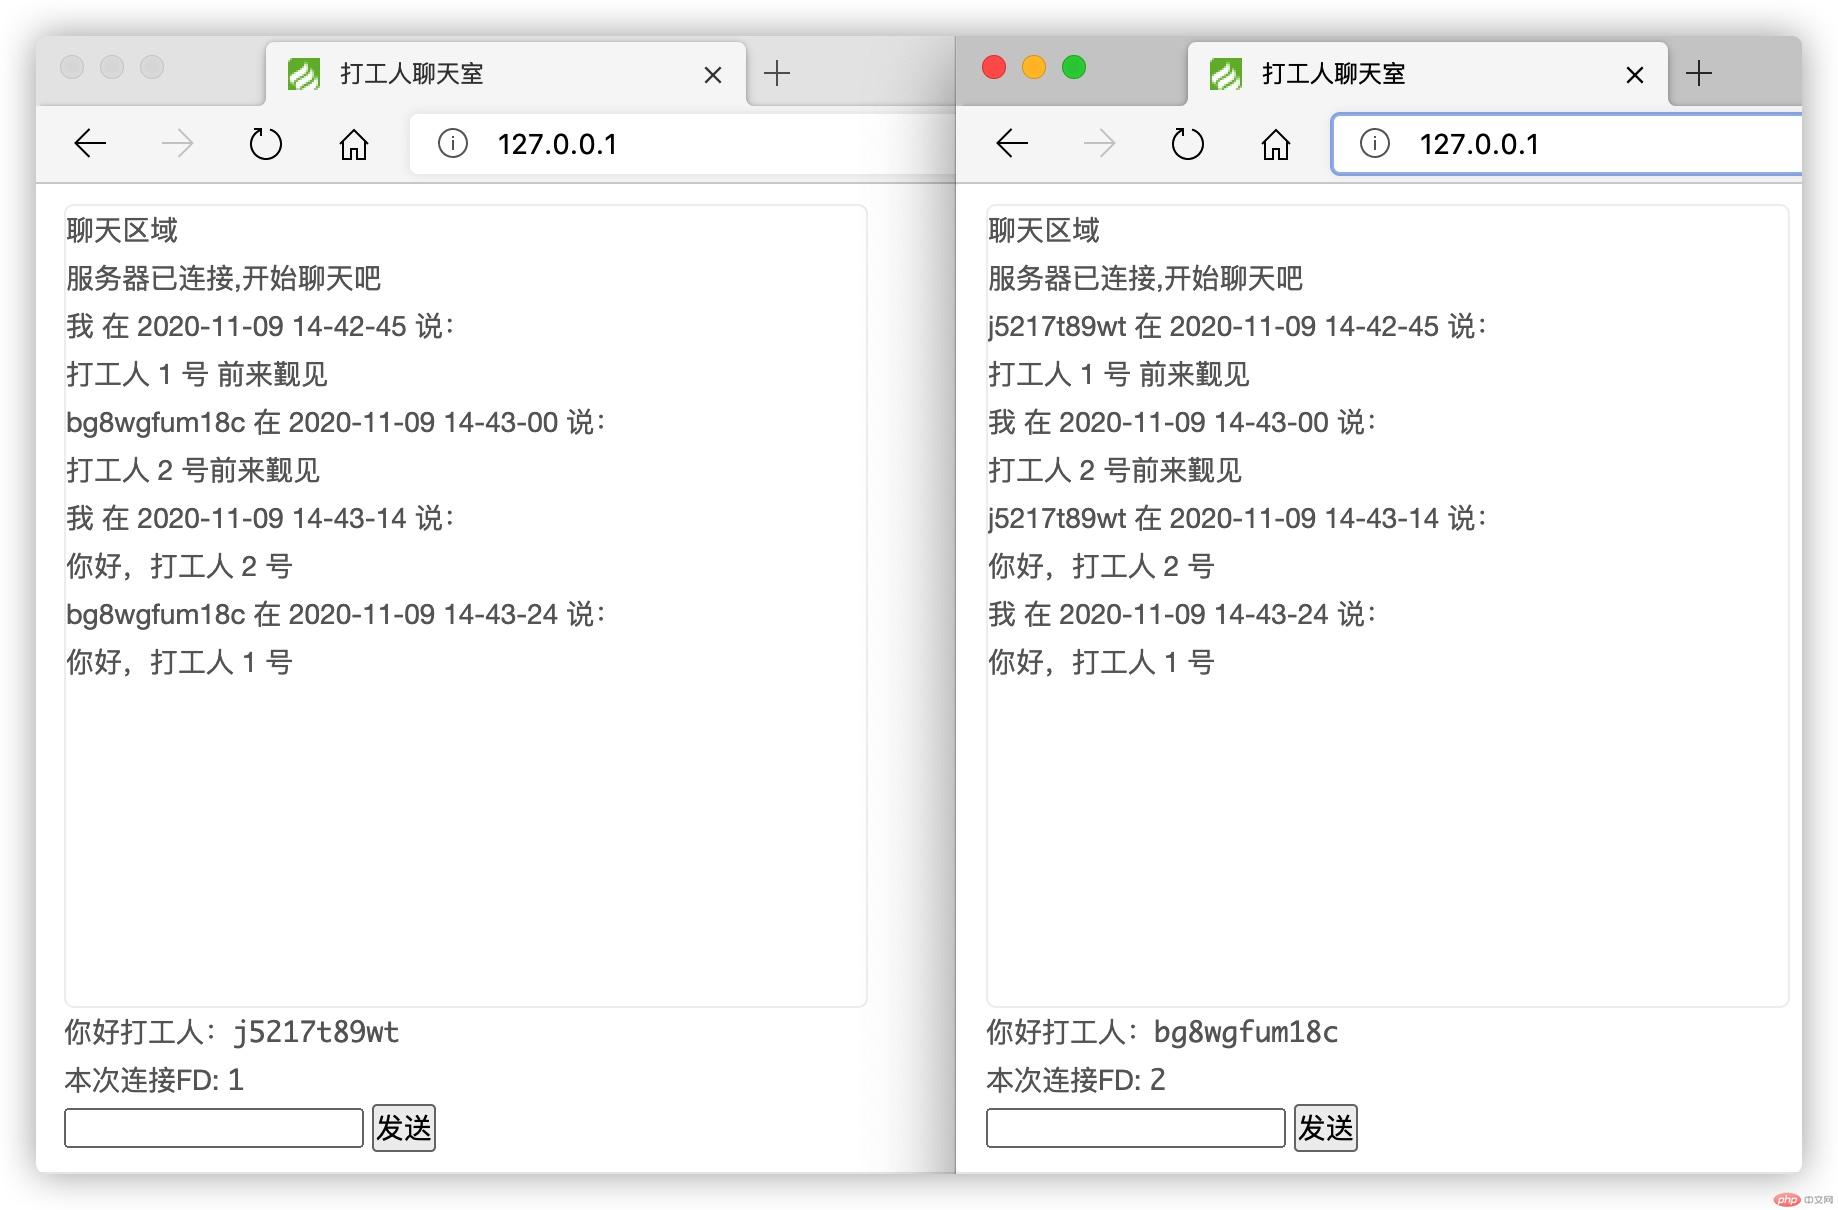
Open a few more windows to simulate multiple users, Then send a message to test: 
Hello, worker.
The code is very simple and not very difficult, but it can reflect the power of webScoket and Swoole very concisely.


![[Web front-end] Node.js quick start](https://img.php.cn/upload/course/000/000/067/662b5d34ba7c0227.png)


