
This article brings you some related questions about container operation of docker core technology, detailed explanation of Dockerfile, etc. I hope it will be helpful to you.





 ##3. Container operation
-It interaction
-d Running
--P port mapping
--V disk hanging
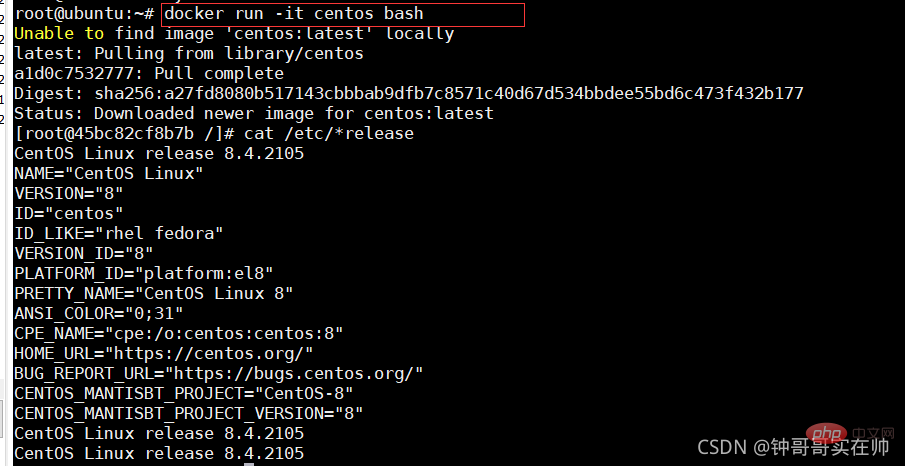


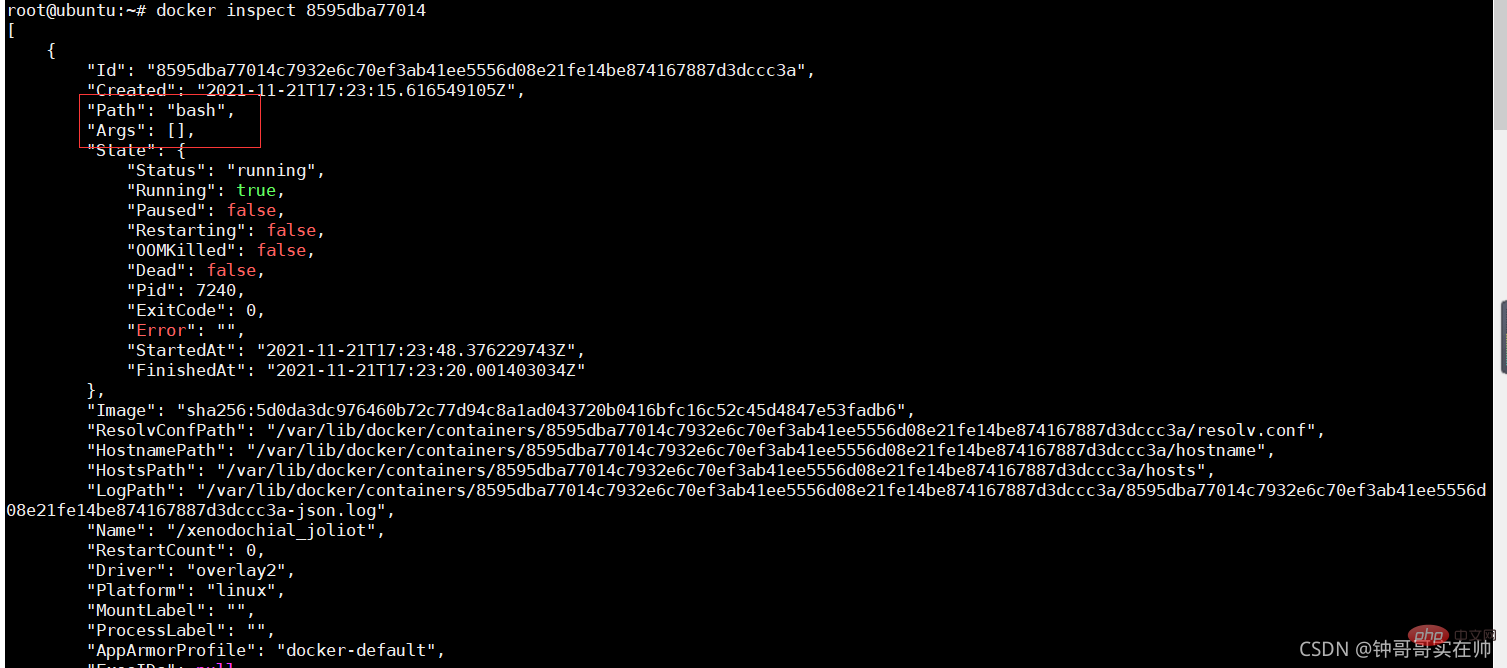
 #docker exits the container without closing the container: ctrl q p

From & LT; Image & GT;@& LT; Digest & GT;
## Example:## Ubuntu
AINTAINER: Maintenance InformationRUN apt-get update && apt The two commands -get install are always connected with &&, otherwise the apt-get update build layer will be cached, which will cause the new package to fail to be installed
CMD ["param1","param2"] ( If ENTRYPOINT is set, call ENTRYPOINT directly to add parameters)
CMD command param1 param2 (execute shell internal command)
ENTRYPOINT command param1 param2 (shell internal command)
USER user
USER user:group
USER uid
USER uid:gid
USER user:gid
USER uid:group
USER www
ARG < name>[=
Example:
ARG build_user=ribbon
##
Linux NameSpace_Frank_Abagnale's Blog-CSDN Blog This article provides a more detailed introduction. You can refer to this article
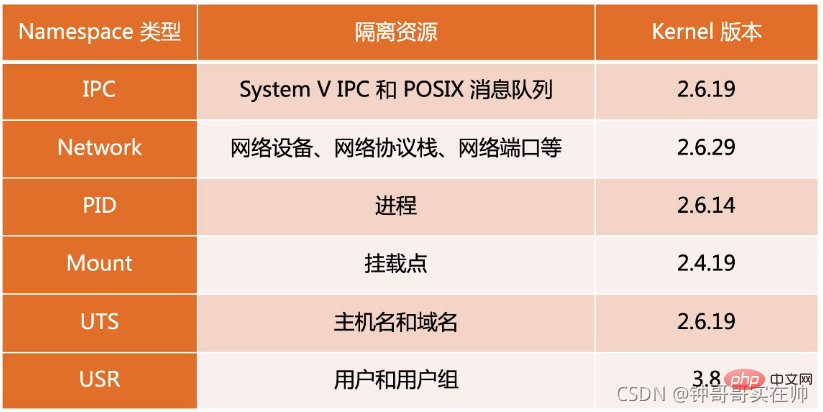
lsns -t

ls -la /proc/

nsenter -t
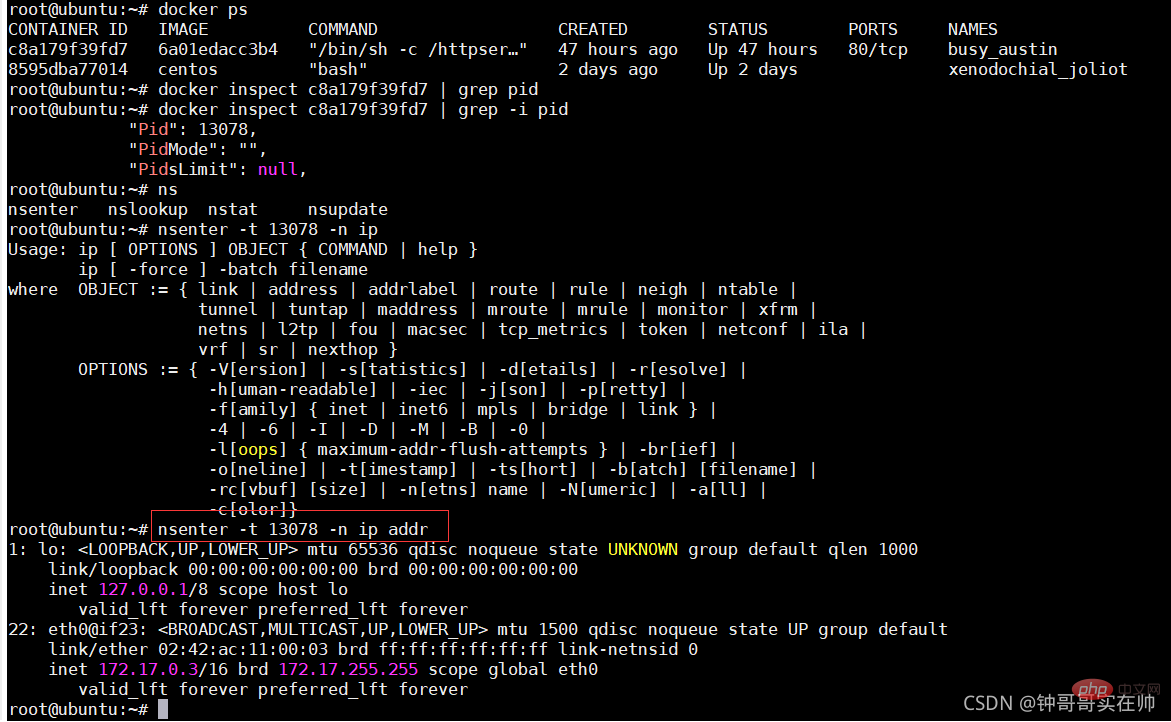
Container Core: cgroups - Brief Book You can refer to this article to learn more
Pass Simulate to better familiarize yourself with the effect of Cgroups controlling resources. First create the cpudemo folder

Execute top and you can see that busyloop takes up two CPU resources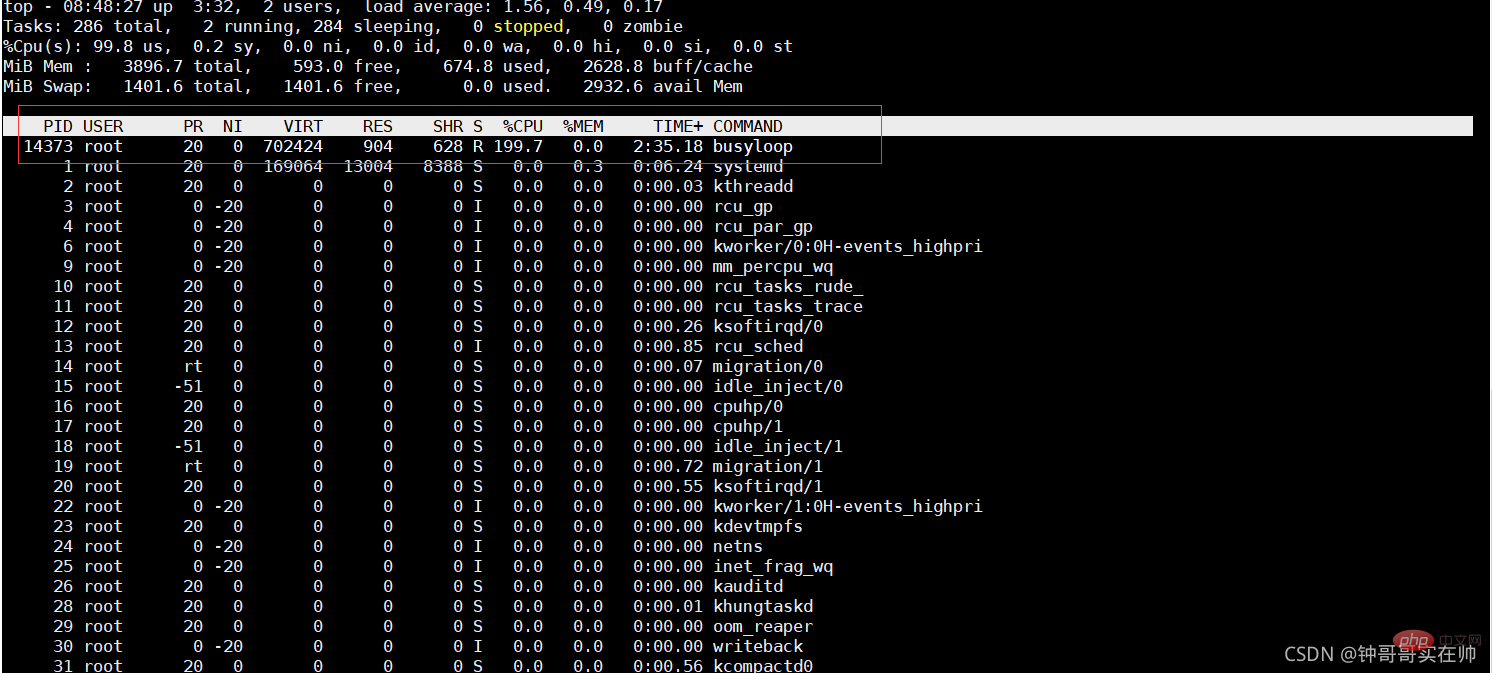
Add the process to the cgroup process configuration group

Set cpuquota

You can see that success will occupy 200% The CPU resources are reduced to 1%
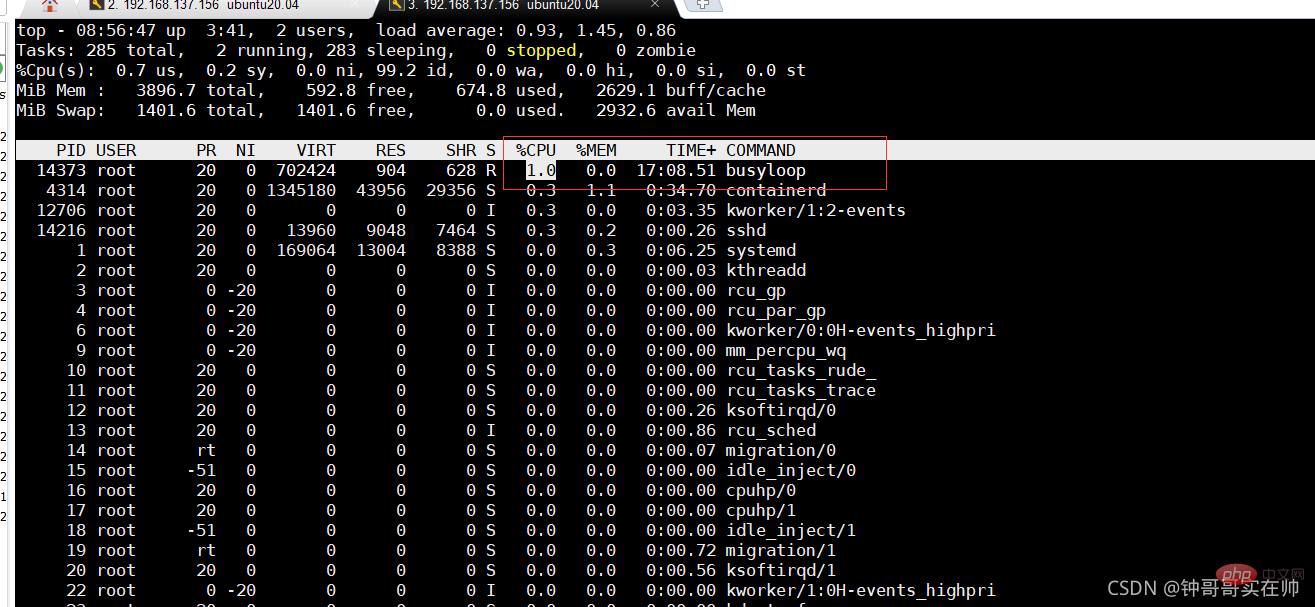
/ Create the memorydemo folder in the sys/fs/cgroup/memory directory

Run the memory-consuming program and use watch to query the memory usage


Configure the process into the cgroups configuration group 
Set the maximum memory size

Waiting for the program Killed by OOM, dmesg can see the kill information


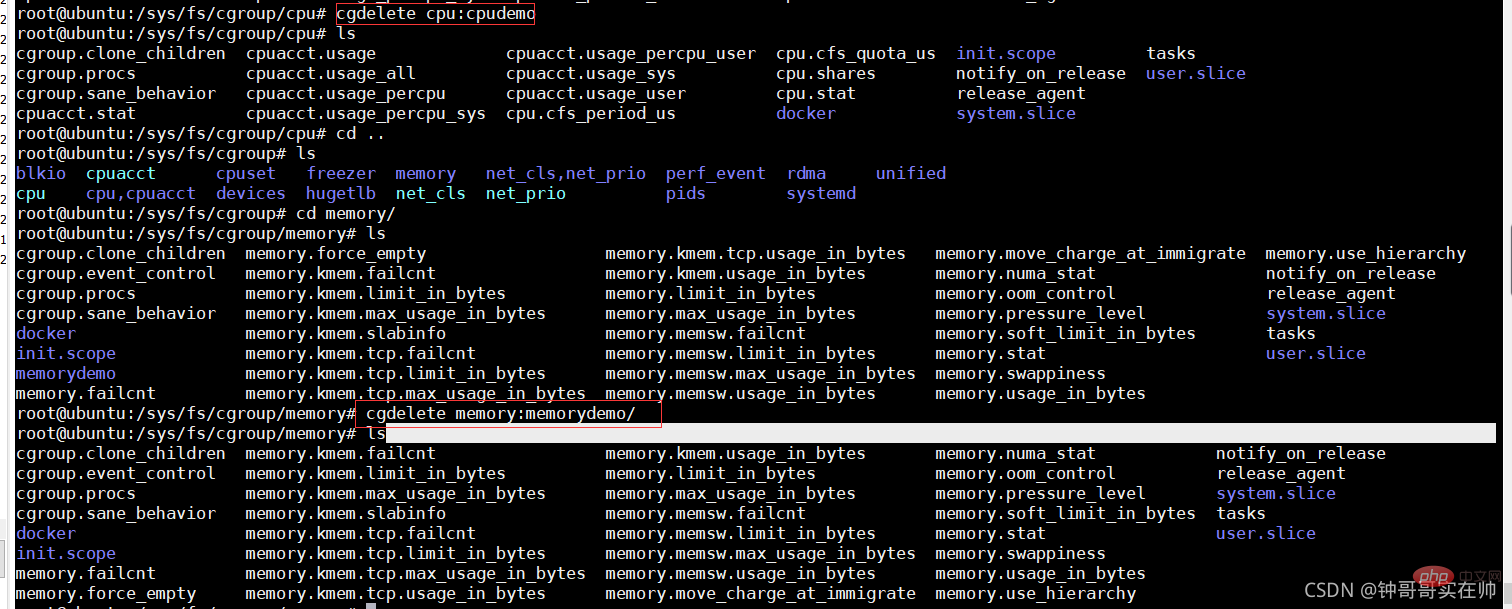
Note: To delete self-created cgroup folders, you need to use cgroup-tools
The technologies used by Docker are all derived from Linux technologies and are not There is no innovation, and the innovation of Docker is the file system.
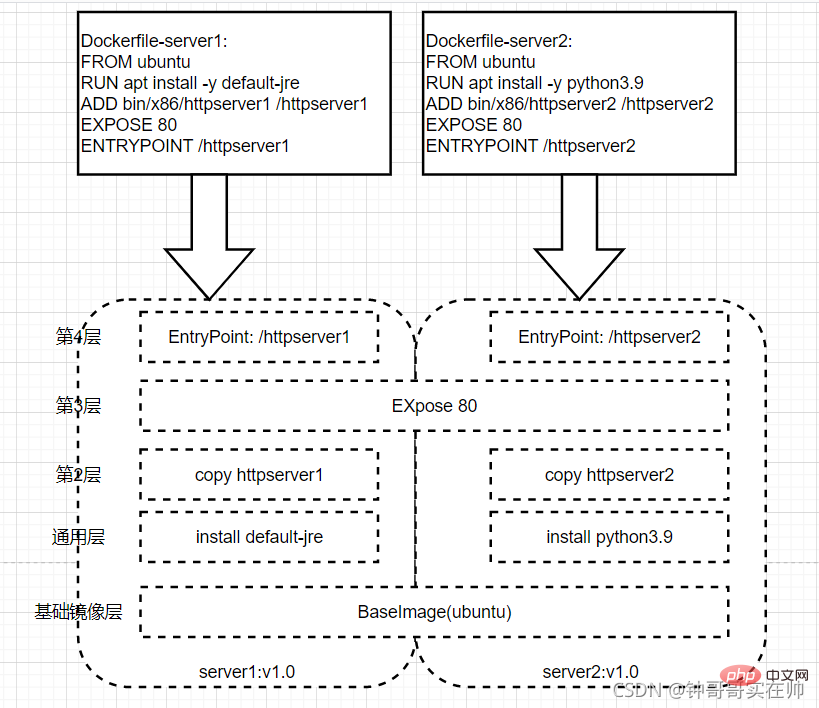
In the design of the Docker image, The concept of layer is introduced, that is to say, every step of the user's image creation operation will generate a layer, that is, an incremental rootfs (a directory), so that the containers where application A and application B are located jointly reference the same The ubuntu operating system layer and the Golang environment layer (as read-only layers) each have their own application layer and writable layer. When starting the container, mount the relevant layers to a directory through UnionFS as the root file system of the container.
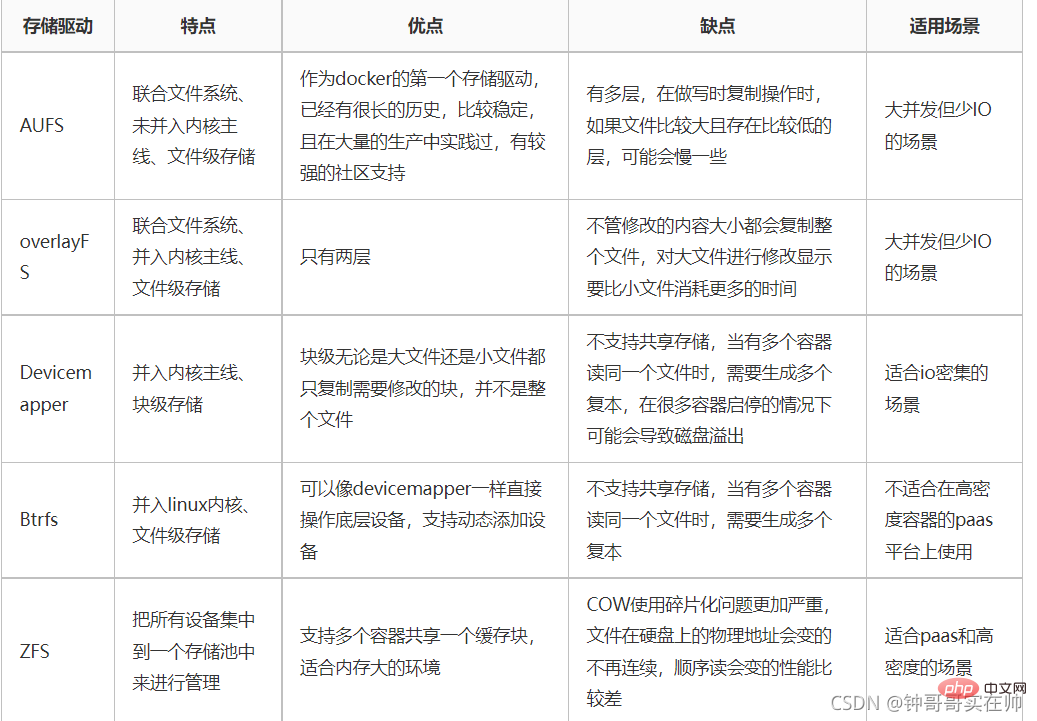

Since the current version of docker uses the overlayFS storage driver, we use the overlay mounting method to conduct experiments. Overlayfs passes through three directories: lower Directory, upper directory, and work directory are implemented. There can be multiple lower directories. The work directory is the basic working directory. After mounting, the content will be cleared and its content will not be visible to the user during use. Finally, the joint mounting is completed. The unified view presented to the user is called the merged directory.

Execute the following command:
mkdir upper lower merged work
echo "lower" > lower/in_lower.txt
echo "from lower" > lower/in_both.txt
echo "from upper" > upper/in_both.txt
echo "upper" > upper/in_upper.txt
path=$(pwd)
mount -t overlay overlay -o lowerdir=${path}/lower,upperdir=${path}/upper,workdir=${path}/work ${path}/merged
## You can see that the overlay storage driver file is mounted using Effect. After the experiment is completed, you need to restore the environment after umounting the merged directory, and then deleting the four directories. If you delete the others first, rm: cannot remove 'merged/': Device or resource busy may appear, resulting in the merged directory not being deleted. 


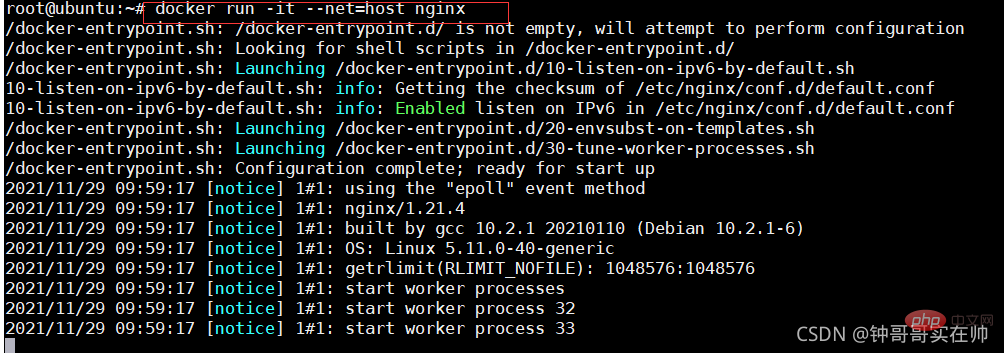
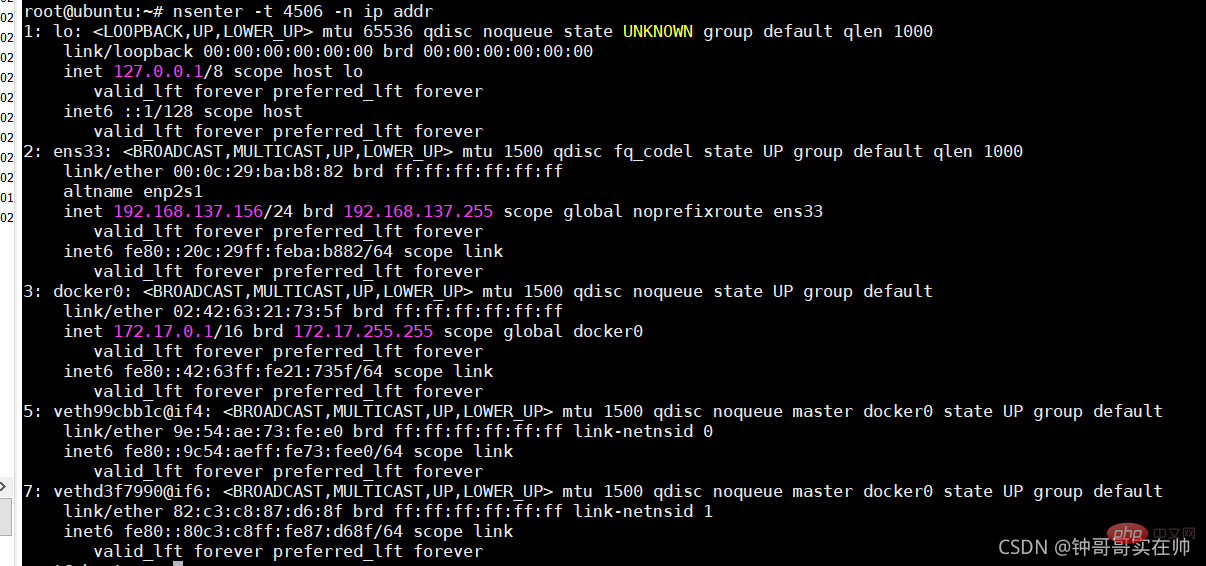
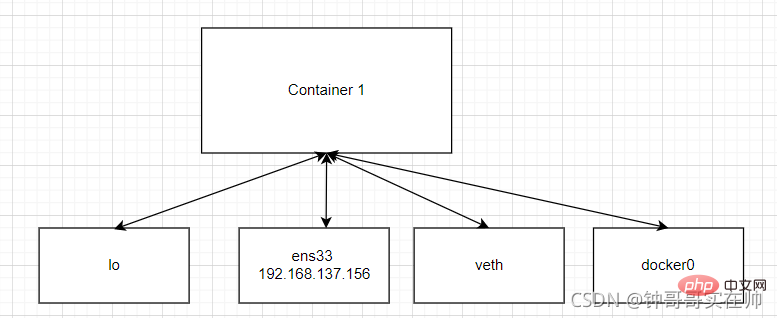 # 2) none mode: use --net=none specified. The network configuration needs to be configured by yourself

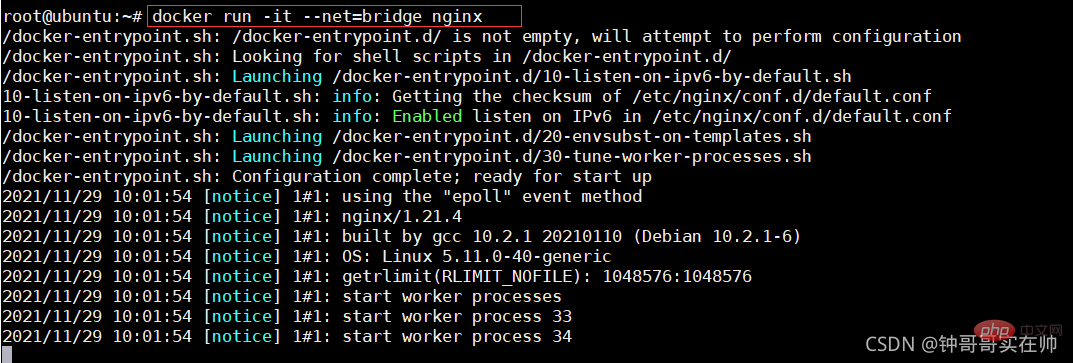
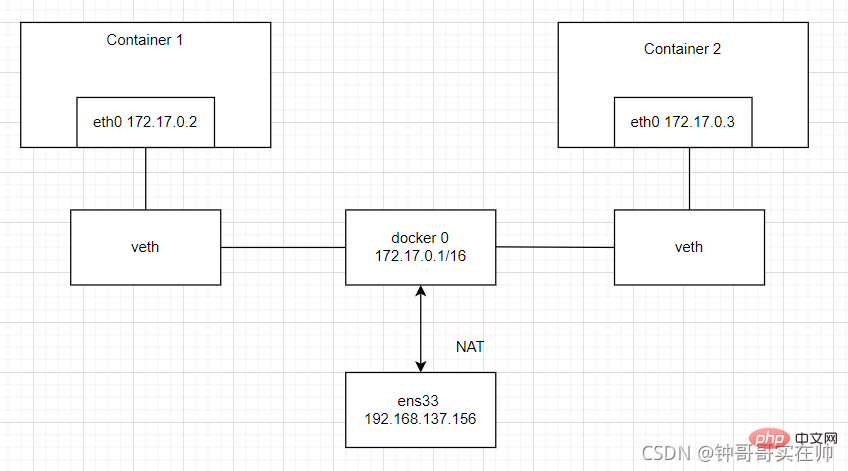
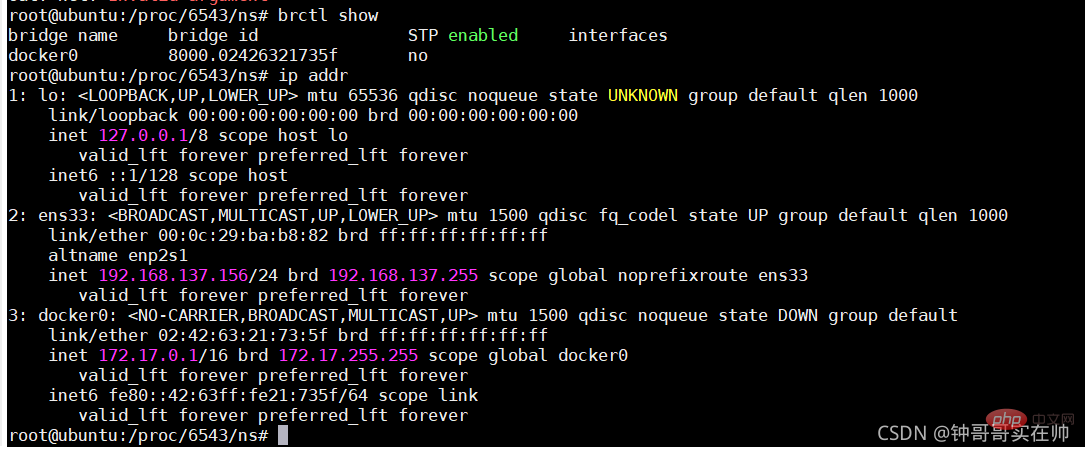
 3) Bridge mode: Use --net=bridge to specify, the default setting.
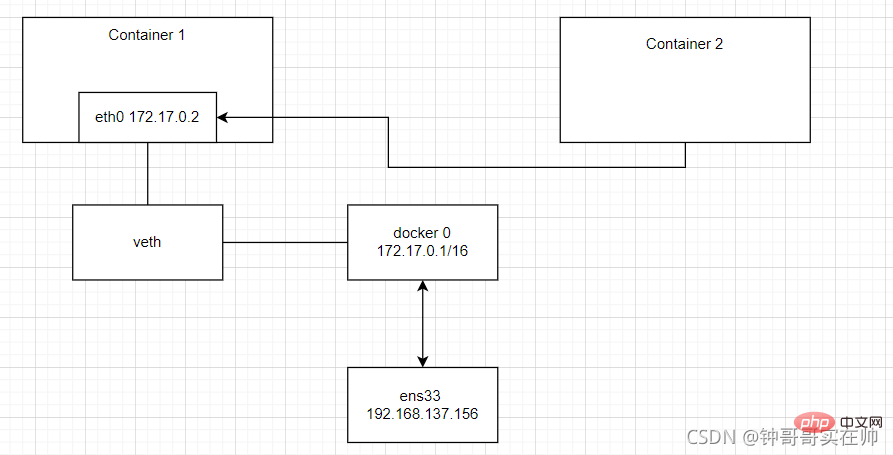
 docker network logic diagram bridge and NAT
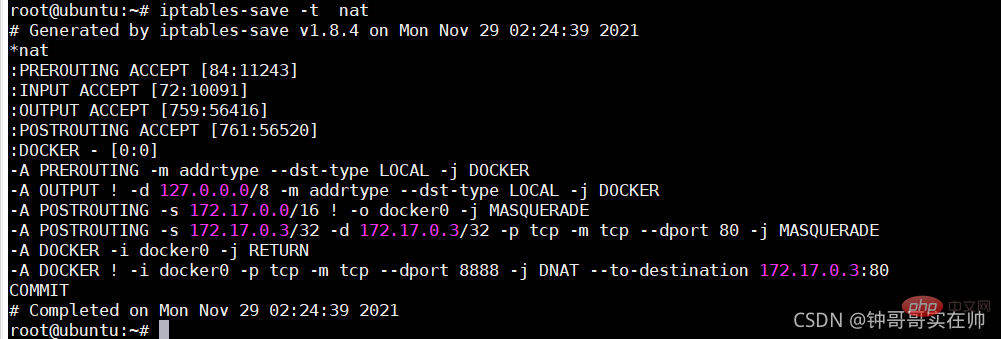
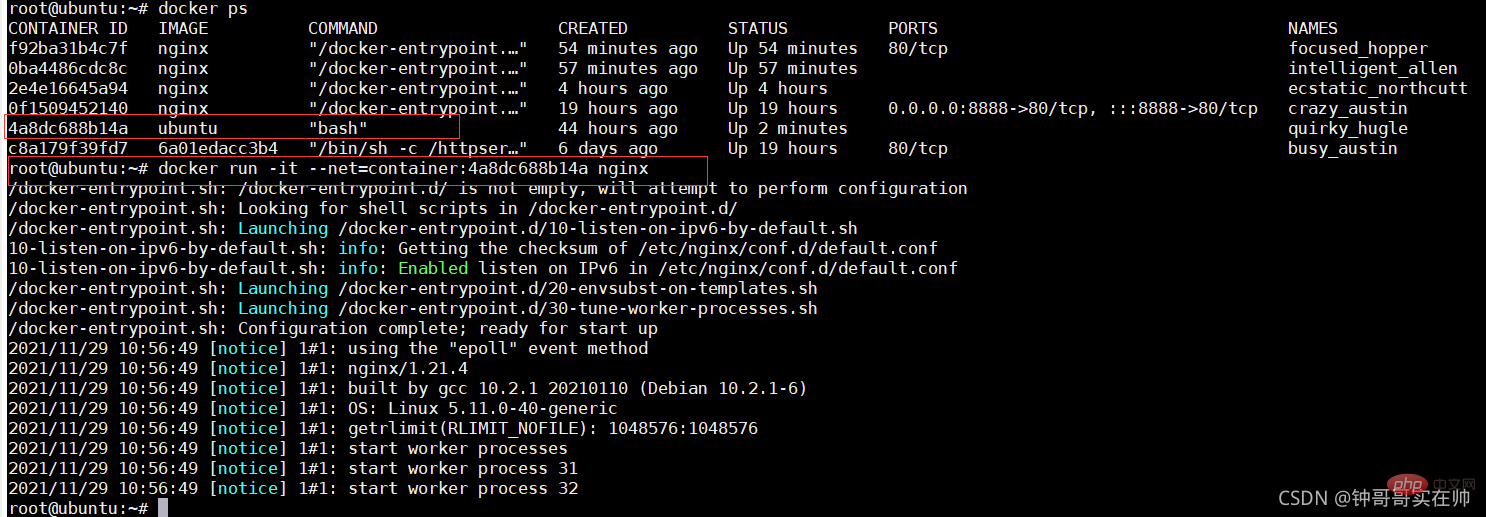
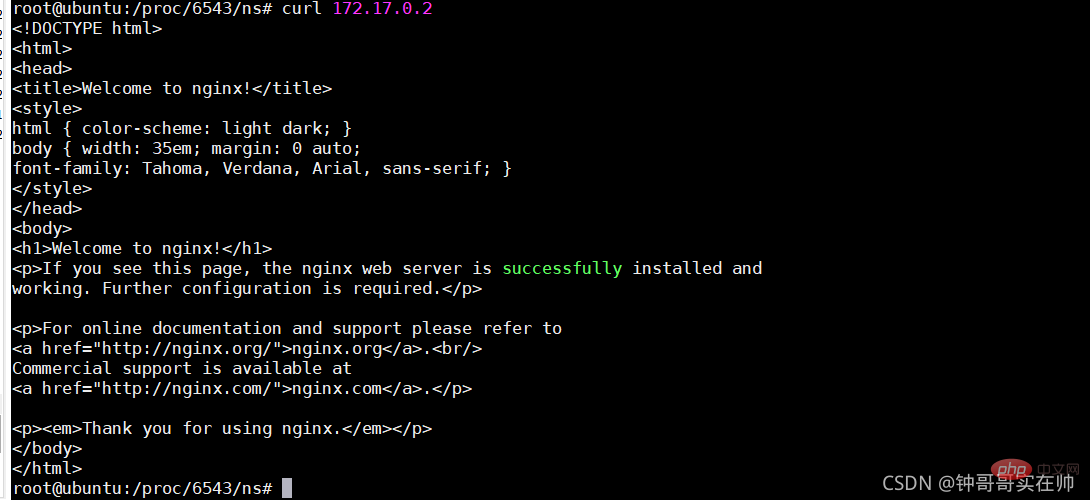
4) Container mode: Use --net=container:NAME_or_ID to specify. Using the network configuration of other containers

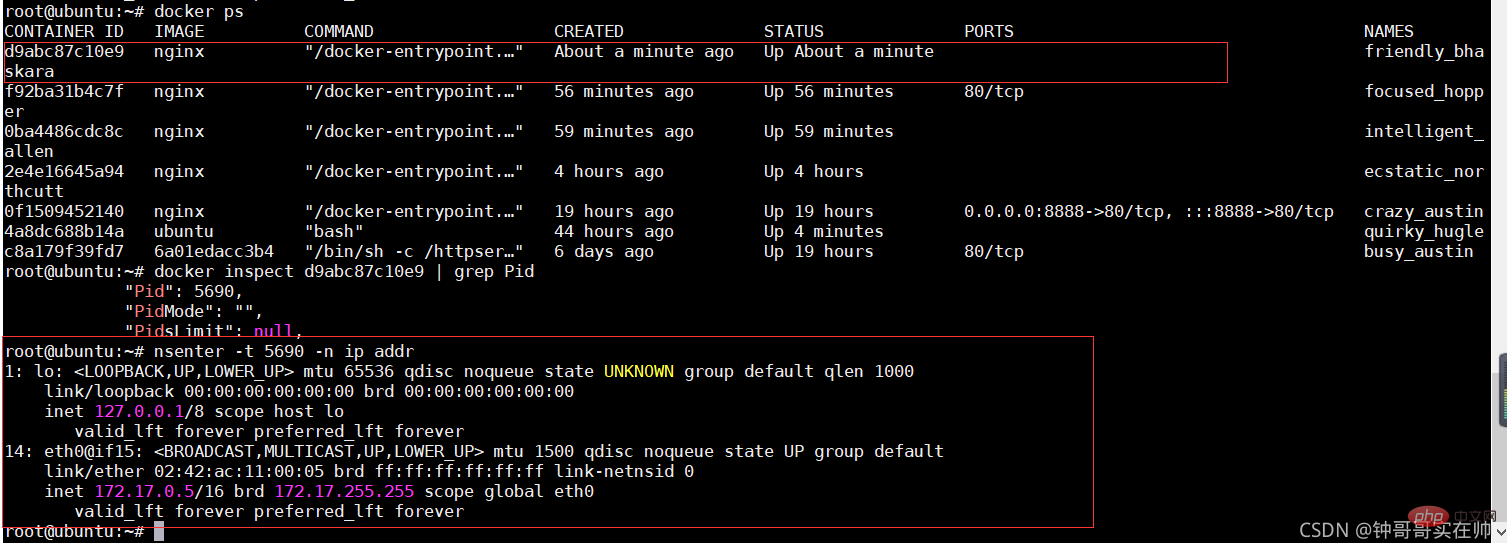




Configure ip gateway for eth0 



Recommended learning: " docker video tutorial
The above is the detailed content of The most systematic mastery of Docker core technology (summary sharing). For more information, please follow other related articles on the PHP Chinese website!
 The difference between k8s and docker
 What are the methods for docker to enter the container?
 What should I do if the docker container cannot access the external network?
 What is the use of docker image?
 How to create a WeChat clone on Huawei mobile phone
 Introduction to article tag attributes
 What is the difference between full-width spaces and half-width spaces?
 How to use the large function