 CMS Tutorial
 WordPress
 How to build a blog with Docker and wordpress (steps with pictures and text)
How to build a blog with Docker and wordpress (steps with pictures and text)
The following column WordPresstutorial will introduce to you how to use Docker and wordpress to build a personal blog. I hope it will be helpful to friends in need!
Use Docker and wordpress to build a personal blog
1. Come first Explain two concepts
Docker is an open source application container engine that allows developers to package their applications and dependency packages into a portable image, and then publish it to any popular Linux or Windows machine , virtualization can also be achieved. Containers completely use the sandbox mechanism and will not have any interfaces with each other
Docker-Compose is an orchestration service of Docker. It is a tool for defining and running complex applications on Docker, which allows Users deploy distributed applications in clusters.
- Service (
service): An application container can actually include several container instances running the same image. - Project (
project): A complete business unit consisting of a set of associated application containers, defined in thedocker-compose.ymlfile.
Compose's default management object is the project, and subcommands are used to conveniently manage the life cycle of a group of containers in the project.
2. Install Docker
The specific installation method can be installed according to your own system.
For window system installation, please refer to the novice tutorial: https://www.runoob.com/docker/windows-docker-install.html
MacOC installation:
Use Homebrew to install
macOS We can use Homebrew to install Docker.
Homebrew Cask already supports Docker for Mac, so you can easily use Homebrew Cask for installation.
The command is:
$ brew cask install docke
The specific screenshot of the installation is as follows:
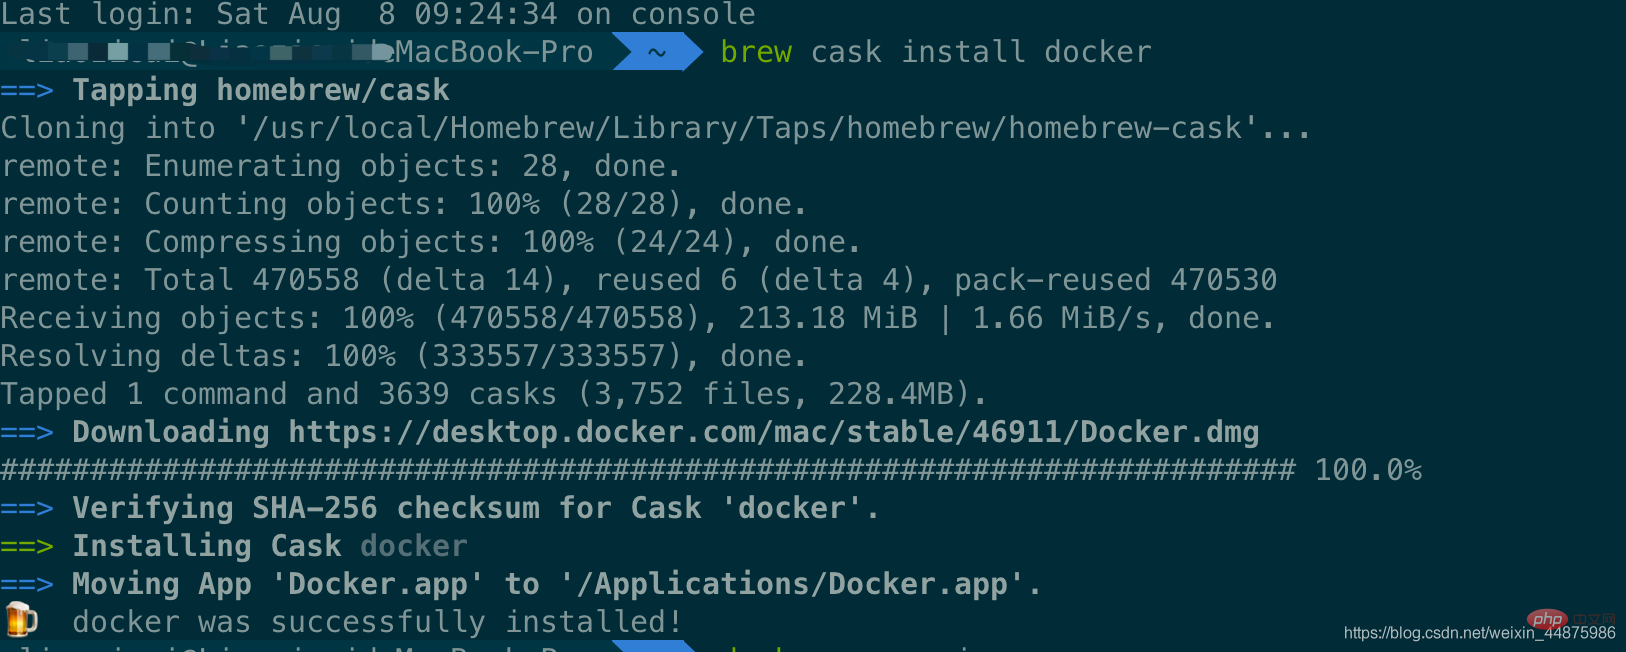
After loading the Docker app, click Next, you may be asked You can enter the macOS login password. Afterwards, a prompt window for Docker running will pop up, and there is also a small whale icon on the status bar 
After starting the terminal, you can check the installed Docker version through the command.
$ docker --version
Docker version 19.03.12, build 48a66213fe
3. Image acceleration
In view of domestic network problems, subsequent pulling of Docker images is very slow. We may need to configure an accelerator to solve the problem. I use NetEase’s image address: http://hub-mirror.c.163.com.
Click the Docker for mac application icon on the taskbar -> Perferences… -> Docker Engine. Just fill in the accelerator address in the list. After the modification is completed, click the Apply & Restart button, and Docker will restart and apply the configured image address.
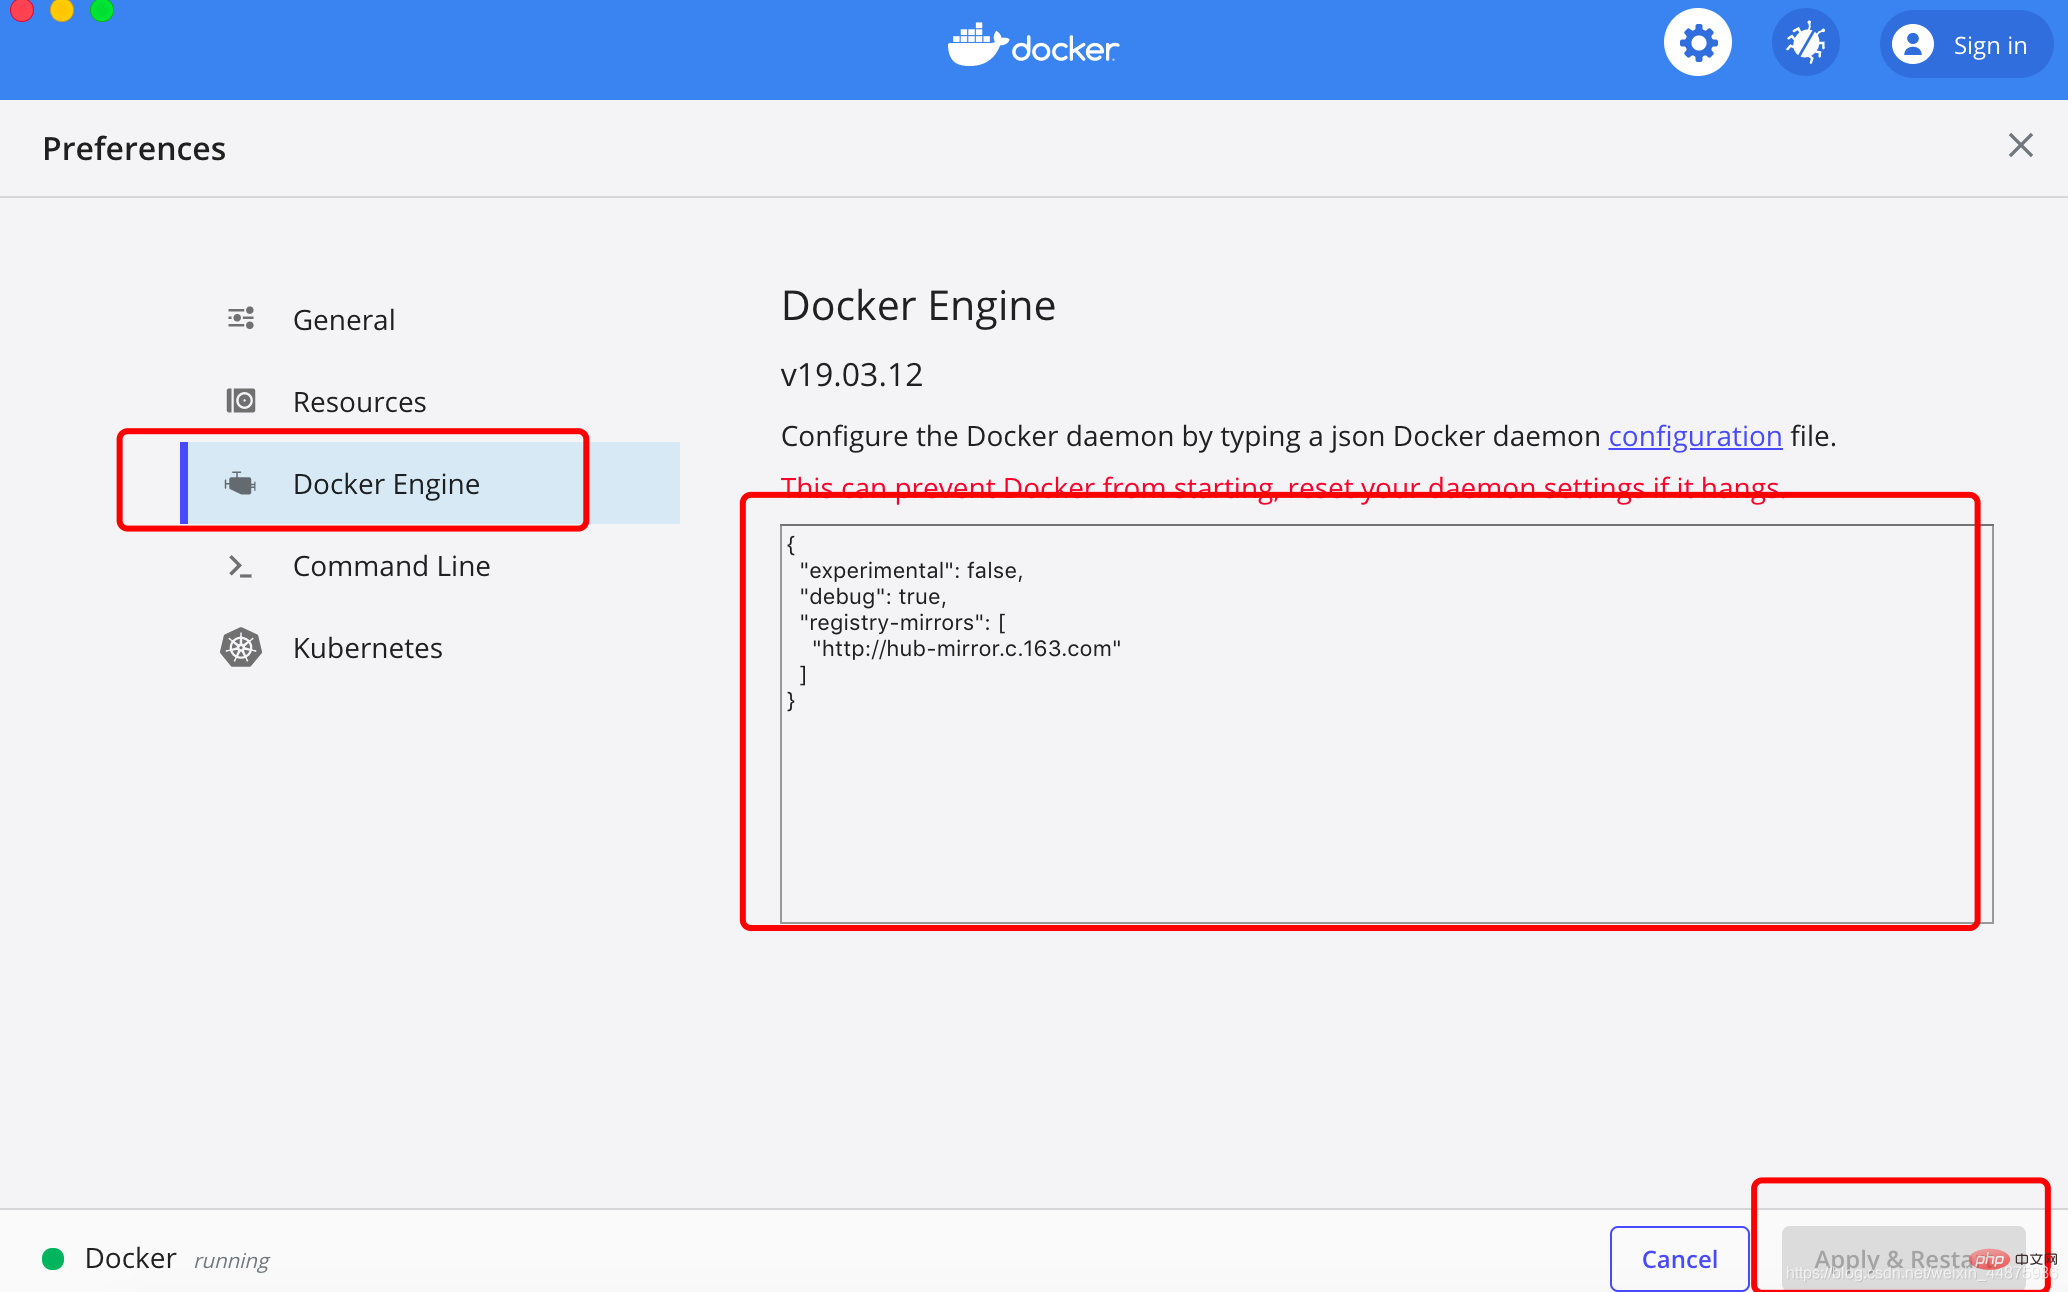
Then enter in the terminal:
$ docker info
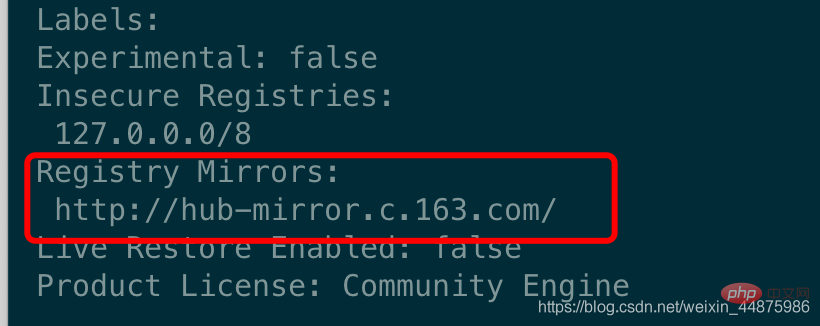
4. Install WordPress
Create a new folder , you can name it as you wish.
Then create the docker-compose.yml file and put it in the folder just now.
The content of docker-compose.yml is as follows:
version: '3.3'services:
   db:
     image: mysql:5.7
     volumes:
       - db_data:/var/lib/mysql     restart: always     environment:
       MYSQL_ROOT_PASSWORD: somewordpress       MYSQL_DATABASE: wordpress       MYSQL_USER: wordpress       MYSQL_PASSWORD: wordpress   wordpress:
     depends_on:
       - db     image: wordpress:latest     ports:
       - "8000:80"
     restart: always     environment:
       WORDPRESS_DB_HOST: db:3306
       WORDPRESS_DB_USER: wordpress       WORDPRESS_DB_PASSWORD: wordpress       WORDPRESS_DB_NAME: wordpressvolumes:
    db_data: {}
Then enter the newly created folder directory in the terminal and use one line of commands to set up the blog:
$ docker-compose up -d
Problems may occur here, as shown below:
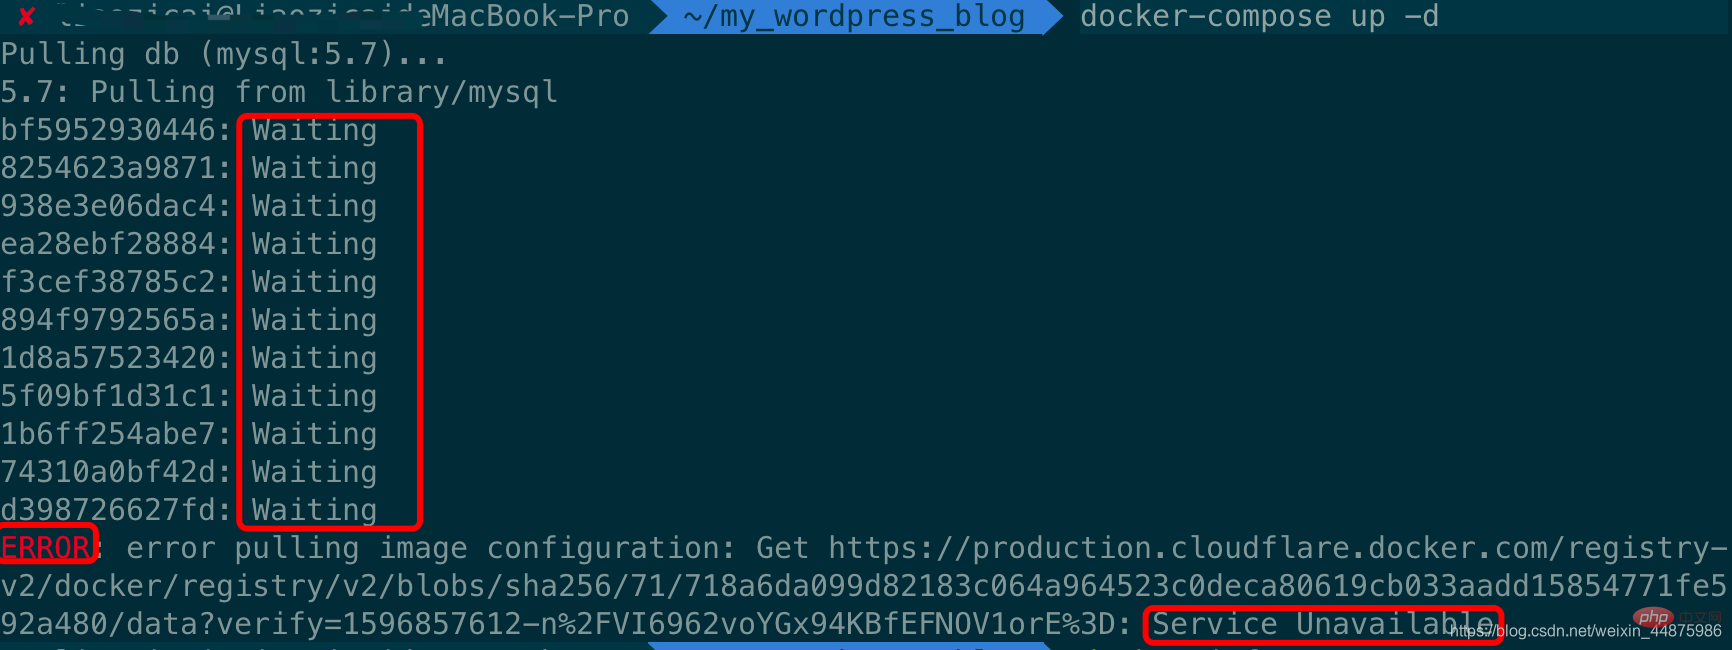
The reason for this problem is that image acceleration is not configured, because docker uses foreign images by default. Download The resource is relatively slow, so it needs to be modified to a domestic image for acceleration. For specific methods, please see the previous point 3, image acceleration.
The screenshot of the successful effect is as follows: 
5. Front-end management page
Front-end access address: IP:8000/: Because I have just set up a blog, the IP is localhost
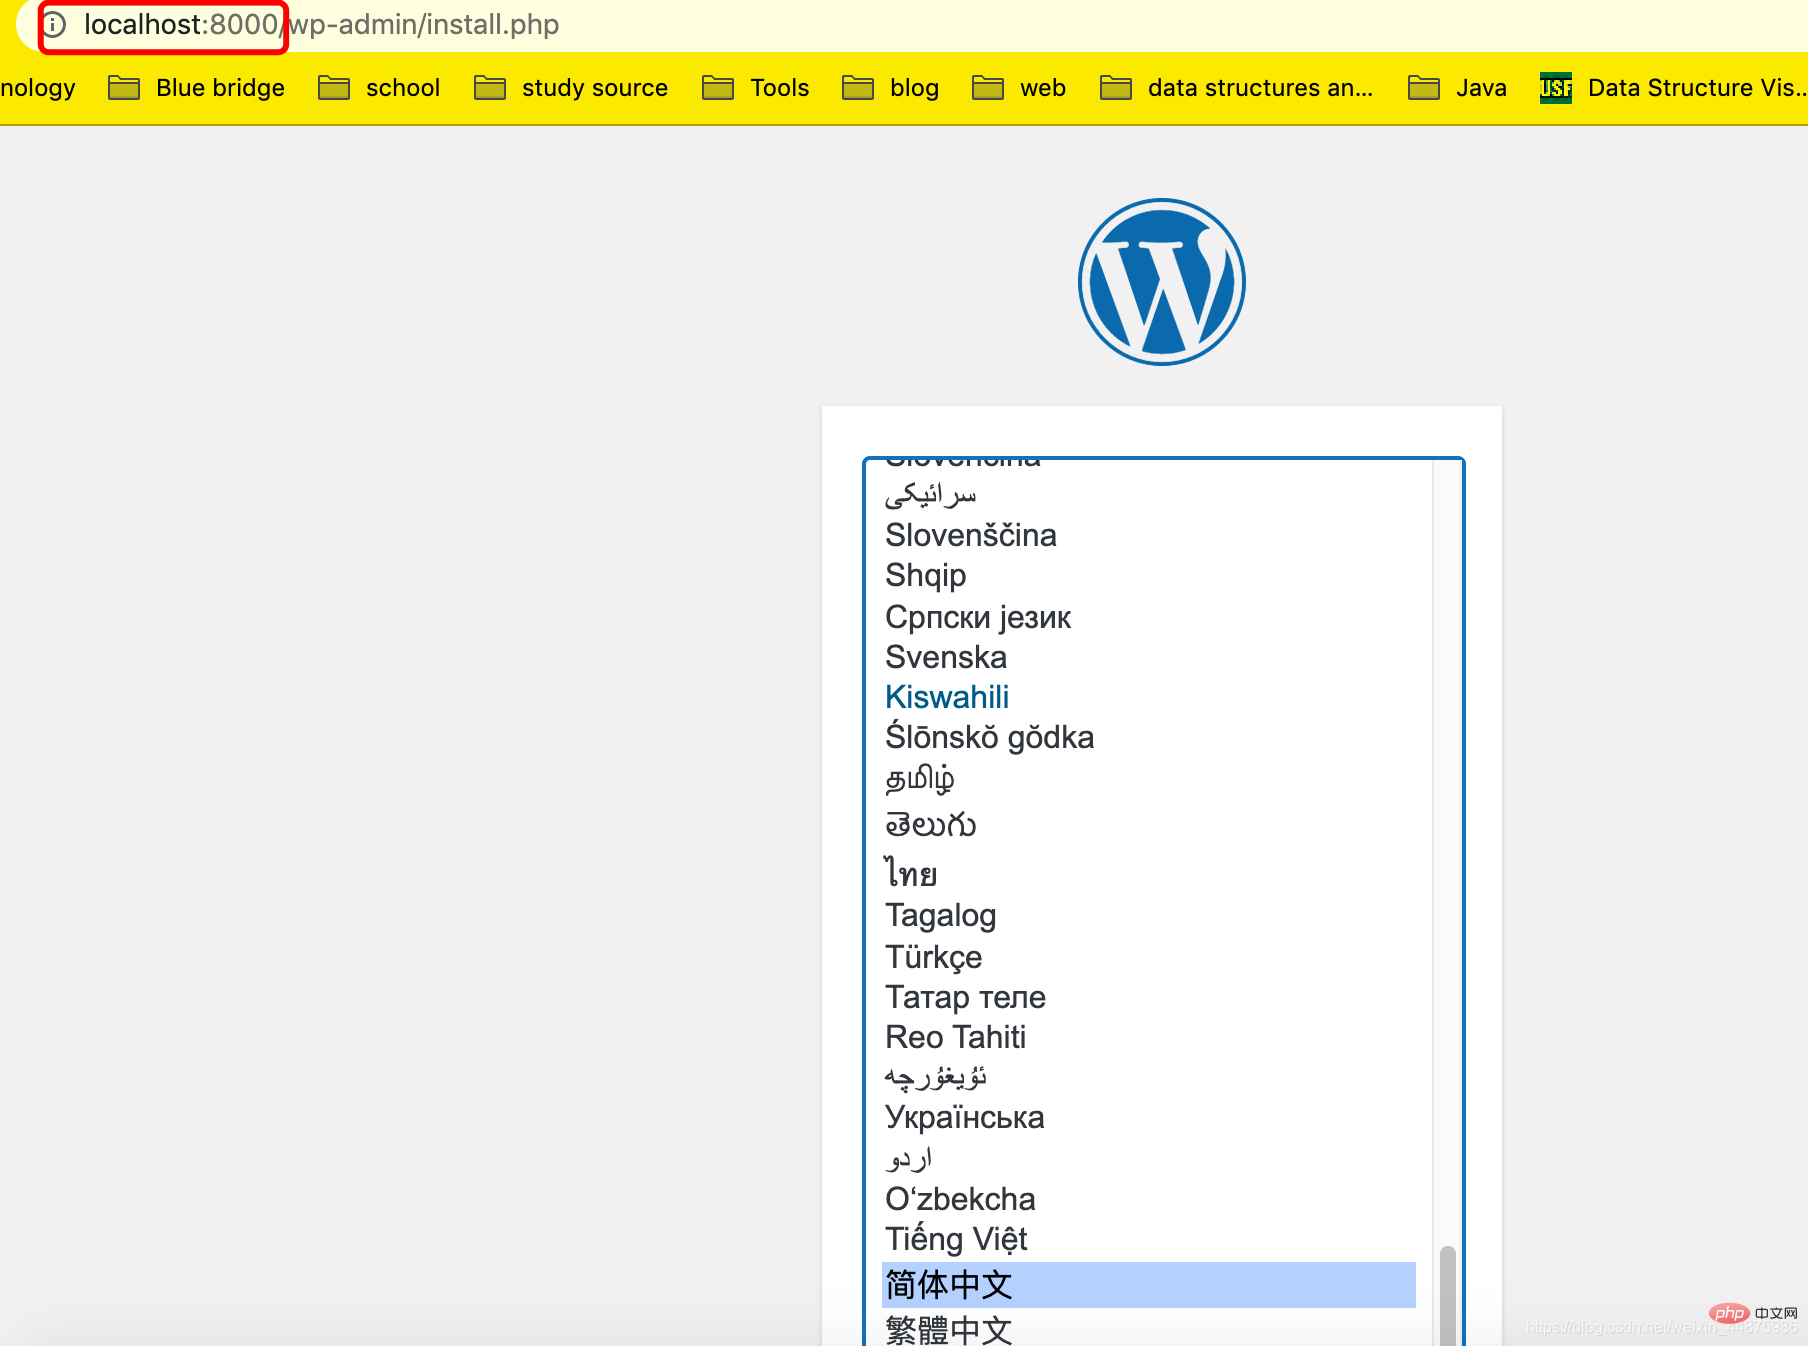
. Enter this page. You can choose the specific language according to your preference. Here I chose Chinese, click to continue.
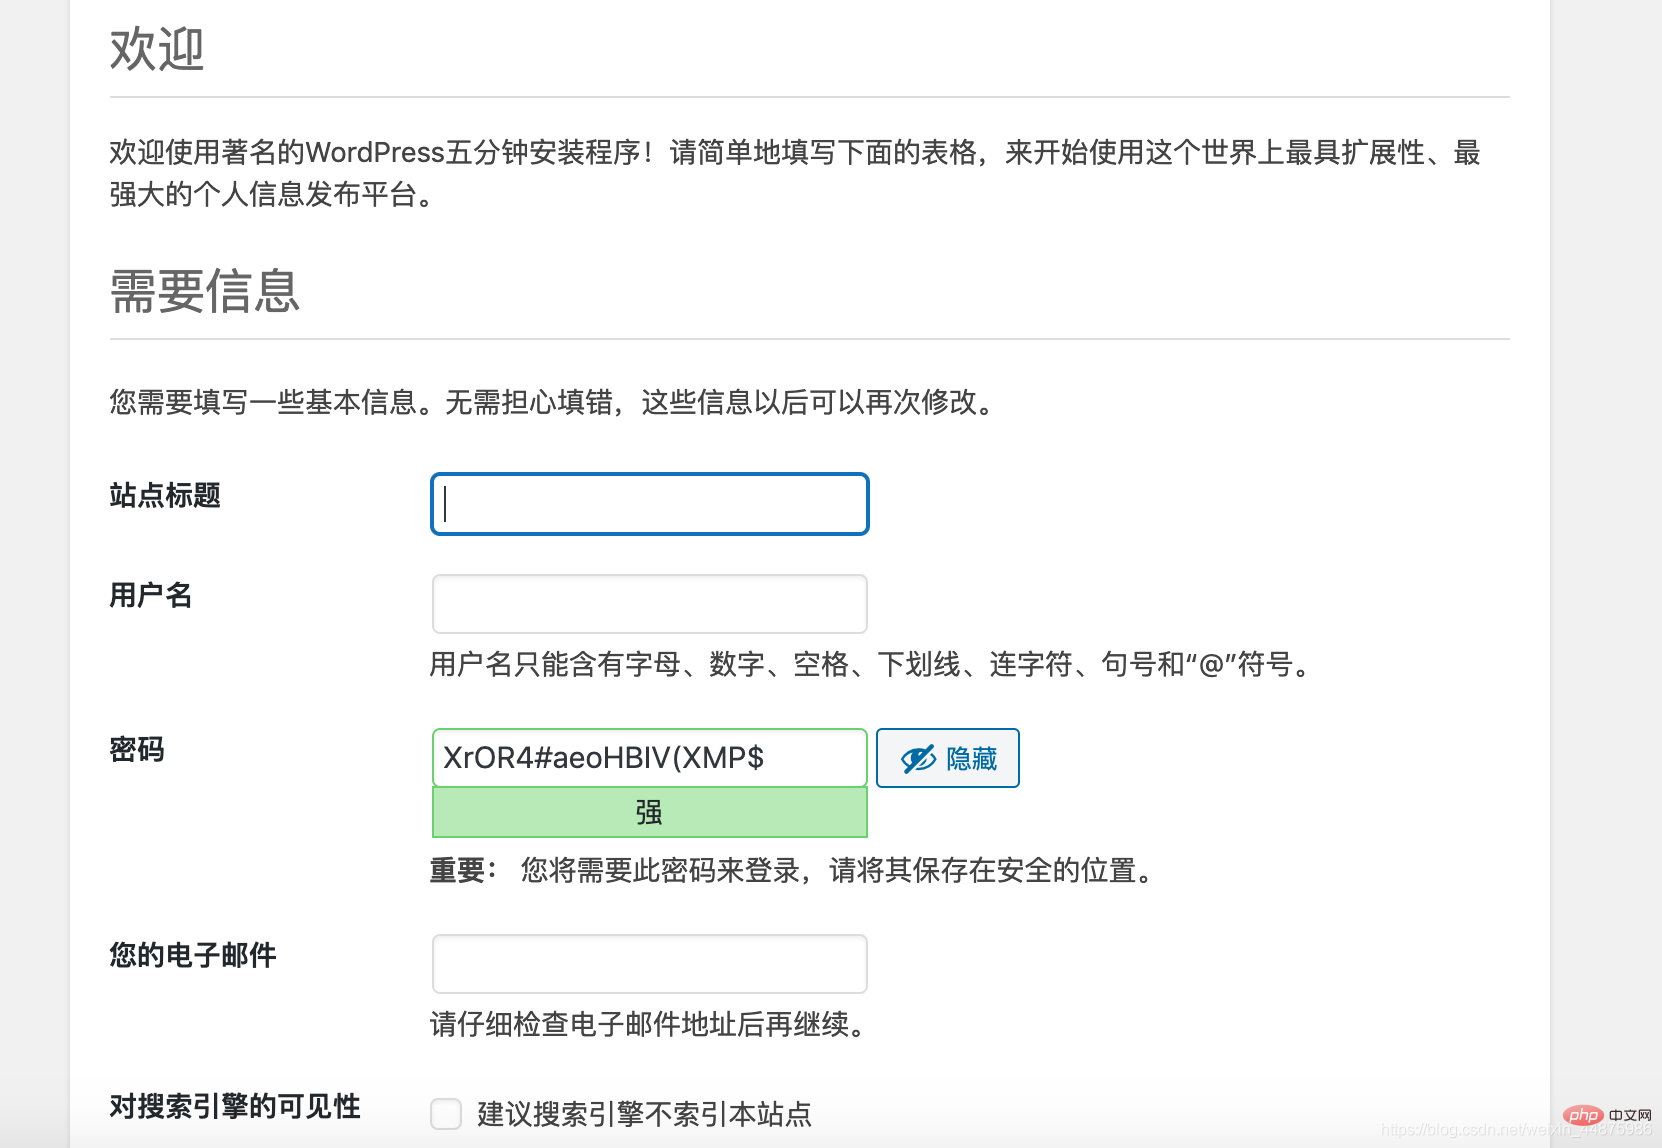
You can fill in this information according to your personal preference.
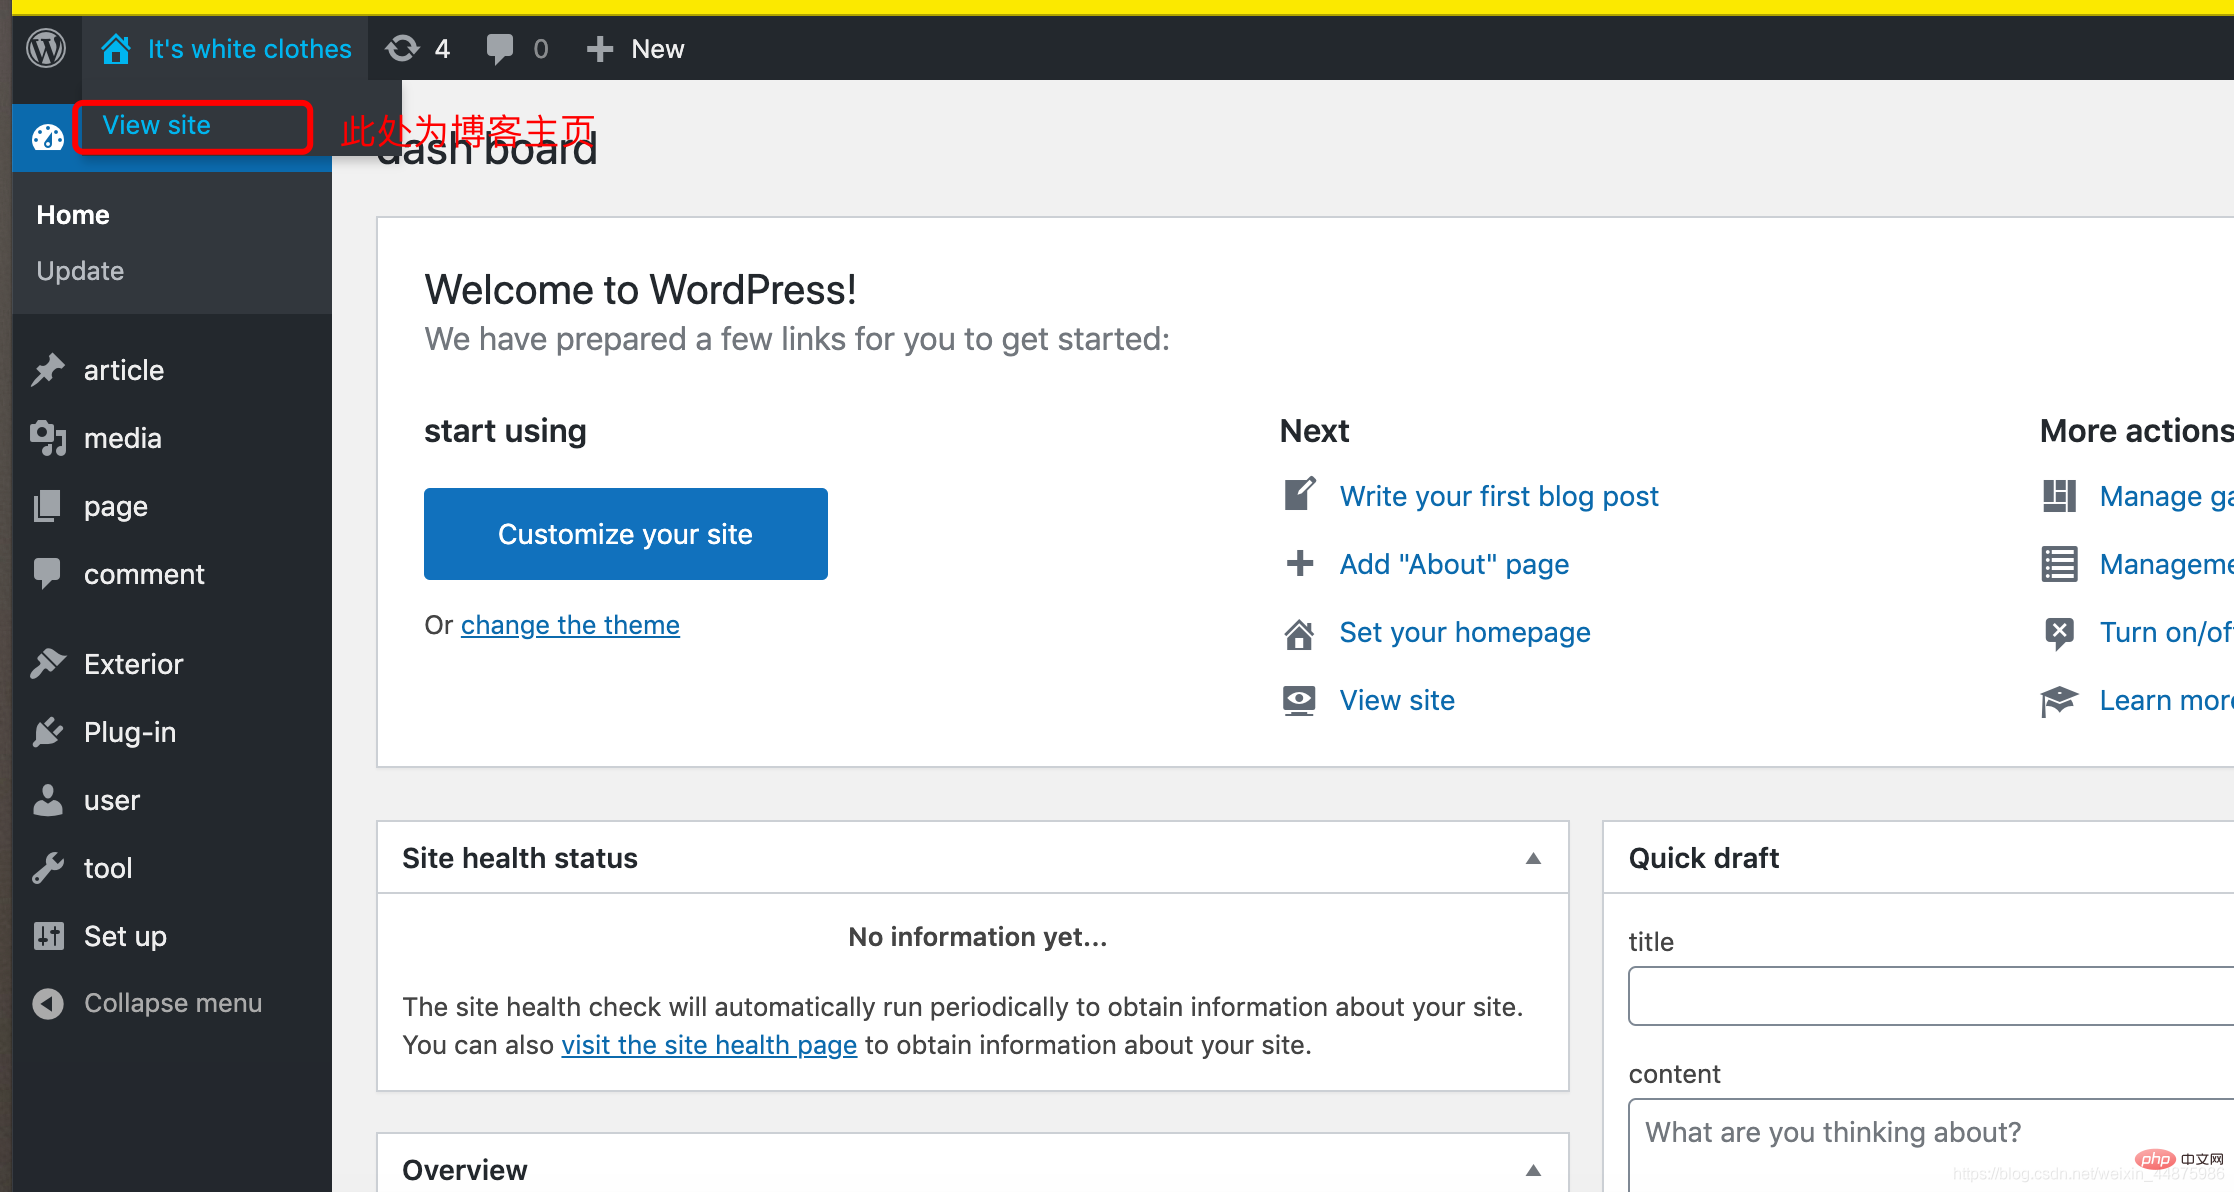
After logging in to your account and password, the blog backend page is as follows:
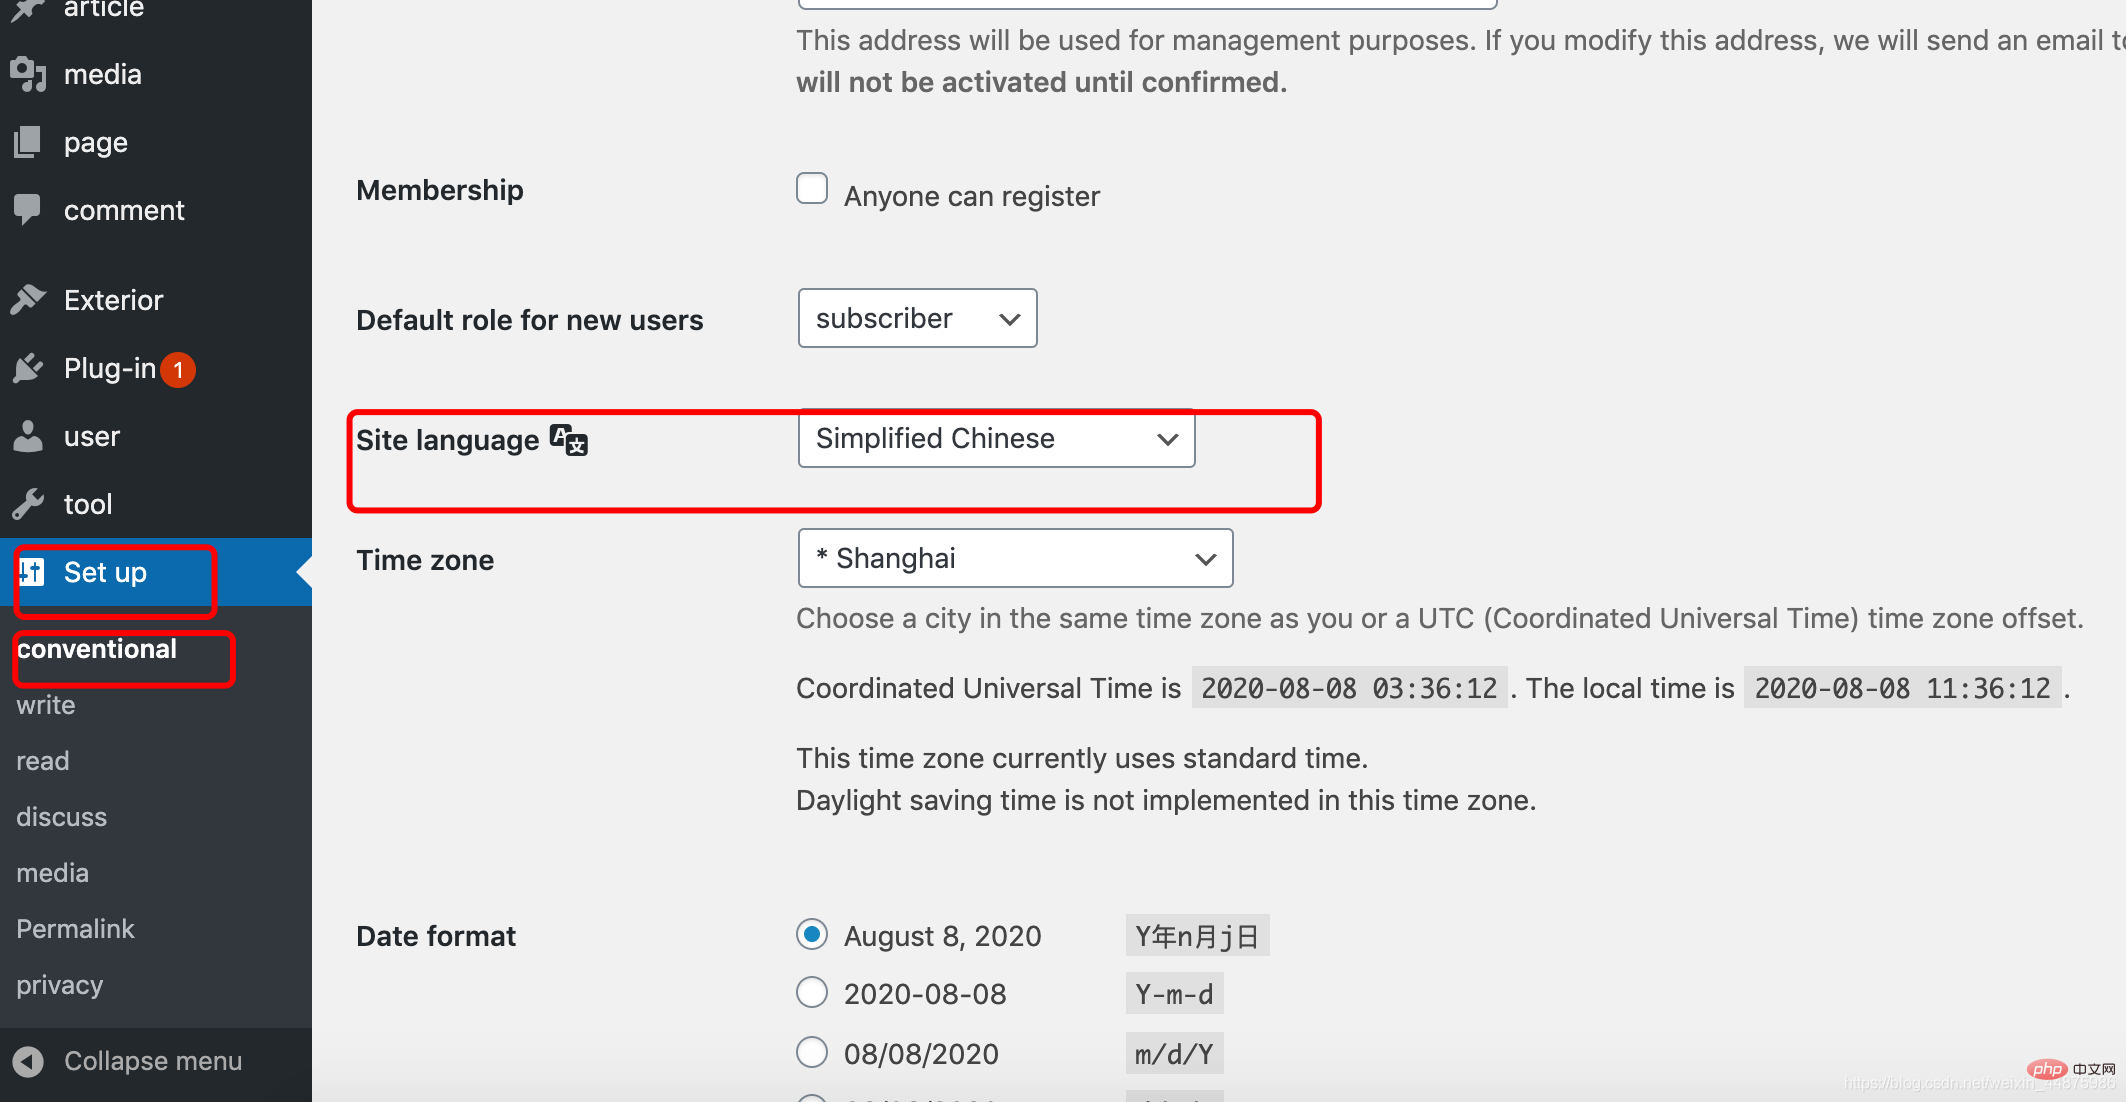
Modify language:
Modify Theme:
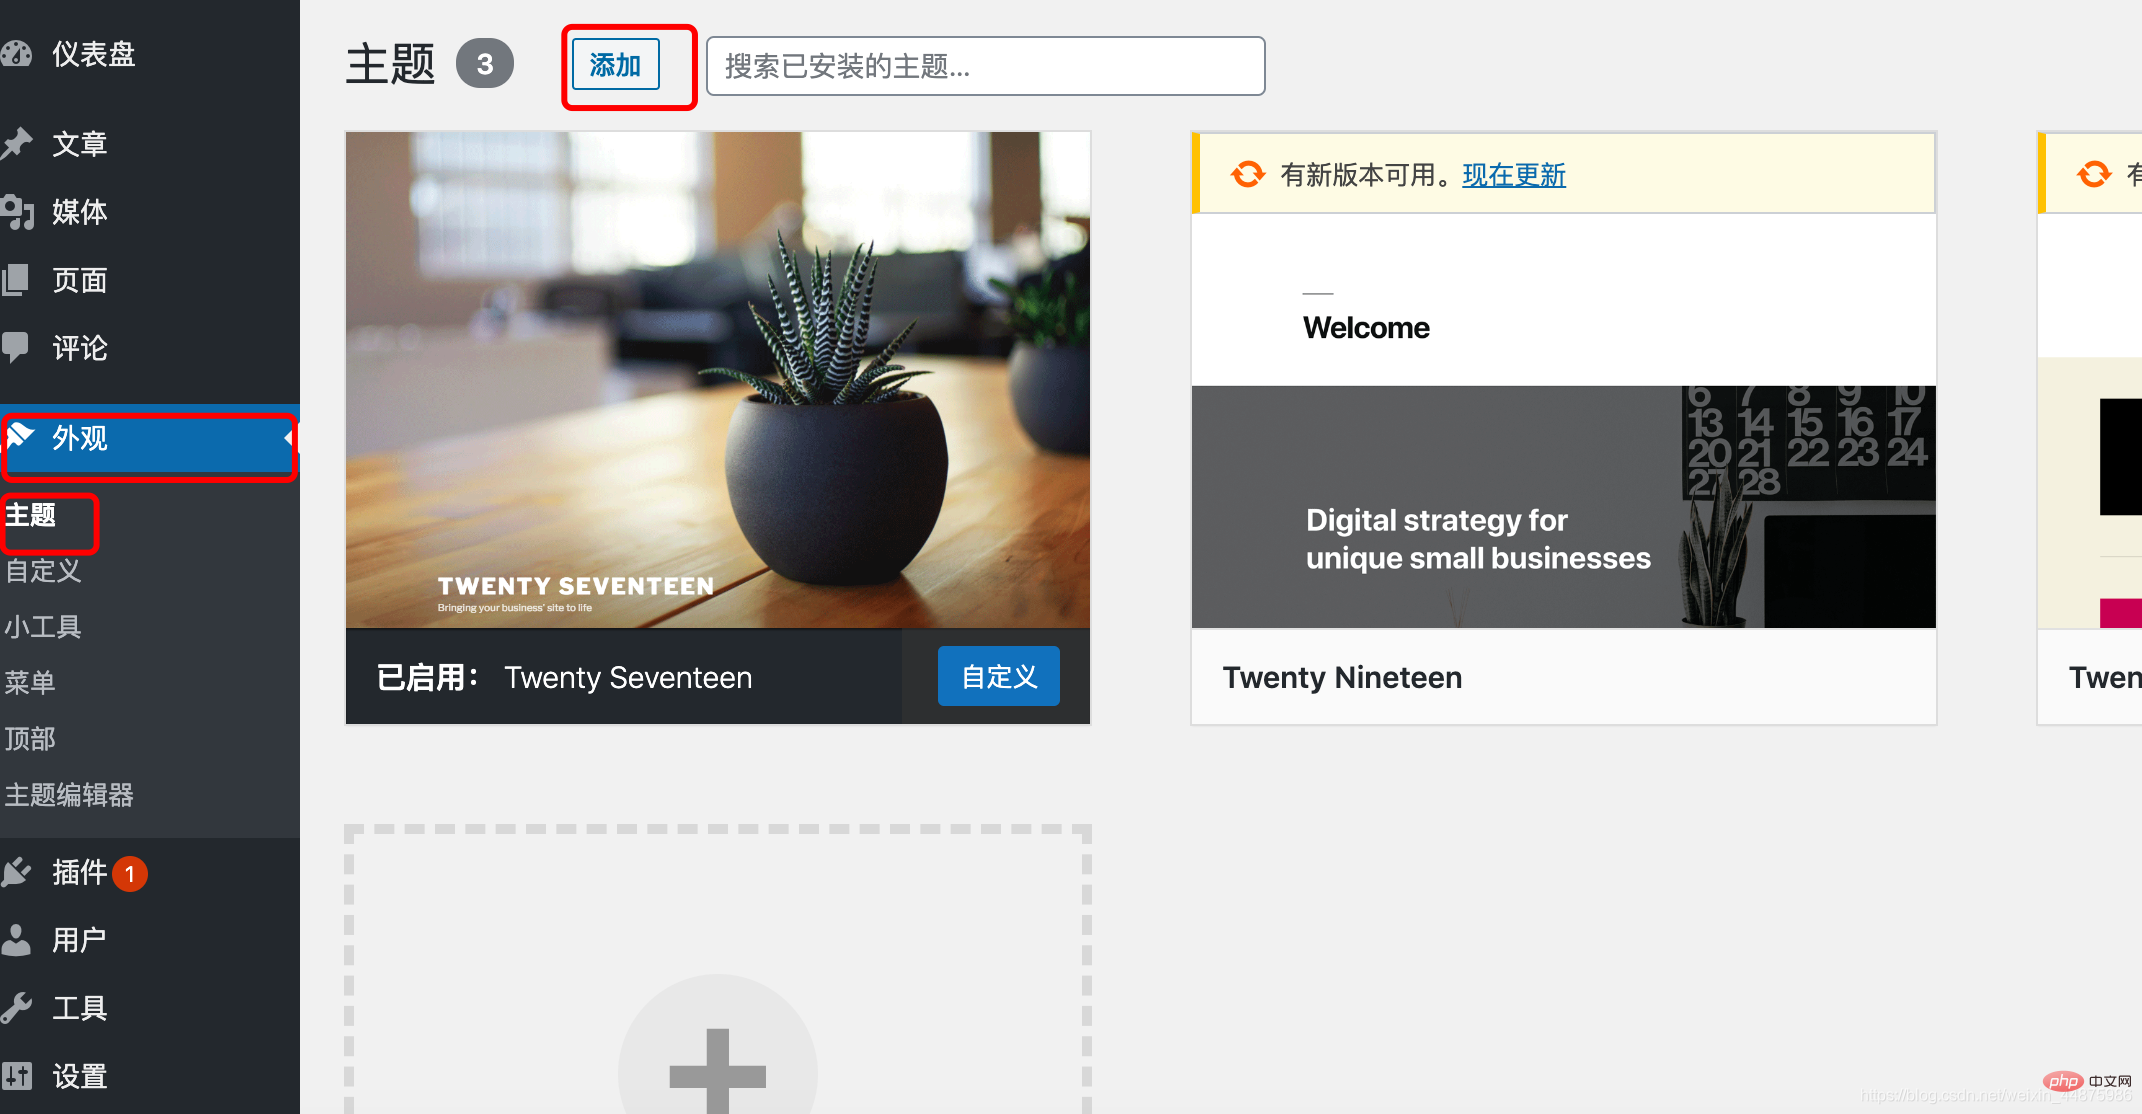
Now your personal blog is complete!
If it was helpful to you, please give it a like!
The above is the detailed content of How to build a blog with Docker and wordpress (steps with pictures and text). For more information, please follow other related articles on the PHP Chinese website!

Hot AI Tools

Undress AI Tool
Undress images for free

Undresser.AI Undress
AI-powered app for creating realistic nude photos

AI Clothes Remover
Online AI tool for removing clothes from photos.

Clothoff.io
AI clothes remover

Video Face Swap
Swap faces in any video effortlessly with our completely free AI face swap tool!

Hot Article

Hot Tools

Notepad++7.3.1
Easy-to-use and free code editor

SublimeText3 Chinese version
Chinese version, very easy to use

Zend Studio 13.0.1
Powerful PHP integrated development environment

Dreamweaver CS6
Visual web development tools

SublimeText3 Mac version
God-level code editing software (SublimeText3)
 Top 10 AI writing software rankings Recommended Which AI writing software is free
Jun 04, 2025 pm 03:27 PM
Combining the latest industry trends and multi-dimensional evaluation data in 2025, the following are the top ten comprehensive AI writing software recommendations, covering mainstream scenarios such as general creation, academic research, and commercial marketing, while taking into account Chinese optimization and localization services:
 What is Docker BuildKit, and how does it improve build performance?
Jun 19, 2025 am 12:20 AM
DockerBuildKit is a modern image building backend. It can improve construction efficiency and maintainability by 1) parallel processing of independent construction steps, 2) more advanced caching mechanisms (such as remote cache reuse), and 3) structured output improves construction efficiency and maintainability, significantly optimizing the speed and flexibility of Docker image building. Users only need to enable the DOCKER_BUILDKIT environment variable or use the buildx command to activate this function.
 How does Docker work with Docker Desktop?
Jun 15, 2025 pm 12:54 PM
DockerworkswithDockerDesktopbyprovidingauser-friendlyinterfaceandenvironmenttomanagecontainers,images,andresourcesonlocalmachines.1.DockerDesktopbundlesDockerEngine,CLI,Compose,andothertoolsintoonepackage.2.Itusesvirtualization(likeWSL2onWindowsorHyp
 How can you monitor the resource usage of a Docker container?
Jun 13, 2025 am 12:10 AM
To monitor Docker container resource usage, built-in commands, third-party tools, or system-level tools can be used. 1. Use dockerstats to monitor real-time: Run dockerstats to view CPU, memory, network and disk IO indicators, support filtering specific containers and recording regularly with watch commands. 2. Get container insights through cAdvisor: Deploy cAdvisor containers to obtain detailed performance data and view historical trends and visual information through WebUI. 3. In-depth analysis with system-level tools: use top/htop, iostat, iftop and other Linux tools to monitor resource consumption at the system level, and integrate Prometheu
 What is Kubernetes, and how does it relate to Docker?
Jun 21, 2025 am 12:01 AM
Kubernetes is not a replacement for Docker, but the next step in managing large-scale containers. Docker is used to build and run containers, while Kubernetes is used to orchestrate these containers across multiple machines. Specifically: 1. Docker packages applications and Kubernetes manages its operations; 2. Kubernetes automatically deploys, expands and manages containerized applications; 3. It realizes container orchestration through components such as nodes, pods and control planes; 4. Kubernetes works in collaboration with Docker to automatically restart failed containers, expand on demand, load balancing and no downtime updates; 5. Applicable to application scenarios that require rapid expansion, running microservices, high availability and multi-environment deployment.
 How does Docker differ from traditional virtualization?
Jul 08, 2025 am 12:03 AM
The main difference between Docker and traditional virtualization lies in the processing and resource usage of the operating system layer. 1. Docker containers share the host OS kernel, which is lighter, faster startup, and more resource efficiency; 2. Each instance of a traditional VM runs a full OS, occupying more space and resources; 3. The container usually starts in a few seconds, and the VM may take several minutes; 4. The container depends on namespace and cgroups to achieve isolation, while the VM obtains stronger isolation through hypervisor simulation hardware; 5. Docker has better portability, ensuring that applications run consistently in different environments, suitable for microservices and cloud environment deployment.
 How to troubleshoot Docker issues
Jul 07, 2025 am 12:29 AM
When encountering Docker problems, you should first locate the problem, which is problems such as image construction, container operation or network configuration, and then follow the steps to check. 1. Check the container log (dockerlogs or docker-composelogs) to obtain error information; 2. Check the container status (dockerps) and resource usage (dockerstats) to determine whether there is an exception due to insufficient memory or port problems; 3. Enter the inside of the container (dockerexec) to verify the path, permissions and dependencies; 4. Review whether there are configuration errors in the Dockerfile and compose files, such as environment variable spelling or volume mount path problems, and recommend that cleanbuild avoid cache dryness
 How do you specify environment variables in a Docker container?
Jun 28, 2025 am 12:22 AM
There are three common ways to set environment variables in a Docker container: use the -e flag, define ENV instructions in a Dockerfile, or manage them through DockerCompose. 1. Adding the -e flag when using dockerrun can directly pass variables, which is suitable for temporary testing or CI/CD integration; 2. Using ENV in Dockerfile to set default values, which is suitable for fixed variables that are not often changed, but is not suitable for distinguishing different environment configurations; 3. DockerCompose can define variables through environment blocks or .env files, which is more conducive to development collaboration and configuration separation, and supports variable replacement. Choose the right method according to project needs or use multiple methods in combination


