
How to connect to a shared printer in win10: 1. Double-click to open this computer and click Network; 2. Click Add Device and Printer, the printer I need is not in the list, select the printer by name, and browse; 3. Find Click to select the printer you need.

The operating environment of this article: windows10 system, Canon LBP 2900 printer, thinkpad t480 computer.
Specific method:
(Learning video sharing: Programming video)
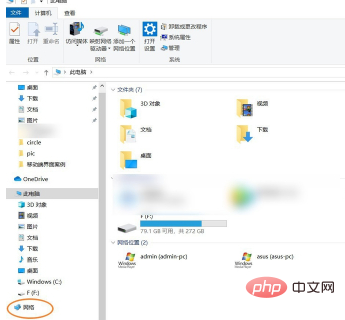
Double-click the [This Computer] icon on the desktop to open it
Click [Network] in the lower left corner of the picture below
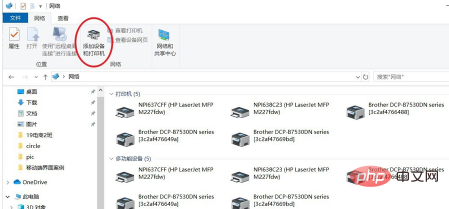
Click [Add Devices and Printers] in the upper right corner
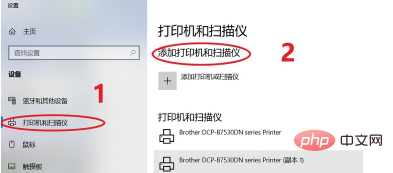
Click [Printers and Scanners] in the lower left corner of the picture below, and then select [Printers or Scanners] in the upper right corner
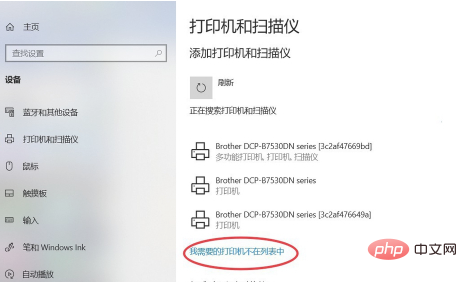
If the required printer is not on the list, click [ The printer I need is not on the list] button.
Select [Select a shared printer by name], then click [Browse]
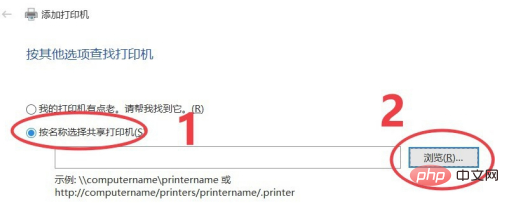
Select "Network" on the address bar "Change the two words to "\\" The directory where the shared printer is located, in my case it is \\slb. Press [enter] to find the required printer, select the current printer, and click [Select]

Click [Next]
The final prompt is that the printer has been successfully added. If you need to print a test page, click [Print Test Page].

Related recommendations: windows system
The above is the detailed content of How to connect to a shared printer in win10. For more information, please follow other related articles on the PHP Chinese website!
 win10 bluetooth switch is missing
 Why do all the icons in the lower right corner of win10 show up?
 The difference between win10 sleep and hibernation
 Win10 pauses updates
 What to do if the Bluetooth switch is missing in Windows 10
 win10 connect to shared printer
 Clean up junk in win10
 How to share printer in win10


