The following tutorial column will give you a detailed explanation of Centos7 disk partitioning and mounting. I hope it will be helpful to friends in need!
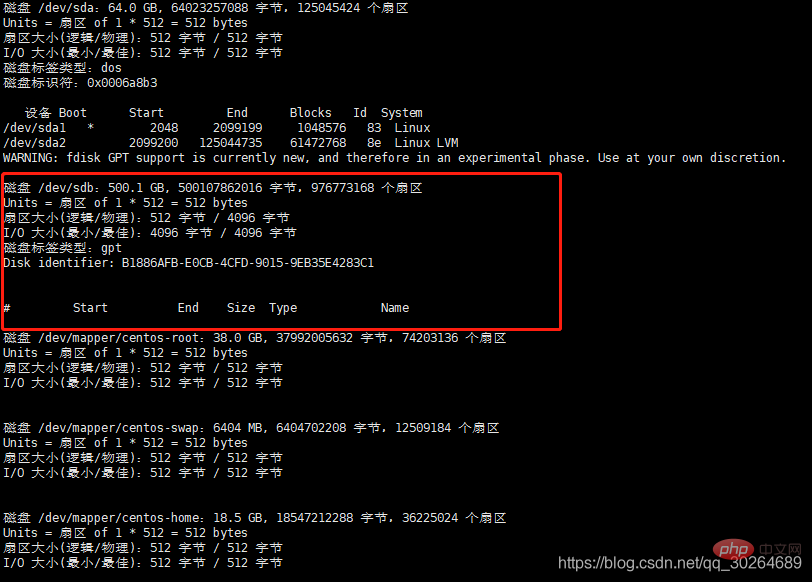
Recently, the existing system hard disk is not enough. It is necessary to add hard disk operations to the existing system. The original environment is centos7 1. Check the overall disk situation :sudo fdisk -l
##/dev/sda This disk is partitioned into two areas:

In this information, you can check which disk has not been partitioned: the /dev/sdb disk in the picture has 500G, and it has not been operated on yet:

2. Hard disk partition
You need to install parted before executing this command: (sudo yum install parted)
/dev/sdb. If there are multiple hard disks, yours may be called another name, such as: / dev/sda
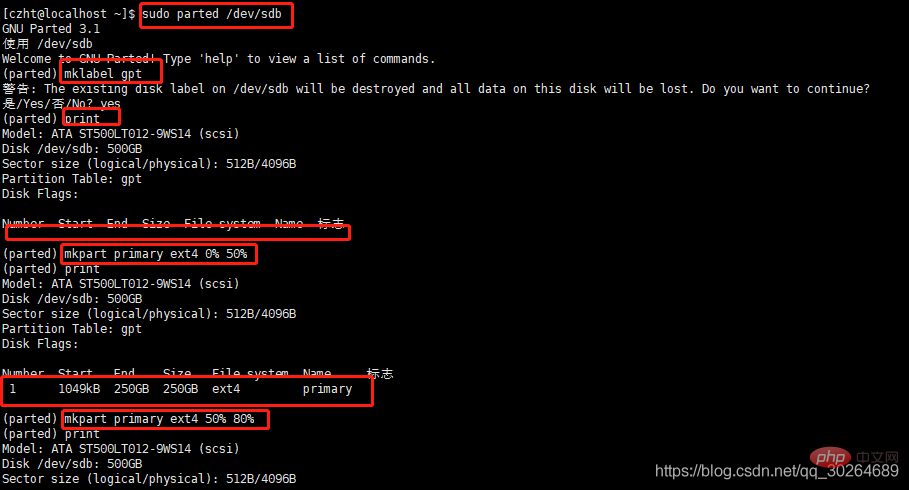
Then the operation command is:1) sudo parted /dev/sdb
//Special reminder to make sure when executing 2)/ dev/sdb is a blank disk, otherwise your stuff will be gone.2) Delete all partitions of the current hard disk: (parted) mklabel gpt
3) You can check the partition status: (parted) print4) Split the disk:
(parted) mkpart primary ext4 0% 50%(parted) mkpart secode ext4 50% 80%5) Exit: (parted ) quit3. Format partition
Mine is divided into two areas: /dev/sdb1 and /dev/sdb2 (sdb1 and sdb2 This name is generated by the system and cannot be modified) 
hang Upload the hard disk to a system folder
Create two folders:
sudo mkdir -p /picture1sudo mkdir -p /picture2
Persist the information:sudo vim /etc/fstabAdd the following line to the last line in /etc/fstab and use mount -a only The temporary partition will become invalid after restarting and needs to be persisted as follows: /dev/sdb1 /picture1 ext4 defaults 0 0/dev/sdb2 /picture2 ext4 defaults 0 0Final execution: sudo mount –aUse df -hl to check the specific disk situation.The above is the detailed content of Detailed explanation of disk partitioning and mounting of Centos7. For more information, please follow other related articles on the PHP Chinese website!