Detailed explanation of ps stack mode is as follows:
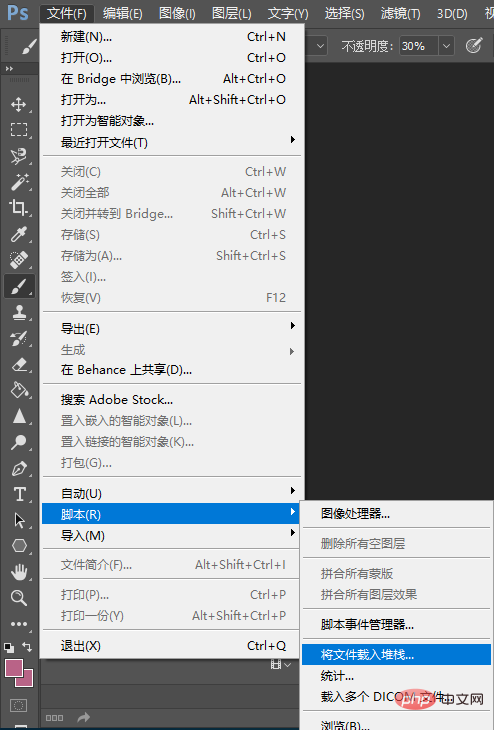
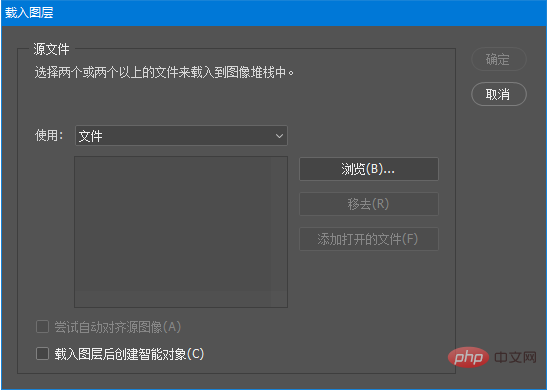
1. File->Script->Load file Stack->Browse->Select image->OK


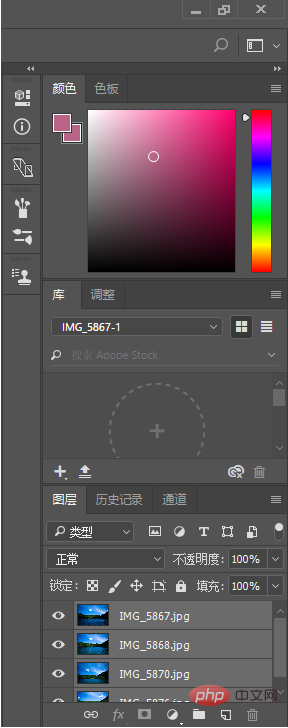
##2. Use the left mouse button to hold down shift on the keyboard key to select all layers in the Layers panel.

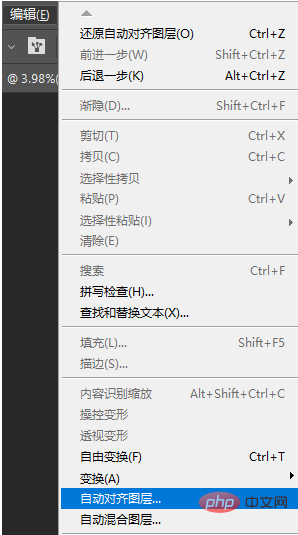
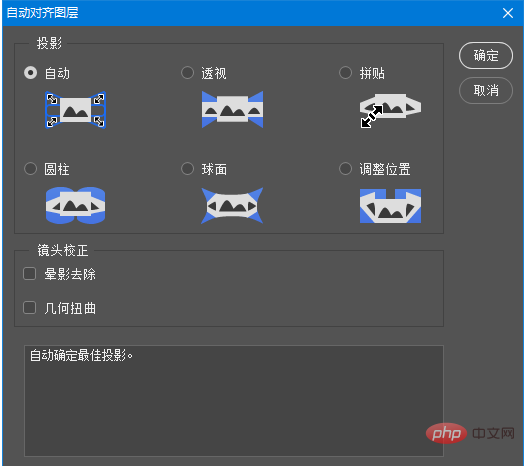
3. Use the left mouse button to select the Edit menu on the menu bar - Automatically align layers, and then select Automatic


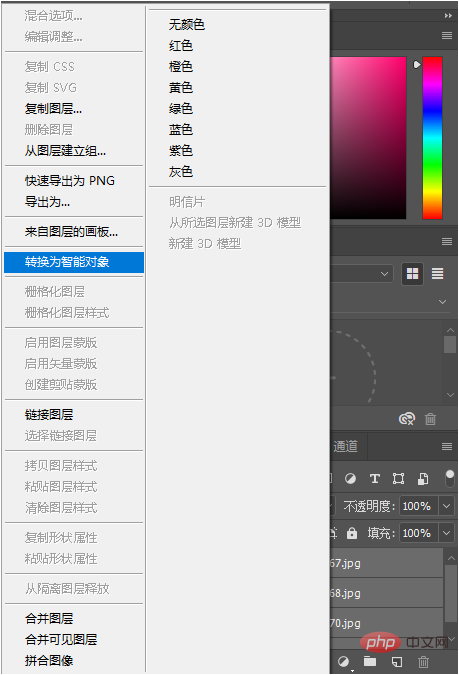
4. Select all layers, right-click and select Convert to Smart Object

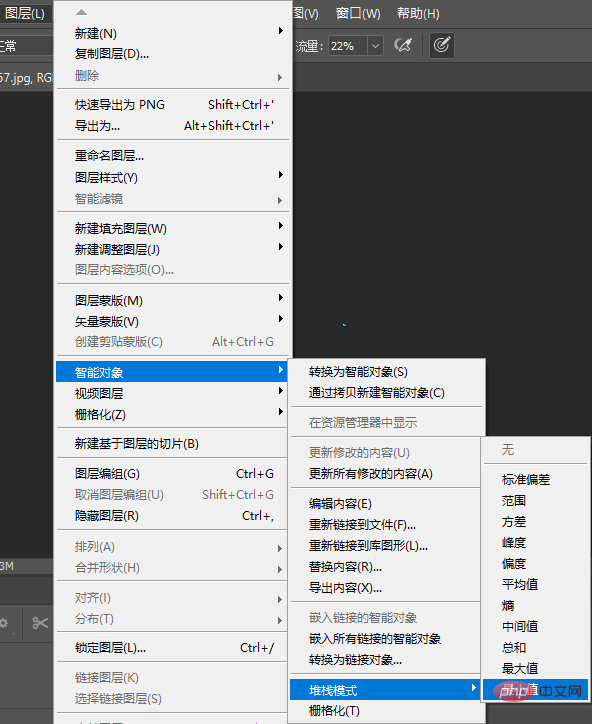
5. Use the mouse Left-click the layer menu bar-smart object-stack mode, and then select the corresponding option from the options he gives

Recommended tutorial: "
PS Video tutorial》
The above is the detailed content of Detailed explanation of ps stack mode. For more information, please follow other related articles on the PHP Chinese website!


