

Step One: Cancel [Auto Arrange Icons] in the right-click menu
Right-click on a blank space on the system desktop - View, you can see the secondary menu of View Check the "Auto-arrange icons" item;
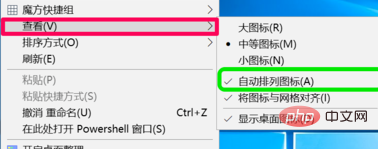
Click "Auto-arrange icons" to uncheck it.
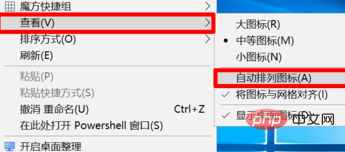
(Recommended learning: html tutorial)
Step 2: Enable [Do not exit when exiting] in the Local Group Policy Editor Save settings]
Enter: gpedit.msc command in the [Run] dialog box, click OK or press Enter to open the Local Group Policy Editor window;

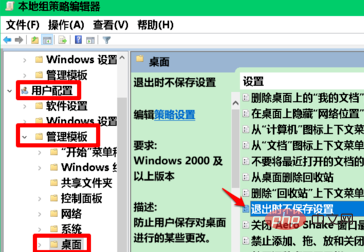
In the opened Local Group Policy Editor window, expand: User Configuration - Administrative Templates - Desktop, in the corresponding right window, double-click with the left button: Do not save settings when exiting;
Click: Enabled, then click: Apply - OK;
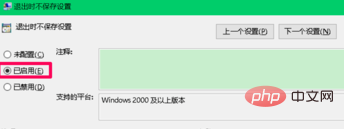
Back to the Local Group Policy Editor window, we can see:
Do not save settings when exiting Enabled
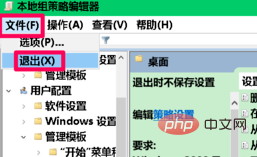
Click [File] in the upper left corner of the window, and click: [Exit] in the drop-down menu to exit the Local Group Policy Editor.
Recommended related tutorials: windows tutorial
The above is the detailed content of How to lock the desktop icon position in win10 system. For more information, please follow other related articles on the PHP Chinese website!
 win10 bluetooth switch is missing
 Why do all the icons in the lower right corner of win10 show up?
 The difference between win10 sleep and hibernation
 Win10 pauses updates
 What to do if the Bluetooth switch is missing in Windows 10
 win10 connect to shared printer
 Clean up junk in win10
 How to share printer in win10


