

How to use the dedecms linkage category?
How to use pictures and texts of dedecms linkage category
Recommended learning: 梦weavercms
Although I also I don’t know how to explain the professional term linkage type, but I believe that more people don’t want this tutorial to be dedicated to explaining this term.
We can split the linkage categories There are two: linkage and category
Linkage can also be understood as linkage and action, linkage means association; action means dynamic explanation;
category is also called menu, and its full name is drop-down menu.
So, my final explanation for the linkage category is: multiple dynamically associated drop-down menus;
This is mainly used for some personalized choices, such as birthdays and residence forms. As shown in Figure 1:
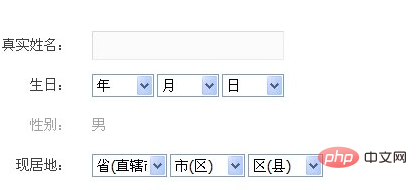
Figure 1
2. Linkage category management
Enter the background and click [Core]-[Channel] Model] - [Linkage Category Management] can enter the management interface of the linkage category.
Figure 2
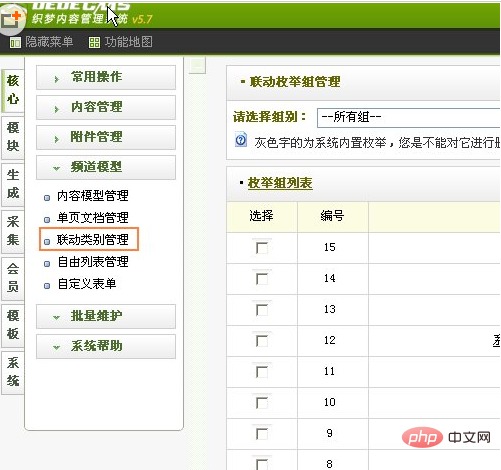
Figure 2
3. Create linkage categories
1) In addition to the system’s own In addition to the linkage categories available, we can also create our own linkage category groups. The method is:
After entering the linkage category management page, click "Add Category Group", as shown in Figure 3:
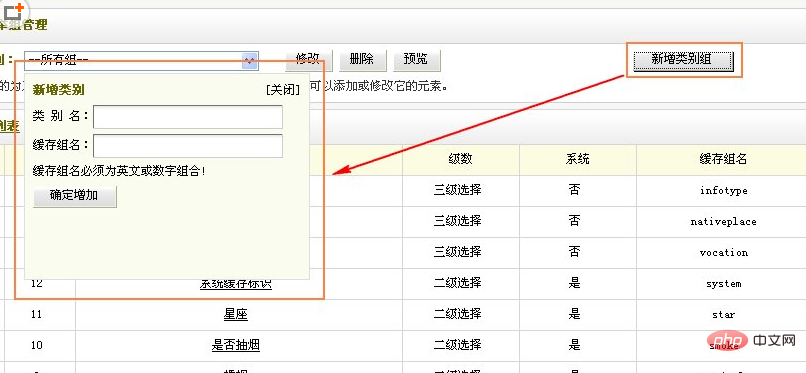
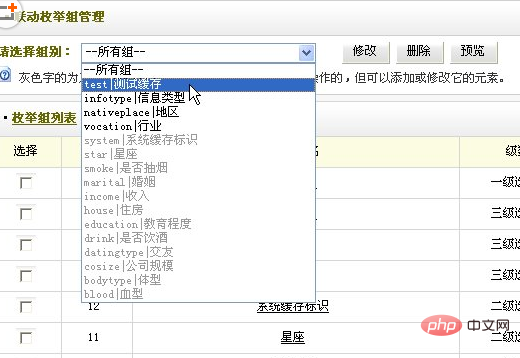
2) Create a linkage category group Later, you usually need to create menu elements as well. In the Dreamweaver system, it is called a subcategory. The method is: first switch to the category group you need to create, such as
3) Add the category name and click "Add Category", as shown in the figure

Figure 5
Note: The category name is the menu you want to display, and it can be in Chinese.
4) If we need to modify and update the subcategory, you can also edit your subcategory information in the "Subcategory List" below

Figure 6
After editing, click "Update".
4. Linkage category maintenance
The linkage category uses caching technology. Therefore, every time we update the information of the linkage category, we need to update its cache
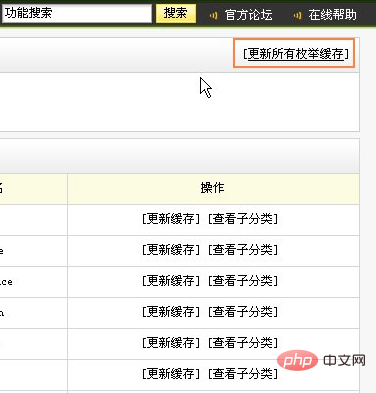
Figure 7
4. Linkage category application
The reason why there is no linkage type in the data type is that the relevant options are commented out in the official template file. The modification method is as follows:
Two files need to be modified,
The first one: dede/templets /diy_field_edit.htm Line 127 Officially commented out the sentence "
The second one: dede/templets/diy_field_add.htm Line 146 officially puts "
After making the changes, save and it’s ok!
Of course, when you add a field in a custom form, the data type must be selected as "linkage type" and the field name must be the name corresponding to the linkage type
The above is the detailed content of How to use dedecms linkage category. For more information, please follow other related articles on the PHP Chinese website!


