
Tools:
Photoshop CC2018
Specific steps:
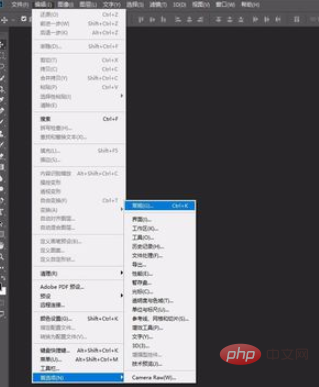
Start the PS software, click [Edit]-[Preferences] -[General] (shortcut key CTRL K)

Select [Technical Preview] on the left side of the preferences, check [Enable Preserve Details 2.0 Magnification], and click [OK] 】.

After importing an image, select [Image]-[Image Size]

In the image size, Set the width unit to [Percent], resample and select [Preserve Details 2.0]

Set the width and height to 500, adjust [Reduce Noise] appropriately and click OK

After clicking, you can see that the picture has been enlarged.

Retype the original picture into the document, you can see that the photo before enlarging is only so small. Press CTRL T to enlarge the original image to the same size as the document.

You can see that the enlarged original image is blurry and unclear.

After hiding the original image, the image enlarged by Preserving Details 2.0 is still very clear.

For more related articles and tutorials, you can view:ps tutorial
The above is the detailed content of Use ps to enlarge pictures and maintain clarity. For more information, please follow other related articles on the PHP Chinese website!


