
Installing the plug-in
1. Installation of the vetur plug-in
This plug-in is a highlighting plug-in for the basic syntax of vue files. Enter vetur in the plug-in window and click to install the plug-in. After installation, click File->Preferences->Settings to open the settings interface, and add configuration
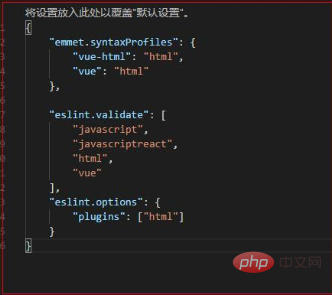
"emmet.syntaxProfiles": {
  "vue-html": "html",
  "vue": "html"
}2 on the right side of the settings interface. , Installation of eslint plug-in
eslint intelligent error detection plug-in plays a great role in specific development and can help us find errors in time. As for installation, also open the plug-in extension window and enter eslint and click to install the plug-in. After installation, you also need to configure it. Configure it in the same place as the vetur plug-in.
"eslint.validate": [
        "javascript",
        "javascriptreact",
        "html",
        "vue"
    ],

 "eslint.options": {
        "plugins": ["html"]
}vetur and eslint plug-ins are configured As shown in the figure below:

Import the project and compile
1. Import the project
from github Download the vuestic-admin project (https://github.com/epicmaxco/vuestic-admin), pull it to the local area, open VSCode, click on the file, open the folder, import the project, and enter # in the console terminal ##npm installAdd package dependencies

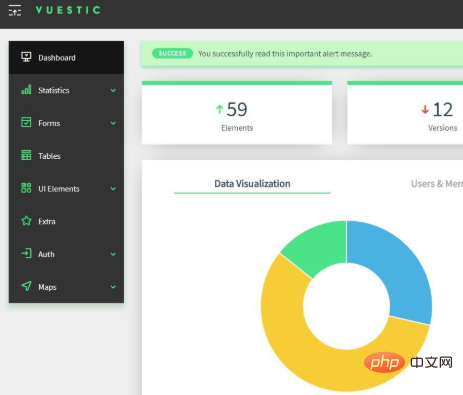
npm run dev at the end to start running the project. This command will automatically run the project on the browser. The results are as follows As shown, the configuration is successful.

The above is the detailed content of How to use vscode to open an existing vue project. For more information, please follow other related articles on the PHP Chinese website!


