
win10 screen recording
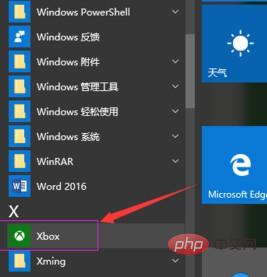
1. Click Start---All Programs---XBOX;

2. After opening the XBOX application, you can see the classic settings gear diagram on the left toolbar of the application;
3. Click the "Game DVR" tab, under which "Use 'Game DVR' to record game clips and screenshots" is enabled by default;
4. If you see that "Record my microphone when I record game clips" is not turned on by default, you can turn it on;
5. Come to the screen recording function setting center that comes with Win10. Let’s take a look at its other shortcut keys. You can see that win G is the default, and It can be modified;
6. Click "Yes, this is a game", the game recording toolbar will open, and the circle The red dot is the button to start recording. Of course, there are buttons for screenshots, settings, etc. on the toolbar;
7. Click the round red After clicking the start recording button, the "Game Recording Toolbar" will expand into a small red area as shown in the figure, and time is passing;
8. As for the storage location of recorded clips or screenshots, the storage path can be seen in the "Save Capture" in the "Game DVR" previously set, or you can directly press "Open Folder" to open the folder.
The above is the detailed content of win10 screen recording. For more information, please follow other related articles on the PHP Chinese website!
 win10 bluetooth switch is missing
 Why do all the icons in the lower right corner of win10 show up?
 The difference between win10 sleep and hibernation
 Win10 pauses updates
 What to do if the Bluetooth switch is missing in Windows 10
 win10 connect to shared printer
 Clean up junk in win10
 How to share printer in win10