
1. Introduction of jquery
Steps:
1. Install jquery
$ npm install jquery --save-dev
2. Add content to webpack.config.js
+ const webpack = require("webpack");
module.exports = {
    entry: './index.js',
    output: {
        path: path.join(__dirname, './dist'),
        publicPath: '/dist/',
        filename: 'index.js'
    },
  + plugins: [
        new webpack.ProvidePlugin({
            jQuery: 'jquery',
            $: 'jquery'
        })
    ]
}3. Add content to the entry file index.js
import $ from 'jquery' ;
Related recommendations: "bootstrap Getting Started Tutorial》
4. Test whether the installation is successful and see if '123' pops up
<template>
  <div>
   Hello world!
  </div>
</template>
<script>
$(function () {
    alert(123);
 });
export default {

};
</script>
<style>
</style>2. Introduce Bootstrap
1. Installation Bootstrap
$ npm install --save-dev bootstrap
2. Introduce the relevant
import './node_modules/bootstrap/dist/css/bootstrap.min.css';
import './node_modules/bootstrap/dist/js/bootstrap.min.js';
3. Add a piece of Bootstrap code
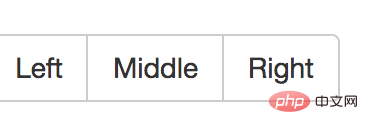
  <div class="btn-group" role="group" aria-label="...">
      <button type="button" class="btn btn-default">Left</button>
      <button type="button" class="btn btn-default">Middle</button>
      <button type="button" class="btn btn-default">Right</button>
</div>4. Run and check the effect. These buttons have become Bootstrap button group.

The above is the detailed content of How to introduce bootstrap into vue. For more information, please follow other related articles on the PHP Chinese website!