Home > Common Problem > Steps to draw title bar in CAD

Steps to draw title bar in CAD

藏色散人
Release: 2019-07-08 10:35:16
Original
41460 people have browsed it

Steps to draw title bar in CAD

CAD drawing title bar steps:

1. Double-click the CAD software on your computer to open it, and then click Format/ Table style.

Steps to draw title bar in CAD

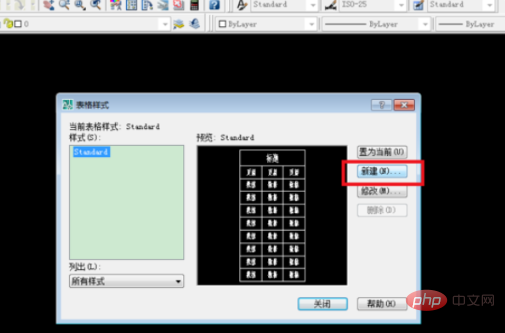
2. Then click to select New.

Steps to draw title bar in CAD

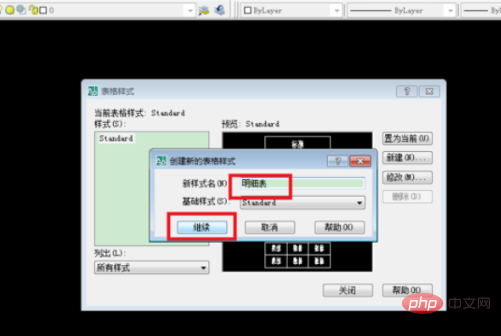
3. Then name the new style and click Continue.
Steps to draw title bar in CAD

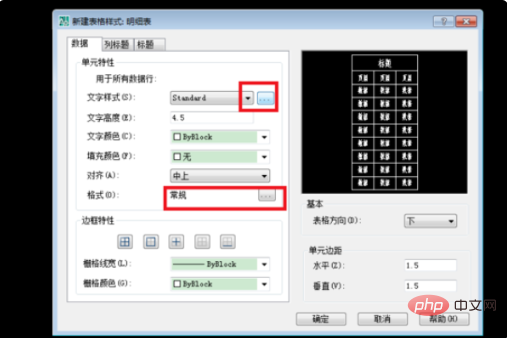
#4. Then select General for format, and then click Text Style.
Steps to draw title bar in CAD

5. Then click Apply.

Steps to draw title bar in CAD

#6. Finally, click [Align] in the center of the data options.
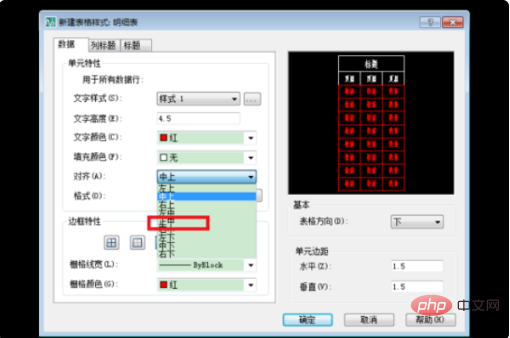
Steps to draw title bar in CAD

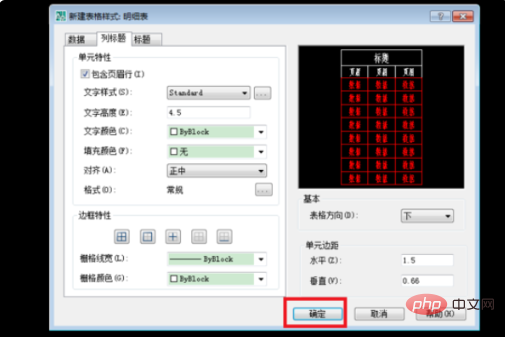
#7. Then select the border color and line width.
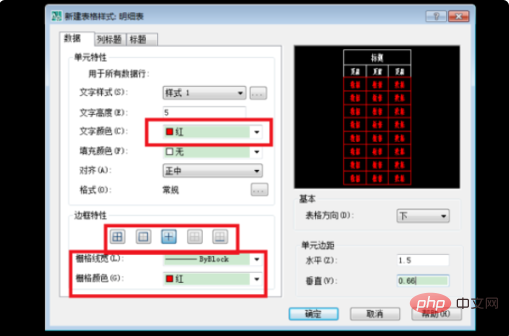
Steps to draw title bar in CAD

#8. Unit height = font size/three-quarters*line vertical*2. It is calculated that the vertical height of a size 5 font is 0.66.
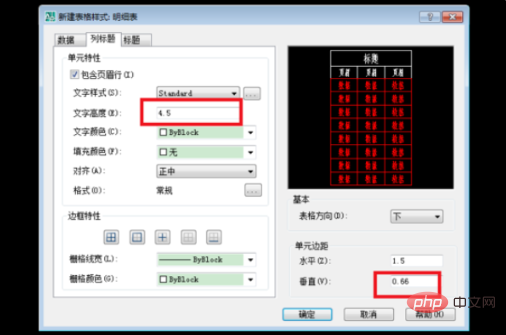
Steps to draw title bar in CAD

9. Finally, click OK.

Steps to draw title bar in CAD

The above is the detailed content of Steps to draw title bar in CAD. For more information, please follow other related articles on the PHP Chinese website!

Related labels:
cad
source:php.cn
Statement of this Website
The content of this article is voluntarily contributed by netizens, and the copyright belongs to the original author. This site does not assume corresponding legal responsibility. If you find any content suspected of plagiarism or infringement, please contact admin@php.cn
Popular Tutorials
More>
Latest Downloads
More>
Web Effects
Website Source Code
Website Materials
Front End Template