Before we delve into mongoDB how to use mongooseJS to connect with nodejs applications, let’s briefly introduce the mainstream technologies in today’s web development field.

Node: Node.js (Node) is an open source development platform for executing JavaScript code on the server side. Node is useful for developing applications that require a persistent connection from the browser to the server, often used for real-time applications such as chat, news feeds, and web push notifications.
mongoDB: mongoDB is a cross-platform, open source document-oriented database and a NoSQL database. As a NoSQL (not just SQL) database, MongoDB eschews the table-based structure of relational databases to accommodate JSON-like documents that have a dynamic schema it calls BSON (Binary JSON).
MongooseJS: Mongoose or MongooseJS is a MongoDB Object Modeling (ODM) tool designed to work in an asynchronous environment. Basically, it is a package that we will use to interact (query, update, operate) with MongoDB database in nodeJS application. We will use NPM (Node Packaging Manager) to install or "require" mongooseJS in our application.
NPM: Node Package Manager or NPM is the official package manager for nodeJS applications. It will be installed together with NodeJS. It is used from the command line or terminal (depending on what operating system is used).
Now that we are familiar with the basic definitions of these technologies, let’s dive into the code and its interpretation.
In this example (for demonstration purposes), our nodejs application will be a javascript file. Let's name it app.js.
Proceed to create the file in the new folder.

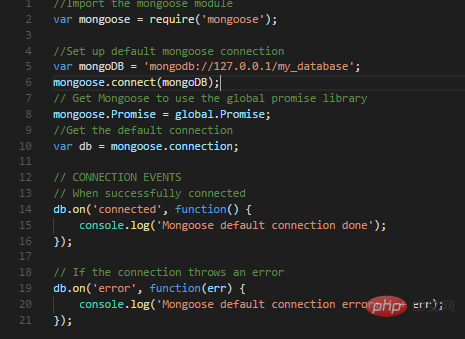
Explanation of source code:
Line 2: "requires" or imports the mongoose package in our application.
Line 4: It assigns the connection string (containing information about the database connection) to our mongoDB variable.
Line 6: These lines help to establish or "open" or initiate a connection to the database mentioned in the mongoDB variable. mongoose.connect()The first parameter of the function is the connection string (mongoDB variable).
Line 10: mongoose.connect()The function returns the database connection as mongoose.connection, which we assign to the db variable.
Line 14: This line logs a message to the console when the connection to the database is established and returned. It listens for the 'connected' event, and when the event fires, the function() containing lines 14, 15, and 16 is executed.
Line 19: This line logs a message to the console when the connection to the database is established and returned. It listens for the 'error' event, and when the event is triggered, the function() containing lines 19, 20, and 21 is executed.
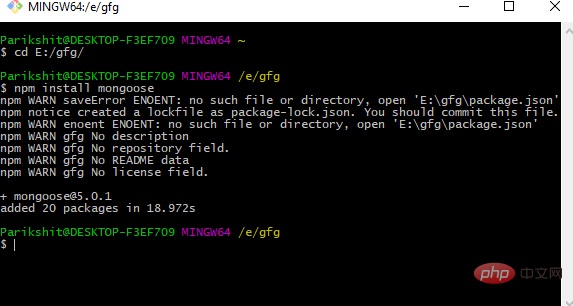
After writing the source code, open a terminal or command prompt (if you are a Windows user) and navigate to the project directory.
Then write the command npm install mongooose, as shown below:

This command installs the mongoose package so that it can be used in the application Using the
above command will create a 'node_modules' folder in the current directory or folder and download the necessary files there.
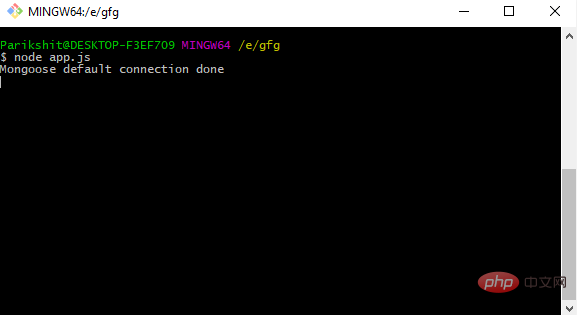
So all the preparations have been completed, now we can test the connection to the database.
Write node app.js to start the application.

The node app.js command runs our application. Start the db.on(' connected ') event and execute the function.
This article is about Nodejs - a detailed introduction to using MongooseJS to connect MongoDB with Node applications. I hope it will be helpful to friends in need!
The above is the detailed content of NodeJS|Connect MongoDB with Node using MongooseJS. For more information, please follow other related articles on the PHP Chinese website!