What this article brings to you is an introduction to two methods (code examples) of implementing Taobao Magnifying Glass in JavaScript. It has certain reference value. Friends in need can refer to it. I hope it will be helpful to you.
What is Taobao Magnifying Glass

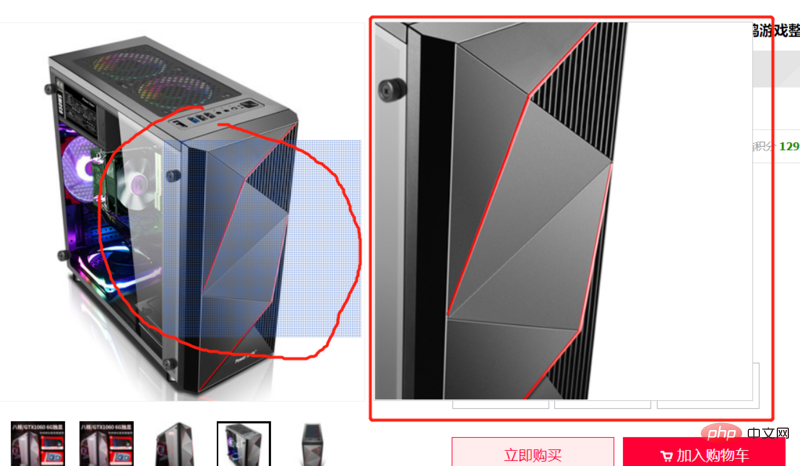
This, when your mouse moves over the main image on the left, a one will appear on the right The enlarged picture, let’s call this a magnifying glass.
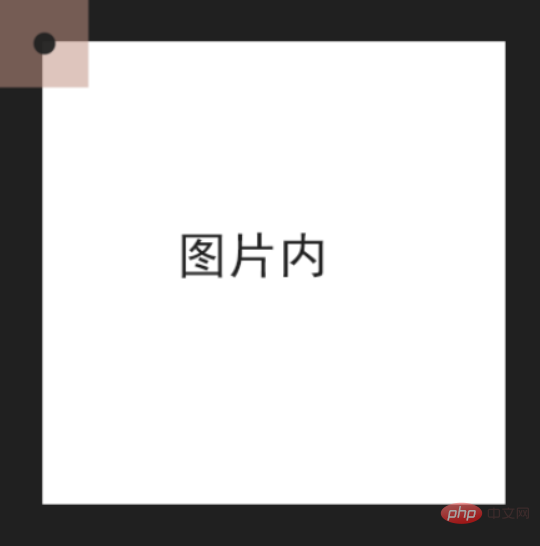
The first way is to have a small picture on the left and an original picture on the right. When the mouse moves over the small picture, change the left and top value to achieve synchronous movement (the position attribute of the original image is set to absolute)
The second method is to change the background-position of the original image when the mouse moves on the small image. value to move synchronously.
The first step is to get the position of the mouse on the small picture and position the box that follows the mouse (you should know Which block is it?).
//e.offsetX ,offsetY是鼠标的位置
//方块的left top在你的鼠标的左上方(网页左上角是原点),因此是减去一个方块的一半。
      var x = e.offsetX - 方块.offsetWidth / 2;
      var y = e.offsetY - 方块.offsetHeight / 2;
      方块.style.left = x + 'px';
      方块.style.top = y + 'px';
This is obviously not enough!
You also need to consider extreme positions/situations
If you only use the above settings, when your mouse moves to the edge of the picture, half of the square will appear outside the picture.

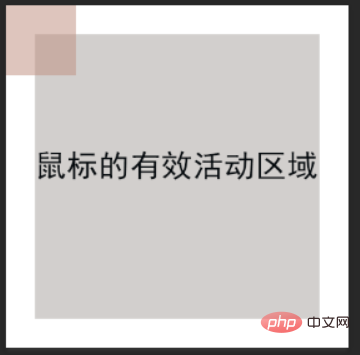
The correct answer should beWhen your block touches the edge, your block can no longer move,Although your mouse is still Move outside the "effective mouse activity area" in the picture below.

Then you need to add some code
      if (x  小图.offsetWidth - 方块.offsetWidth) {
        x = 小图.offsetWidth - 方块.offsetWidth;
      }
      if (y > 小图.offsetHeight - 方块.offsetHeight) {
        y = 小图.offsetHeight - 方块.offsetHeight;
}The second step is to control the left - top or background-position in the big picture
      //第一种方法:需要注意的是这里的left 和 top得反过来,你鼠标在小图上往下移的时候,对应的大图其实是往上移的。
      //所以:大图上的left = -小图上的left * 他们的缩放倍率
      大图.style.display = "block";
      大图.style.left = -x * 大图.offsetWidth / 小图.offsetWidth  + 'px';
      大图.style.top = -y * 大图.offsetHeight / 小图.offsetHeight + 'px';

     //第二种方法,这里需要注意 backgroundPosition的值是从0 - 100%的(得用百分比表示);
     //需要注意的是何时为百分百,从上面的极端情况判定我们可以知道
     //x 是从0 到 mask.offsetWidth - rect.offsetWidth;
     //因此这就是0 - 100%;y同理
      大图.style.display = "block";
大图.style.backgroundPosition =`${x/(mask.offsetWidth - rect.offsetWidth)*100}% ${y/(mask.offsetHeight- rect.offsetHeight)*100}%`;We mentioned above that we bind the mousemove event to the small image img to locate the box. In fact, in actual operation, we cannot use it directly. img to bind, but you must use a mask layer the same size as the img to bind, otherwise when you move the mouse, the picture will flash crazily, crazy! crazy!
#There is also function throttling. If you want to throttle this, just throttle it.
Another very important thing is that the size of the p on the right that displays the large picture must be the size of the box on the small picture* Zoom If the size of the magnification is too large, there will be more blank space. If it is too small, the display will be incomplete. There's code below that you can take home and Crazy Test.
I know I may not be very detailed, so. .
nbsp;html>
<meta>
<meta>
<meta>
<title>tb放大镜</title>
<style>
.small-box {
position: relative;
height: 300px;
}
.small-pic {
width: auto;
height: 300px;
}
.mask {
width: 526px;
position: absolute;
top: 0;
left: 0;
z-index: 1;
height: 100%;
cursor: crosshair;
}
.rect {
position: absolute;
top: 0;
left: 0;
width: 100px;
height: 100px;
opacity: .5;
background-color: red;
z-index: 0;
}
.big-box {
display: inline-block;
position: relative;
width: 266px;
height:266px;
border: 1px solid red;
overflow: hidden;
}
.big-pic {
position: absolute;
width: 1400px;
height: 798px;
top: 0;
left: 0;
}
.big-pic2{
display: inline-block;
width: 266px;
height:266px;
background-size: auto 798px;
background-image: url("https://timgsa.baidu.com/timg?image&quality=80&size=b9999_10000&sec=1550846791000&di=15edaf7bce643e13b65f70c82d74de30&imgtype=0&src=http%3A%2F%2Fpic.92to.com%2F360%2F201604%2F08%2F19864861_13.jpg");
background-position: 0 0;
}
</style>
<div>
<img alt="Introduction to two methods of implementing Taobao magnifying glass in JavaScript (code examples)" >
<div></div>
<div></div>
</div>
<div>
<img alt="Introduction to two methods of implementing Taobao magnifying glass in JavaScript (code examples)" >
</div>
<div>
<div></div>
</div>
<script>
window.onload = function () {
var mask = document.getElementsByClassName('mask')[0];
//为什么要用mask呢?不直接用选中small-pic。
//如果直接选择图片标签来绑定下面的mouseover事件,图片会一直闪烁!所以我们得给他一个和图片一样大小的遮罩层
var rect = document.getElementsByClassName('rect')[0];
var bPic = document.getElementsByClassName("big-pic")[0];
var bPic2 = document.getElementsByClassName("big-pic2")[0];
mask.addEventListener('mousemove', throttle(magnifier,100))
function magnifier(e){
//方块的left top在你的鼠标的左上方(网页左上角是原点),因此是减去一个方块的一半。
var x = e.offsetX - rect.offsetWidth / 2;
var y = e.offsetY - rect.offsetHeight / 2;
//极端情况,也就是当你的鼠标上的方块到四个边的边缘的时候。
if (x < 0) {
x = 0;
}
if (y < 0) {
y = 0;
}
if (x > mask.offsetWidth - rect.offsetWidth) {
x = mask.offsetWidth - rect.offsetWidth;
}
if (y > mask.offsetHeight - rect.offsetHeight) {
y = mask.offsetHeight - rect.offsetHeight;
}
//方块定位
rect.style.display="block";
rect.style.left = x + 'px';
rect.style.top = y + 'px';
//第一种方法:需要注意的是这里的left 和 top得反过来,你鼠标在小图上往下移的时候,对应的大图其实是往上移的。
//所以:大图上的left = -小图上的left * 他们的缩放倍率
bPic.style.display = "block";
bPic.style.left = -x * bPic.offsetWidth / mask.offsetWidth + 'px';
bPic.style.top = -y * bPic.offsetHeight / mask.offsetHeight + 'px';
//第二种方法,这里需要注意 backgroundPosition的值是从0 - 100%的(得用百分比表示);
//需要注意的是何时为百分百,从上面的极端情况判定我们可以知道
//x 是从0 到 mask.offsetWidth - rect.offsetWidth;
//因此这就是0 - 100%;y同理
bPic2.style.display = "block";
bPic2.style.backgroundPosition =`${x/(mask.offsetWidth - rect.offsetWidth)*100}% ${y/(mask.offsetHeight- rect.offsetHeight)*100}%`;
}
mask.addEventListener('mouseout',function(){
rect.style.display = "none";
bPic.style.display = "none";
bPic2.style.display = "none";
})
//函数节流
function throttle(fn, delay) {
var pre = new Date().getTime();
return function () {
var context = this;
var args = arguments;
var now = new Date().getTime();
if (now - pre > delay) {
fn.apply(this,arguments);
}
}
}
}
</script>
The above is the detailed content of Introduction to two methods of implementing Taobao magnifying glass in JavaScript (code examples). For more information, please follow other related articles on the PHP Chinese website!


