This article mainly introduces the method of building a site to implement the login page with PHP source code. It has a certain reference value. Now I share it with you. Friends in need can refer to it
Main:
SiteBuilding
Implement login page
Analysis and improvement
1) In the apache installation directory: [conf\extra\httpd-vhosts.conf] Add site configuration
 1 <VirtualHost *:80>
 2     #站点根目录
 3     DocumentRoot "D:\htdocs\Demo"
 4       #站点绑定的域名
 5     ServerName www.test.com
 6      #站点别名
 7     ServerAlias test.com
 8   <Directory  "D:\htdocs\Demo">
 9         #允许所有访问
 10         #allow from all
 11         Require all granted
 12         #允许分布式权限配置(允许重写)(.htacess)
 13         AllowOverride All
 14         #不显示站点目录的文件结构
 15         Options -indexes
 16   </Directory>
 17 </VirtualHost>
2) Add domain name resolution to the host file. Host file location: [C:\Windows\System32\drivers\etc\hosts]
1 127.0.0.1 www.test.com test.com
3) Restart apache. Complete site configuration.
1) Create the project directory blog [D:\htdocs\Demo\blog], initialize git, and submit to Code Cloud
Right click in the project directory》Git Bash Prerequisite: git
1  git init
2  git remote add origin
3  git pull origin master
2) User data tablepbg_users
 1 CREATE TABLE `pbg_users` (
 2   `id` int(10) unsigned NOT NULL AUTO_INCREMENT COMMENT '用户主键',
 3   `username` varchar(20) NOT NULL COMMENT '用户名',
 4   `pwd` char(32) NOT NULL COMMENT '密码',
 5   `email` varchar(50) NOT NULL DEFAULT '' COMMENT '注册邮箱',
 6   `token_email` varchar(32) NOT NULL DEFAULT '' COMMENT '邮箱验证',
 7   `flag` tinyint(1) unsigned NOT NULL DEFAULT '0' COMMENT '是否是管理员,1-管理员,2-普通用户',
 8   `created_at` datetime DEFAULT NULL COMMENT '注册时间',
 9   `updated_at` datetime DEFAULT NULL COMMENT '最后一次登录时间',
 10   `login_ip` varchar(20) NOT NULL DEFAULT '' COMMENT '最后登录的ip地址',
 11   `login_times` smallint(6) NOT NULL DEFAULT '0' COMMENT '登录次数',
 12   PRIMARY KEY (`id`),
 13   UNIQUE KEY `username` (`username`),
 14   UNIQUE KEY `email` (`email`)
 15 ) ENGINE=MyISAM AUTO_INCREMENT=1 DEFAULT CHARSET=utf8;
3) Log in Interface [login.html]
1 <!DOCTYPE html>
2 <html lang="zh-CN">
3 <head>
4 <meta charset="UTF-8">
5 <title>登录</title>
6 <link rel="stylesheet" type="text/css" href="layui/css/layui.css">
7 <link rel="stylesheet" type="text/css" href="css/style.css">
8 </head>
9 <body>
10 <p class="container">
11 <p class="content">
12 <form action="login.php" class="layui-form" method="post">
13 <p class="layui-form-item">
14 <h2>登录</h2>
15 </p><hr>
16
17 <p class="layui-form-item">
18 <label class="layui-form-label">用户名:</label>
19 <p class="layui-input-block">
20 <input type="text" name="username" class="layui-input" required lay-verify="required" placeholder="请输入用户名" autocomplete="off" >
21 </p>
22 </p>
23
24 <p class="layui-form-item">
25 <label class="layui-form-label">密 码:</label>
26 <p class="layui-input-block">
27 <input type="password" name="pwd" required lay-verify="required" placeholder="请输入密码" class="layui-input">
28 </p>
29 </p>
30
31 <p class="layui-form-item">
32 <p class="layui-input-block">
33 <button lay-submit class="layui-btn">登录</button>
34 <button type="reset" class="layui-btn layui-btn-primary">重置</button>
35 </p>
36 </p>
37 </form>
38 </p>
39 </p>
40 <script type="text/javascript" src="layui/layui.js"></script>
41 <script>
42 layui.use('form', function(){
43 var form = layui.form;
44 });
45 </script>
46 </body>
47 </html>4) Login page style adjustment [css/style.css]
 1 @charset "UTF-8";
 2
 3 body {
 4     background-color: #1E9FFF;
 5 }
 6
 7 /*登录*/
 8 .container {
 9     position: absolute;
 10     left: 50%;
 11     top:50%;
 12     width: 500px;
 13     margin-left: -250px;
 14     margin-top: -200px;"
 15 }
 16 .content{
 17     background: #ffffff;
 18     padding: 20px;
 19     border-radius: 4px;
 20     box-shadow: 5px 5px 50px #444444;
21 }View style sheet
5) Login operation: Process login information [login.php]
1 <?php
2 /**
3 * 登录数据处理
4 * User: young
5 */
6 header("content-type:text/html;charset=utf-8");
7 //1-接收登录信息
8 $data = array();
9 $data['username'] = trim($_POST['username']);
10 $data['pwd'] = trim($_POST['pwd']);
11
12 //2-连接数据库
13 $conn = @mysql_connect('localhost','root','root') or die('连接数据库失败!');
14 // mysql_set_charset("utf8");
15 // mysql_select_db("web");
16 mysql_query('set names utf8',$conn);
17 mysql_query('use web',$conn);
18
19 //3-查询数据库 校验登录信息
20 $sql = "select username,pwd from pbg_users where username='{$data['username']}'";
21 $res = mysql_query($sql,$conn);
22
23 //4-登录结果提示信息
24 if($res != false){
25 $user = mysql_fetch_array($res);
26 if( $user['pwd'] == md5($data['pwd']) ){ exit('登录成功'); }
27 }
28 echo "用户名或密码不正确!";
29 header('refresh:3; url=login.html');Click to view
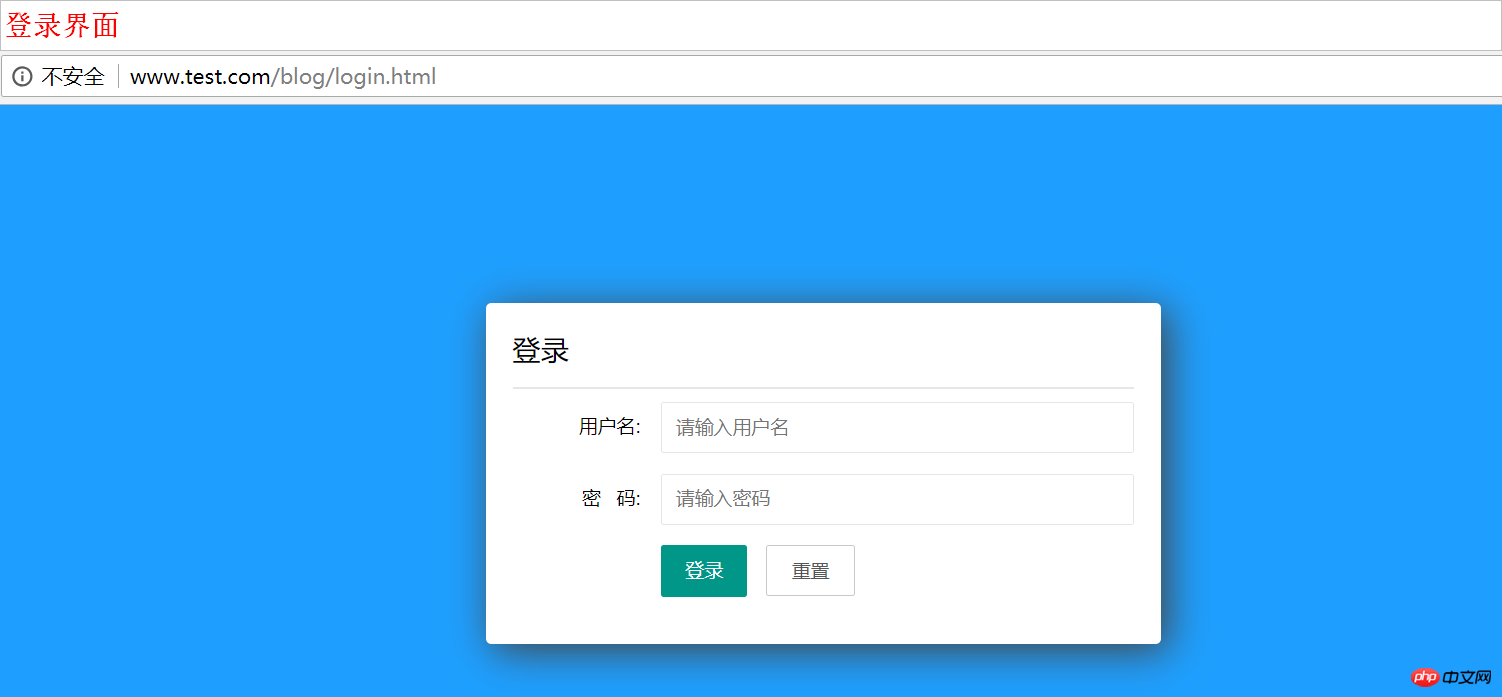
6) Login interface effect

1) Prepare to optimize the
file directory structure and implement the MVC structure
access form : Implement single-entry file access
2) Submit code:
1 git add -A
2 git commit -m "第一次提交 && 登录页"
3 git push origin master
View the source code of this project: https://gitee.com/NewbiesYang/young_blog
Summary: The main completions this time are:
1. Site configuration
2. Login data table and login page production, simple implementation of login logic
3. Next step optimization Improvement
The above is the entire content of this article. I hope it will be helpful to everyone's learning. For more related content, please pay attention to the PHP Chinese website!
Related recommendations:
php source code method to implement single-entry MVC structure
php remove project file bom headers in batches Methods
The above is the detailed content of PHP source code: How to build a site to implement a login page. For more information, please follow other related articles on the PHP Chinese website!


