This article mainly introduces you to the relevant information about introducing vuex storage interface data and calls in vue.js. The article introduces it in detail through sample code, which has certain reference learning value for everyone's study or work. Friends who need it, please follow the editor to learn together.
Preface
A few days ago, I saw Teacher Huang Yi’s high-imitation Ele.me app video tutorial on MOOC.com, and I was working on the interface. When designing, I was thinking, can this interface be stored and called globally? Instead of going through the interface many times, it is also troublesome to manage.
The universal vue does have this function, that is vuex.
Vuex is a data management architecture similar to Flux that is mainly used in medium and large single-page applications. It mainly helps us better organize the code and keep the state within the application in a maintainable and understandable state.
If you don’t quite understand what the state in the Vue.js application means, you can imagine the data field in the Vue component you wrote before. Vuex divides the state into component internal state and application level state:
Component internal state: state (data field) used only within one component
Application level status: a status shared by multiple components
For example: For example, there is a parent component that has two child components. This parent component can use props to pass data to the child component. This data channel is easy to understand.
The specific implementation process is, of course, to install
npm install vuex --save(推荐使用淘宝镜像cnpm,具体实施请自行百度)
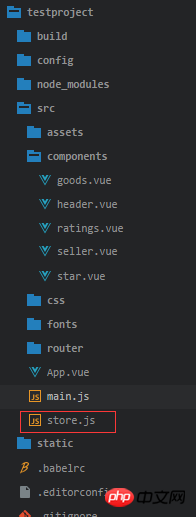
and then create a store.js file to manage the data

The content inside is like this
import Vue from 'vue'
import Vuex from 'vuex'
Vue.use(Vuex)
export default new Vuex.Store({
 state:{
 },
 actions:{
 },
 mutations:{
 }
})Then introduce this js file in main.js
import store from './store.js'
Then start requesting data, in mutations Write
mutations:{
  getJson(){
   Vue.http.get('../data.json',{
    },{
    headers:{},
    emulateJSON:true
    }).then(response=>{
    this.state.newslist=response.data;
    },response=>{

    })
  }
}in this attribute so that the actions can be called and the data is stored in the state. The official website says that this is asynchronous storage of data. I understand that this asynchronous is the same as the asynchronous loading of ajax. Meaning, of course synchronization is mutations. But asynchronous data is written in mutations first and then can be called, so you have to write it like this in actions
actions:{
  newJson(obj){
   obj.commit('getJson');
  }
},and then write the state like this
state:{
  newslist:[]
},The purpose of writing this is to avoid reporting errors. To avoid errors such as not being found.
The newJson and obj above are customized by me. You can write them as you like. getJson is the method you want to use in mutations. It will be convenient for branching later. This getJson method can also add parameters, but the parameters must be It is state. This state is the above state, not customized. Write to death.
Next, you can split the flow in your sub-component!
The code in the subcomponent is like this:
import {mapState} from 'vuex';
computed:{
 ...mapState({
  goods:state=>state.newslist.goods,
  classMap:state=>state.classMap
 })
}Here I customized a goods to replace state.newslist.goods, because my data is
{
"goods":[]
}I found this format too long, so I shortened it.
Then you can call it directly in the html. Here is a small piece of code
<ul>
<li v-for="(item,index) in goods" class="menu-item" :class="{'current':currentIndex===index}" @click="selectMenu(index,$event)">
<span class="text border-1px">
<span class="icon" v-show="item.type>0">
</span>
{{item.name}}
</span>
</li>
</ul>The above is what I compiled for everyone. I hope it will be helpful to everyone in the future.
Related articles:
How to prevent repeated rendering using React
How to implement the directive function in vue
How to implement encapsulation based on mssql module in nodejs
How to implement bind in Javascript
How to implement it in js Second level linkage
The above is the detailed content of How to call vuex to store interface data in vue.js. For more information, please follow other related articles on the PHP Chinese website!


