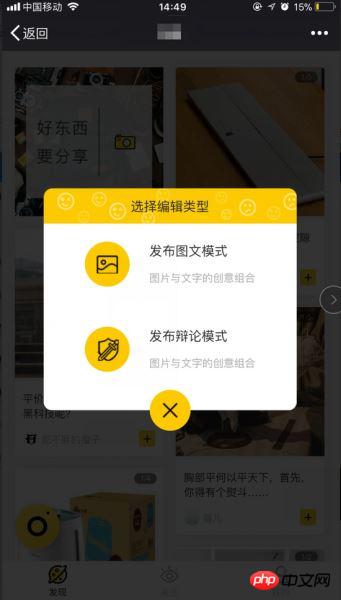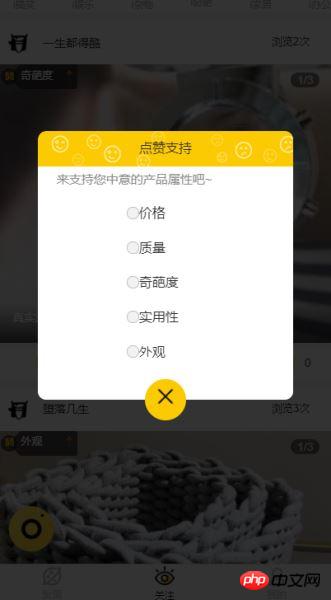
This time I will show you how to use the Vue component to implement the pop-up window function. What are the precautions for using the Vue component to implement the pop-up window function. The following is a practical case, let's take a look.
I have been using the element-ui framework recently and used the Dialog dialog component. The effect achieved is roughly the same as a pop-up component I made in my previous mobile project. Then I wanted to share with you the implementation method of this pop-up window component. The following article will guide you through the implementation of a pop-up window component.
The main content of this article will involve the implementation of pop-up window masks, the use of slot slots, props and $emit parameters, and the specific component codes are also uploaded. If you like it, you can like/follow and support it. I hope everyone can gain something from reading this article.
The final effect of the component

<template>
<p class="dialog">
<!--外层的遮罩 点击事件用来关闭弹窗,isShow控制弹窗显示 隐藏的props-->
<p class="dialog-cover back" v-if="isShow" @click="closeMyself"></p>
<!-- transition 这里可以加一些简单的动画效果 -->
<transition name="drop">
<!--style 通过props 控制内容的样式 -->
<p class="dialog-content" :style="{top:topDistance+'%',width:widNum+'%',left:leftSite+'%'}" v-if="isShow">
<p class="dialog_head back">
<!--弹窗头部 title-->
<slot name="header">提示信息</slot>
</p>
<p class="dialog_main" :style="{paddingTop:pdt+'px',paddingBottom:pdb+'px'}">
<!--弹窗的内容-->
<slot name="main">弹窗内容</slot>
</p>
<!--弹窗关闭按钮-->
<p class="foot_close" @click="closeMyself">
<p class="close_img back"></p>
</p>
</p>
</transition>
</p>
</template>background. The css of the specific content can be set according to your own needs.
<style lang="scss" scoped>
 // 最外层 设置position定位
 .dialog {
 position: relative;
 color: #2e2c2d;
 font-size: 16px;
 }
 // 遮罩 设置背景层,z-index值要足够大确保能覆盖,高度 宽度设置满 做到全屏遮罩
 .dialog-cover {
 background: rgba(0,0,0, 0.8);
 position: fixed;
 z-index: 200;
 top: 0;
 left: 0;
 width: 100%;
 height: 100%;
 }
 // 内容层 z-index要比遮罩大,否则会被遮盖,
 .dialog-content{
 position: fixed;
 top: 35%;
 // 移动端使用felx布局
 display: flex;
 flex-direction: column;
 justify-content: center;
 align-items: center;
 z-index: 300;
 }
</style>The above is a single slot It is called the default slot. The correct way to use the slot in the parent component is:
<my-component>
 <!--在my-component里面的所有内容片段都将插入到slot所在的DOM位置,并且会替换掉slot标签-->
 <!--这两个p标签,将替换整个slot标签里面的内容-->
 <p>这是一些初始内容</p>
 <p>这是更多的初始内容</p>
</my-component>
<p class="dialog_head back ">
<!--弹窗头部 title-->
<slot name="header">提示信息</slot>
</p>
<p class="dialog_main " :style="{paddingTop:pdt+'px',paddingBottom:pdb+'px'}">
<!--弹窗的内容-->
<slot name="main">弹窗内容</slot>
</p>The method of using the pop-up component slot in the parent component is as follows.
<dialogComponent>
 <p slot="header">插入到name为header的slot标签里面</p>
  <p class="dialog_publish_main" slot="main">
  这里是内容插入到子组件的slot的name为main里面,可以在父组件中添加class定义样式,事件类型等各种操作
  </p>
</dialogComponent>
Then bind the props data in the parent component.
<script>
export default {
 props: {
 isShow: {
 //弹窗组件是否显示 默认不显示
  type: Boolean,
  default: false,
  required:true, //必须
 },
 //下面这些属性会绑定到p上面 详情参照上面的html结构
 // 如: :style="{top:topDistance+'%',width:widNum+'%'}"
 widNum:{
 //内容宽度
  type: Number,
  default:86.5
 },
 leftSite:{
  // 左定位
  type: Number,
  default:6.5
 },
 topDistance: {
  //top上边距
  type: Number,
  default:35
 },
 pdt:{
  //上padding
  type: Number,
  default:22
 },
 pdb:{
  //下padding
  type: Number,
  default:47
 }
 },
}
</script><dialogComponent :is-show="status.isShowPublish" :top-distance="status.topNum"> </dialogComponent>
ps:props传递数据不是双向绑定的,而是 单向数据流 ,父组件的数据变化时,也会传递到子组件中,这就意外着我们不应该在子组件中修改props。所以我们在关闭弹窗的时候就 需要通过 $emit 来修改父组件的数据 ,然后数据会自动传到子组件中。
现在基本上弹窗组件都已实现的差不多了,还差一个弹窗的关闭事件,这里就涉及到子组件往父组件传参了。
4. $emit 触发父组件事件修改数据,关闭弹窗
Vue中在子组件往父组件传参,很多都是通过 $emit 来触发父组件的事件来修改数据。
在子组件中,在点击关闭,或者遮罩层的时候触发下面这个方法:
methods: {
 closeMyself() {
  this.$emit("on-close");
  //如果需要传参的话,可以在"on-close"后面再加参数,然后在父组件的函数里接收就可以了。
 }
}父组件中的写法:
<dialogComponent :is-show="status.isShowPublish" :top-distance="status.topNum" @on-close="closeDialog">
 </dialogComponent>
 //"on-close是监听子组件的时间有没有触发,触发的时候执行closeDialog函数
methods:{
 closeDialog(){
 // this.status.isShowPublish=false;
 //把绑定的弹窗数组 设为false即可关闭弹窗
 },
}可以用弹窗组件实现下列这种信息展示,或者事件交互:

弹窗组件代码
上面是把弹窗的每个步骤拆分开来,一步步解析的,每一步都说的比较清楚了,具体连起来的话,可以看看 代码 ,再结合文章就能理的很清楚了。
相信看了本文案例你已经掌握了方法,更多精彩请关注php中文网其它相关文章!
推荐阅读:
The above is the detailed content of How to use Vue components to implement pop-up window functions. For more information, please follow other related articles on the PHP Chinese website!


