This article mainly introduces the basic framework for building the Laravel5.5 Homestead environment. It has a certain reference value. Now I share it with you. Friends in need can refer to it.
1. Building the project Basic framework: (Separate front-end and back-end writing api interfaces)
1, Download and install laravel5;
Command line: composer create-project laravel/laravel Project name --prefer-dist "5.5.*"

2. Install the application key;
2.1, rename the .env.example file to .env,Configure the database, etc.;
2.2, install Key: run artisan command php artisan key:generate , will generate the APP_KEY value in the .env file.
APP_KEY=base64:yl52j20RBBhfs2LUB47126/9geAQ+l6A6Y9HgdHjb3M=
3, installationDingoAPI;
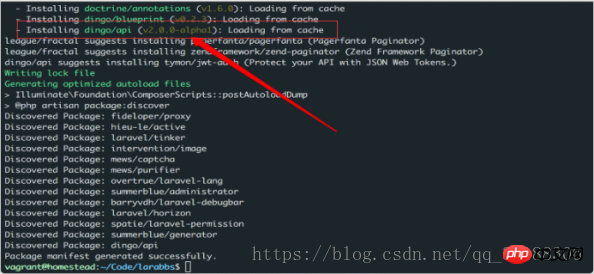
Command line:composer require dingo/api:2.0.0-alpha1

Error solution: Open the root directory composer.json file, Add manually "dingo/api": "2.0.0-alpha1"

##Then Execute composer update

dingo/apiHas been successfully installed
3.1 , Configuration
First publish the dingo configuration file, Command line: php artisan vendor:publish
执行成功后,我们会在 config 目录先看到 api.php 文件,打开文件我们可以看到所有的配置都是可以再 .env 中修改:
Accept: application/
API_STANDARDS_TREE=prs
API_SUBTYPE=changan
API_PREFIX=api
API_VERSION=v1
API_STRICT=true
API_DEBUG=true
(1)、访问 v1 版本
Accept: application/prs.changan.v1+json
(2)、访问 v2 版本
Accept: application/prs.changan.v2+json
(3) 、在.env.example 文件中,提交到版本库
# dingo config
API_STANDARDS_TREE=
API_SUBTYPE=
API_PREFIX=
API_VERSION=
API_STRICT=
API_DEBUG=
4、安装jwt-auth令牌
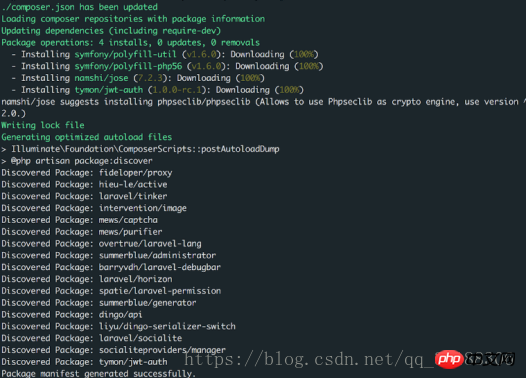
命令行:composer require tymon/jwt-auth:1.0.0-rc.1

(1)、安装完成后,我们需要设置一下 JWT 的 secret,这个 secret 很重要,用于最后的签名,更换这个secret 会导致之前生成的所有 token 无效。
命令行:php artisan jwt:secret

(2) 、可以看到在 .env 文件中,增加了一行 JWT_SECRET;
JWT_SECRET=xFWZJRNeK9S6R2TtVaASvqCnTtC7vvQv
(3)、修改 config/auth.php,将 api guard 的 driver 改为 jwt。
'guards' => [
    'web' => [
        'driver' => 'session',
        'provider' => 'users',
    ],

    'api' => [
        'driver' => 'jwt',
        'provider' => 'admin_users',//admin_users是用户表
    ],
],(3)、修改 config/api.php,auth 中增加 JWT 相关的配置
'auth' => [
    'jwt' => 'Dingo\Api\Auth\Provider\JWT',
],(4)、在config/app.php中添加
'aliases' => [
    'App' => Illuminate\Support\Facades\App::class,
    'Artisan' => Illuminate\Support\Facades\Artisan::class,
    ..........
    'JWTAuth' => Tymon\JWTAuth\Facades\JWTAuth::class, //添加此行
],5、安装Arrayserializer响应数据结构统一扩展包
命令行:composer require liyu/dingo-serializer-switch
安装成功后,在路由文件里routes/api.php修改:
<?php
$api = app('Dingo\Api\Routing\Router');
$api->version('v1', [
'namespace' => 'App\Http\Controllers\Api',
'middleware' => ['serializer:array', 'bindings']
], function ($api) {
$api->group([
'namespace' => 'Admin',
'prefix' => 'admin',
'middleware' => 'api.throttle'
], function ($api) {
//写路由(可根据命名空间分组)
});
$api->version('v2', function ($api) {
$api->get('version', function () {
return response('this is version v2');
});
});6、添加语言包使用 Composer 来安装 laravel-lang
命令行:composer require "overtrue/laravel-lang:~3.0"
6.1、将项目语言设置为中文config/app.php
'locale' => 'zh-CN',
'timezone' => 'PRC',
备注:语言包在vendor->caouecs->laravel-lang->src文件夹下,使用时直接将需要的语言包复制到resources->lang文件夹下即可使用。
基础框架搭建到此结束
相关推荐:
PHP环境搭建(phpStudy)与集成开发工具(phpStorm)的安装
The above is the detailed content of Laravel5.5+Homestead environment+building basic framework. For more information, please follow other related articles on the PHP Chinese website!


