


This article mainly introduces the method of rewriting the jump prompt page in TP5, and analyzes the modification steps and related operation precautions of thinkPHP5 jump prompt page in the form of examples. Friends in need can refer to the following
The example of this article describes the method of rewriting the jump prompt page in thinkPHP5 (TP5). Share it with everyone for your reference, the details are as follows:
Everyone knows that the successful and failed execution pages of the Tp framework have not been particularly good-looking, but this also gives developers a good choice. We can use Rewrite this jump prompt page according to your own preferences
I use the Tp5 framework. The rewriting of the jump prompt page of Tp5 is similar to that of Tp3. First, let’s take a look at the built-in Tp framework. I directly pasted the code for the jump prompt page:
{__NOLAYOUT__}<!DOCTYPE html PUBLIC "-//W3C//DTD XHTML 1.0 Transitional//EN" "http://www.w3.org/TR/xhtml1/DTD/xhtml1-transitional.dtd">
<html xmlns="http://www.w3.org/1999/xhtml">
<head>
<meta http-equiv="Content-Type" content="text/html; charset=utf-8" />
<title>跳转提示</title>
<style type="text/css">
*{ padding: 0; margin: 0; }
body{ background: #fff; font-family: "Microsoft Yahei","Helvetica Neue",Helvetica,Arial,sans-serif; color: #333; font-size: 16px; }
.system-message{ padding: 24px 48px; }
.system-message h1{ font-size: 100px; font-weight: normal; line-height: 120px; margin-bottom: 12px; }
.system-message .jump{ padding-top: 10px; }
.system-message .jump a{ color: #333; }
.system-message .success,.system-message .error{ line-height: 1.8em; font-size: 36px; }
.system-message .detail{ font-size: 12px; line-height: 20px; margin-top: 12px; display: none; }
</style>
</head>
<body>
<p class="system-message">
<?php switch ($code) {?>
<?php case 1:?>
<h1>:)</h1>
<p class="success"><?php echo(strip_tags($msg));?></p>
<?php break;?>
<?php case 0:?>
<h1>:(</h1>
<p class="error"><?php echo(strip_tags($msg));?></p>
<?php break;?>
<?php } ?>
<p class="detail"></p>
<p class="jump">
页面自动 <a id="href" href="<?php echo($url);?>" rel="external nofollow" >跳转</a> 等待时间: <b id="wait"><?php echo($wait);?></b>
</p>
</p>
<script type="text/javascript">
(function(){
var wait = document.getElementById('wait'),
href = document.getElementById('href').href;
var interval = setInterval(function(){
var time = --wait.innerHTML;
if(time <= 0) {
location.href = href;
clearInterval(interval);
};
}, 1000);
})();
</script>
</body>
</html>Let’s rewrite it below. First of all, the css can be deleted directly, which is almost It has no effect. I forgot to mention that the replacement jump prompt I use is the layer plug-in. This plug-in does a good job. The official website: http://layer.layui.com/. If you want to see it, please turn left.
1. Download the layer plug-in and decompress it. The decompressed file package is as follows:
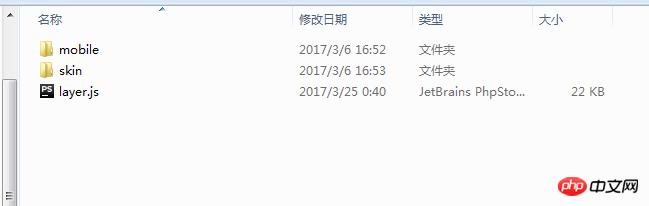
After decompression, it contains these three main files, of which we need What is introduced into the file is layer.js
But don’t forget to introduce jquery.js
Then let’s take a look at a few more important lines of code in Tp’s original code:
 <p class="success"><?php echo(strip_tags($msg));?></p>
<?php echo($url);?>
<?php echo($wait);?>
These three points are prompt information, jump path, and waiting time
With these, you can use hidden fields when rewriting The technique is to use hidden fields to obtain the required information in the form of jquery, and then insert it into the following js:
<script type="text/javascript">
(function(){
layer.open({
content: msg,
yes: function(index, layero){
//do something
layer.close(index); //如果设定了yes回调,需进行手工关闭
}
});
var wait = document.getElementById('wait'),
href = document.getElementById('href').href;
var interval = setInterval(function(){
var time = --wait.innerHTML;
if(time <= 0) {
location.href = href;
clearInterval(interval);
};
}, 1000);
})();
</script>
var msg = $('#msg').val(); 提示信息
var url = $('#url').val(); 跳转url
var wait = $('#wait').val(); 等待时间Rewritten js:
<script type="text/javascript">
(function(){
var msg = $('#msg').val();
var url = $('#url').val();
var wait = $('#wait').val();
layer.open({
content: msg,
yes: function(index, layero){
//do something
location.href = url;
layer.close(index); //如果设定了yes回调,需进行手工关闭
}
});
})();
</script>Here I did not use automatic jump, but manually clicked to jump, so the following timer was deleted directly and did not affect
The rewriting was successful
Related recommendations:
An example of TP5 implementing email sending service encapsulation and sending attachments
The above is the detailed content of TP5 implements the method of rewriting the jump prompt page. For more information, please follow other related articles on the PHP Chinese website!
 How to restart the service in swoole framework
 The relationship between bandwidth and network speed
 How to switch between Huawei dual systems
 Python online playback function implementation method
 Remove header line
 What is the difference between a demo machine and a real machine?
 What are the common secondary developments in PHP?
 Introduction to article tag attributes


![[Web front-end] Node.js quick start](https://img.php.cn/upload/course/000/000/067/662b5d34ba7c0227.png)


