This article mainly introduces HTML5 to teach you how to do cool fragmented image switching (canvas). It has certain reference value. Those who are interested can learn more
Preface
Old rule, source code first. The image area is clickable, and the animation will start from the clicked position.
Originally I made this effect 3 years ago, but I thought it was done with countless p tags. The performance was a problem and it couldn’t run at all on the mobile terminal. Recently, on a whim, I wanted to learn how to use pure CSS to implement it from a master who is very good at making CSS. However, I had no choice but to give up because I didn’t have enough skills, and finally chose to use canvas to complete it.
Preparation
1. First prepare several pictures of the same size. In this example, the picture sizes are all 1920 * 1080 (note: The size here is the size of the original image, not the size displayed on the page through css). For future use, add these images to a hidden element in HTML for later use.
<p class='hide'>
<img class='img' src='./images/a.jpg' />
<img class='img' src='./images/b.jpg' />
<img class='img' src='./images/c.jpg' />
<img class='img' src='./images/d.jpg' />
<img class='img' src='./images/e.jpg' />
</p>.hide {
display: none;
}2. Insert canvas in HTML, with custom size, but must ensure the width and height of the image resource Than consistent. In this example the canvas size is 800 * 450.
<canvas id="myCanvas" width="800" height="450">您的浏览器不支持 CANVAS</canvas>
3. The basic code is as follows. First, get the context object of the canvas; second, get the picture object; and finally draw the picture through the drawImage method.
var ctx = document.querySelector('#myCanvas').getContext('2d'),
    img = document.querySelector('.img');

ctx.beginPath();
ctx.drawImage(img, 0, 0);
ctx.closePath();
ctx.stroke();realization
I believe many people will understand soon after reading this. This is a combination of several small units. Together, each unit is responsible for drawing only a small part of the picture, and finally they are put together to form a complete picture.
So before explaining the source code in detail, let us review the usage of the drawImage function in canvas. Since we need to use 9 parameters of this function and there are many parameters, we need to keep in mind the meaning of these parameters and the reference objects.
context.drawImage(img, sx, sy, swidth, sheight, x, y, width, height);
· img: Specifies the image, canvas or video to be used
· sx: The x-coordinate position to start cutting
· sy: the y coordinate position where shearing starts
· swidth: the width of the sheared image
· sheight: the height of the sheared image
·x: in The x-coordinate position of the image placed on the canvas
· y: The y-coordinate position of the image placed on the canvas
· width: The width of the image to be used
· height: The height of the image to be used
I believe that even if the above parameters are listed, it is still easy to get confused during development. Here is a little tip recommended to you: in addition to the first img parameter, there are 8 parameters. The size reference object of the first 4 parameters is the original image, that is, 1920 * 1080; the size reference object of the last 4 parameters is Canvas, that is 800 * 450.
Remember this formula and it will not be easy to get dizzy when actually writing.
Grid
Griding is to determine the size of a unit in the canvas. The most important thing is that the unit size can be changed by the screen. Divisible by the length of the two sides, that is, the unit size should be the common divisor of the width and height of the screen. The common divisor is not necessarily the greatest common divisor or the least common divisor, because if it is too large, the effect will not be cool enough, and if it is too small, the performance will be under pressure.
Taking the size of the artboard in this example as 800 * 450, I choose 25 * 25 as the unit size, that is, the entire canvas is composed of 32 * 18, a total of 576 cells. After dividing the grid, we need to calculate some basic parameters first.
var imgW = 1920, //图片原始宽/高
    imgH = 1080;

var conW = 800, //画布宽/高
    conH = 450;

var dw = 25, //画布单元格宽/高
    dh = 25;

var I = conH / dh, //单元行/列数
    J = conW / dw;

var DW = imgW / J, //原图单元格宽/高
DH =imgH / I;The first three groups of parameters were set by us before. Please note that when calculating the fourth group of rows/columns, you must be clear: Number of rows= Canvas height/cell height; number of columns = screen width/cell width. If this is reversed, you will be in trouble later. The last group of DW/DH is enlarged and converted to the cell size on the original image, which is used for cropping the image later.
Drawing
Step by step, we draw the upper-left corner cell first. Because its original image cutting position and canvas placement position are both (0, 0), so it is the simplest.
ctx.drawImage(img, 0, 0, DW, DH, 0, 0, dw, dh);

Success. So now we need to draw the pictures in row 2 and column 3. How should we write them?
var i = 2,
    j = 3;
ctx.drawImage(img, DW*j, DH*i, DW, DH, dw*j, dh*i, dw, dh);What is easy to confuse here is: The abscissa of cropping or placement is the cell width * column number, and the ordinate is the cell height * row number .

For convenience, a pure function responsible for rendering is encapsulated. It does not participate in logic and will only draw based on the incoming image object and coordinates.
function handleDraw(img, i, j) {
    ctx.drawImage(img, DW*j, DH*i, DW, DH, dw*j, dh*i, dw, dh);
}After encapsulating the rendering method, the entire image is rendered through a double loop of rows and columns.
ctx.beginPath();

for (var i = 0; i < I; i ++) {
    for (var j = 0; j < J; j ++) {
        handleDraw(img, i, j);
    }
}

ctx.closePath();
ctx.stroke();
完美~。其实到这一步核心部分就完成了,为什么呢?因为此时这幅图片已经是由几百个单元格拼合而成的,大家可以凭借天马行空的想像赋予其动画效果。
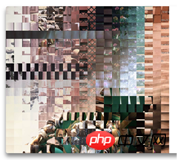
在分享自己的动画算法之前,先给大家看下拼错是什么样的~

还有点炫酷~
动画算法
下面分享下我的动画算法。Demo 里的效果是怎么实现的呢?
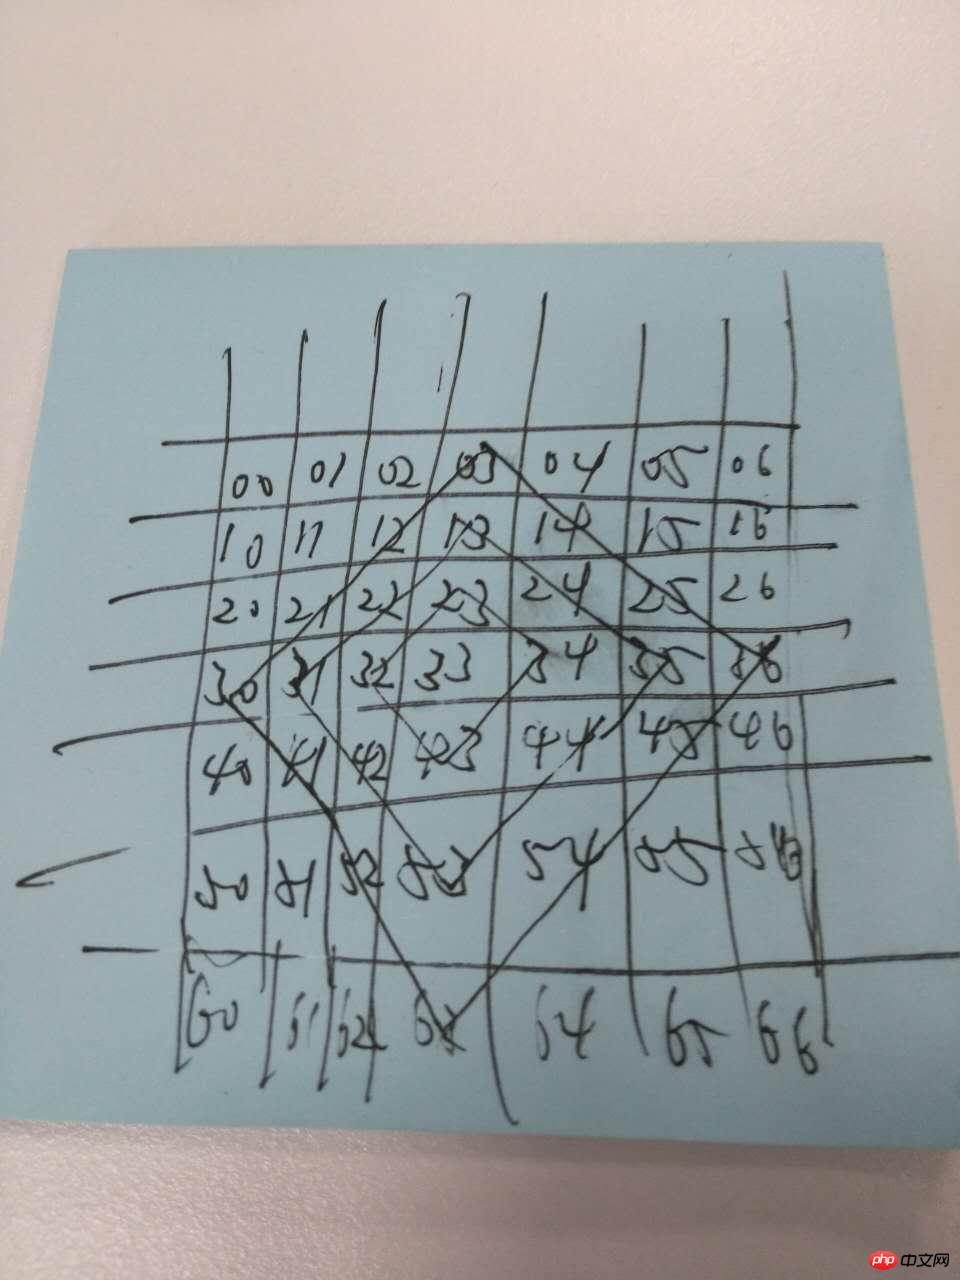
由于在画布的网格上,每个单元格都有行列号(i,j)。我希望能给出一个坐标(i,j)后,从近到远依次得出坐标周围所有菱形上的点。具体如下图,懒得做图了~

比如坐标为(3,3)
距离为 1 的点有(2,3)、(3,4)、(4,3)、(3,2)共4个;
距离为 2 的点有(1,3)、(2,4)、(3,5)、(4,4)、(5,3)、(4,2)、(3,1)、(2,2)共8个;
........
求出这一系列点的算法也很容易, 因为菱形线上的点与坐标的 行号差值的绝对值 + 列号差值的绝对值 = 距离,具体如下:
function countAround(i, j, dst) {
    var resArr = [];
    for (var m = (i-dst); m <= (i+dst); m++) {
        for (var n = (j-dst); n <= (j+dst); n++) {
            if ((Math.abs(m-i) + Math.abs(n-j) == dst)) {
                resArr.push({x: m, y: n});
            }
        }
    }
    return resArr;
}该函数用于给定坐标和距离(dst),求出坐标周围该距离上的所有点,以数组的形式返回。但是上面的算法少了边界限制,完整如下:
countAround(i, j, dst) {
    var resArr = [];
    for (var m = (i-dst); m <= (i+dst); m++) {
        for (var n = (j-dst); n <= (j+dst); n++) {
            if ((Math.abs(m-i) + Math.abs(n-j) == dst) && (m >=0 && n >= 0) && (m <= (I-1) && n <= (J-1))) {
                resArr.push({x: m, y: n});
            }
        }
    }
    return resArr;
}这样我们就有了一个计算周围固定距离上所有点的纯净函数,接下来就开始完成动画渲染了。
首先编写一个用于清除单元格内容的清除函数,只需要传入坐标,就能清除该坐标单元格上的内容,等待之后绘制新的图案。
handleClear(i, j) {
    ctx.clearRect(dw*j, dh*i, dw, dh);
}anotherImg 为下一张图,最后通过 setInterval 不断向外层绘制新的图片完成碎片式的渐变效果。
var dst = 0,
intervalObj = setInterval(function() {
    var resArr = countAround(i, j, dst);

    resArr.forEach(function(item, index) {
        handleClear(item.x, item.y);
        handleDraw(anotherImg, item.x, item.y);
    });

    if (!resArr.length) {
        clearInterval(intervalObj);
    }
    dst ++;
}, 20);当 countAround 返回的数组长度为0,即到坐标点该距离上的所有点都在边界之外了,就停止定时器循环。至此所有核心代码已经介绍完毕,具体实现请查看源码。
现在给定画布上任意坐标,就能从该点开始向四周扩散完成碎片式的图片切换效果。
在自动轮播时,每次从预设好的8个点(四个角及四条边的中点)开始动画,8个点坐标如下:
var randomPoint = [{
    x: 0,
    y: 0
}, {
    x: I - 1,
    y: 0
}, {
    x: 0,
    y: J - 1
}, {
    x: I - 1,
    y: J - 1
}, {
    x: 0,
    y: Math.ceil(J / 2)
}, {
    x: I - 1,
    y: Math.ceil(J / 2)
}, {
    x: Math.ceil(I / 2),
    y: 0
}, {
    x: Math.ceil(I / 2),
    y: J - 1
}]点击时,则算出点击所在单元格坐标,从该点开始动画。
function handleClick(e) {
    var offsetX = e.offsetX,
      offsetY = e.offsetY,
      j = Math.floor(offsetX / dw),
      i = Math.floor(offsetY / dh),

    //有了i, j,开始动画...
},目前该效果只是 Demo 阶段,有空的话会将该效果插件化,方便有兴趣的朋友使用。
The above is the detailed content of Detailed explanation of the production method of html5 fragmented image switching. For more information, please follow other related articles on the PHP Chinese website!
 what is h5
 What are the production methods of html5 animation production?
 The difference between HTML and HTML5
 How to implement h5 to slide up and load the next page on the web side
 What is a dump file?
 How to enter root privileges in linux
 How to learn go language from 0 basics
 okex official website


