
This article details the creation of the first project based on eclipse (eclipse-jee-neon-3-win32-x86_64.zip) + spring boot.
spring Boot is a new framework provided by the Pivotal team. It is designed to simplify the initial construction and development process of new Spring applications. The framework uses an ad hoc approach to configuration, eliminating the need for developers to define boilerplate configurations. In this way, Boot strives to become a leader in the booming field of rapid application development. In other words, Spring Boot was born to simplify Spring development. The main idea is to reduce the entry level of spring so that novices can run the program under the spring framework as quickly as possible.
Today we will create the first project based on eclipse (eclipse-jee-neon-3-win32-x86_64.zip) + spring boot.
1. InstallationSTS plug-in
To use spring bootto create a project in eclipse, STS (Spring Tool Suite (STS) for Eclipse) must be installed first. If the network speed is strong, you can choose to install it online. Otherwise, it is recommended to choose offline installation.
1. Install online
Help -> Eclipse Marketplace
Search or select the "Popular" tab and select Spring Tool Suite (STS) for Eclipse plug-in, install:

2. Offline installation
(1) First download the STS plug-in, the download address is: https: //spring.io/tools/sts
(2)Help->Install New Software
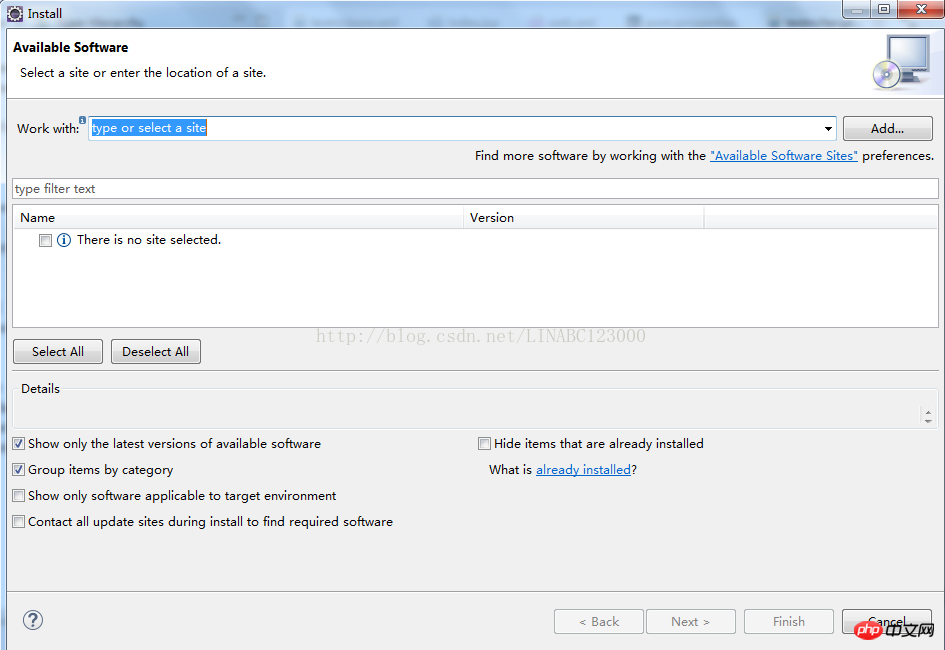
(3)Click "Add->Archive ..", then select the STS plug-in you just downloaded, give the plug-in a name, and click "OK".

# (4) Just select a few components ending with IDE to install. If the event is waiting for a long time, you can install them one by one.
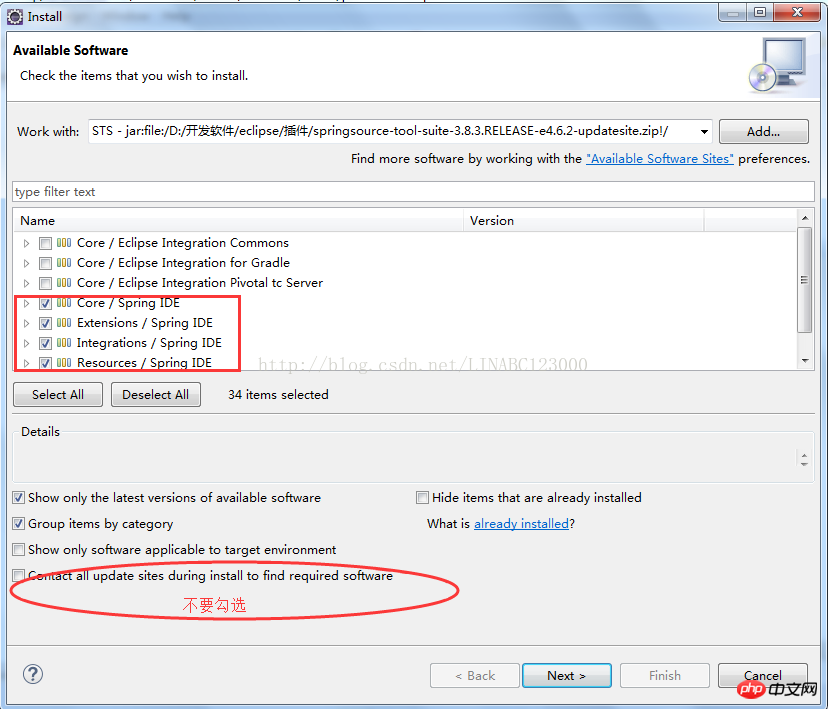
(5) Check whether the installation is successful
Window->Show View->Other, check whether there are Spring components, if there are, it means that we have The installation was successful.
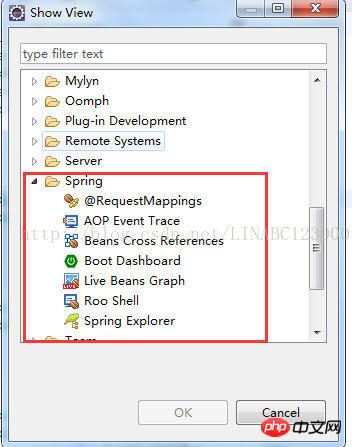
2. Create a Spring Boot project
(1) Create a project and select Spring starter Project. Fill in various information related to the project, and then Next:
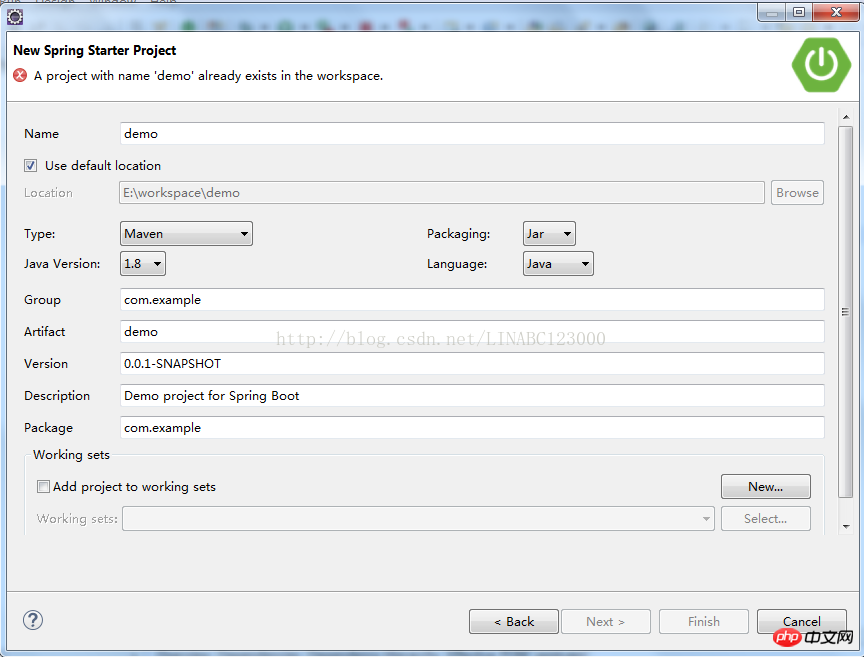
(2) Select the required Dependency, and then Next:
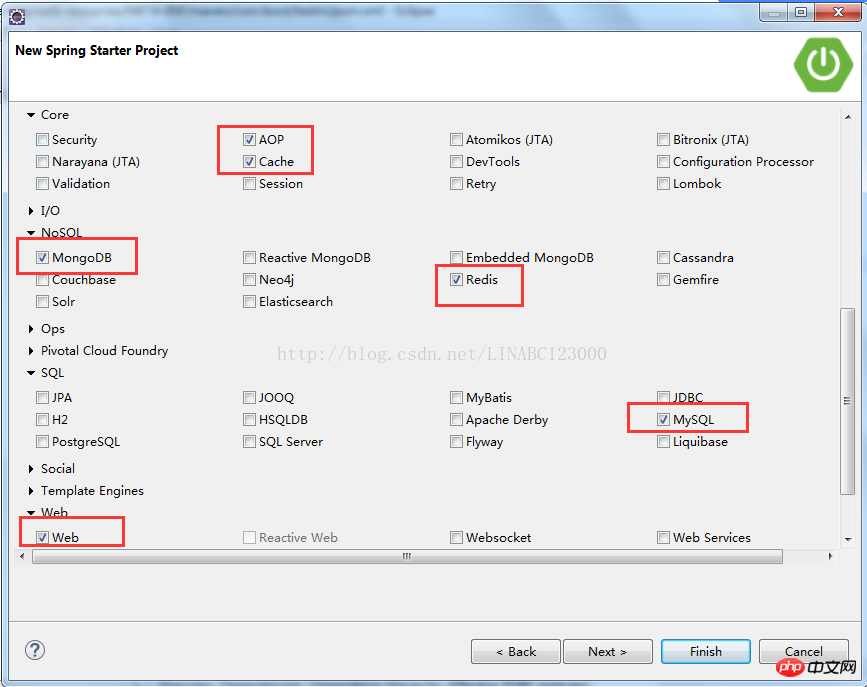
(3) Finally "Finish" and start downloading the jar package. This process takes a long time.
3. Run the project
(1) Right-click the main method in DemoApplication, Run As -> Spring Boot App, and the project will be ready started.
package com.example;

import org.springframework.boot.SpringApplication;
import org.springframework.boot.autoconfigure.SpringBootApplication;

@SpringBootApplication
public class DemoApplication {

 public static void main(String[] args) {
  SpringApplication.run(DemoApplication.class, args);
 }
}(2) If you want to run hello world, use the @RestController annotation and add the hello method.
package com.example;
import org.springframework.boot.SpringApplication;
import org.springframework.boot.autoconfigure.SpringBootApplication;
import org.springframework.web.bind.annotation.RequestMapping;
import org.springframework.web.bind.annotation.RestController;

@RestController
@SpringBootApplication
public class DemoApplication {

 @RequestMapping("/")
  public String hello(){
  return"Hello world!";
  }

 public static void main(String[] args) {
  SpringApplication.run(DemoApplication.class, args);
 }
}How to run our Application and see the output of hello world?
The first way is to run the main method directly:
Select the main method of DemoApplication -> Right-click -> Run as ->Java Application, then open the browser and enter the address: http ://127.0.0.1:8080/ and you can see Hello world!.
Second method:
Right-click the project -> Run as -> Maven build -> Enter spring-boot:run in Goals, then Apply, and finally click Run.
4. Packaging
1. Command: clean package
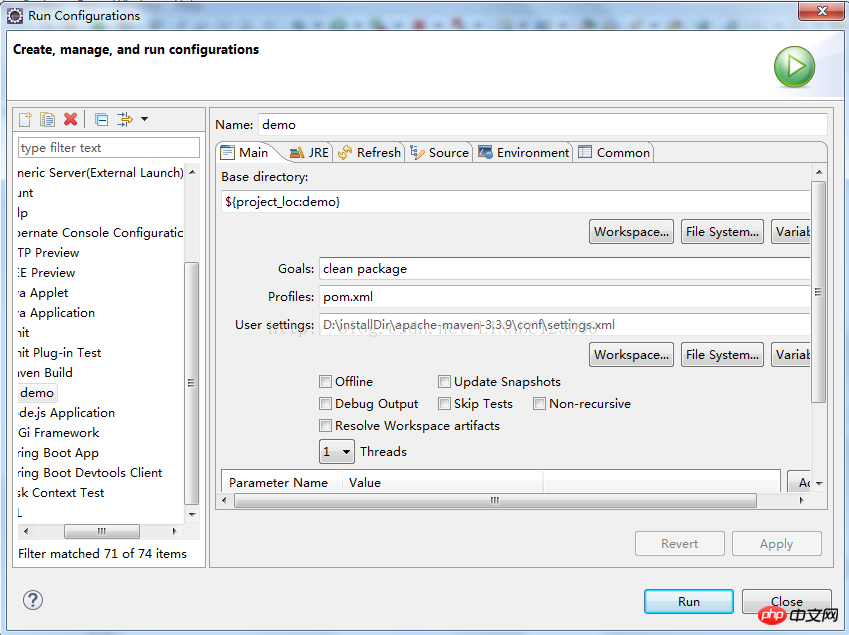
2. Execute command: Java –jar xxxxxx.jar
The above is the detailed content of Teach you java code examples for creating spring boot projects under eclipse. For more information, please follow other related articles on the PHP Chinese website!


