


Preparatory stage of WeChat development
2, Baidu BAE platform account
one, WeChat public account application
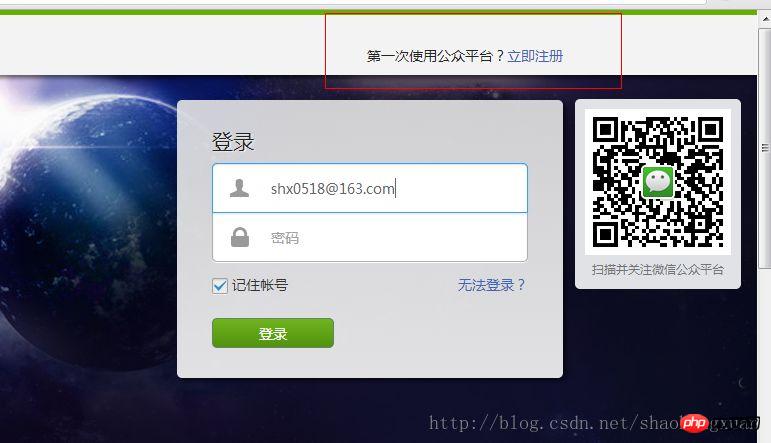
Log in to the WeChat public platform. There is registration in the upper right corner.
#Fill in the relevant information to register. What I registered here is a personal subscription account. If there is company information You can register a service account. In addition, due to the limited interface for personal subscription accounts, it is not very beneficial for personal development. WeChat also provides a test account, which is specially used by developers. Enter the following address to apply for a test account 
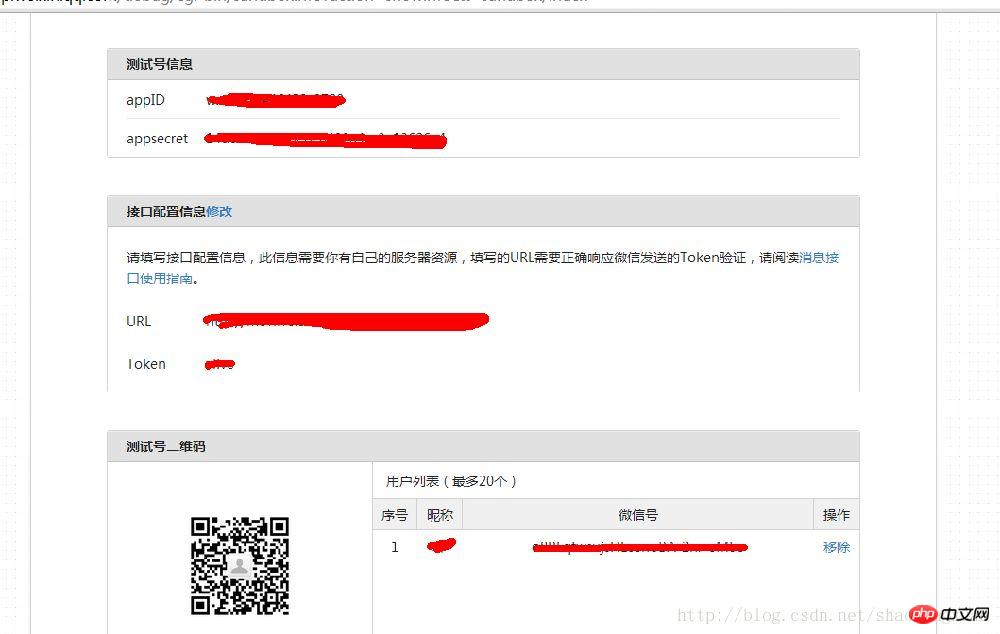
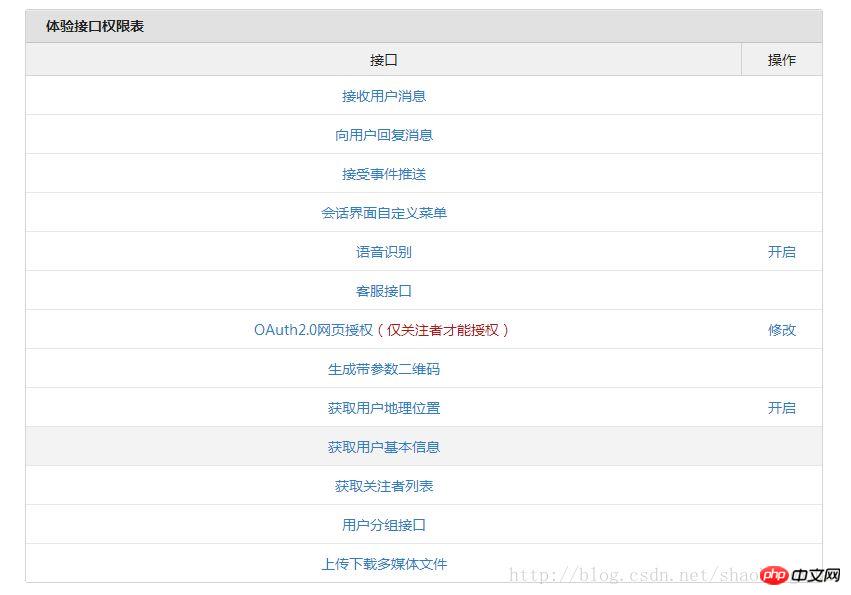
The test account permissions are still very good for development~
Because WeChat access developers The mode needs to provide the URL address that the WeChat server can send requests to, so your server must be able to access the public network. You can use DNS service providers such as Peanut Shell. Here, since I am using community broadband and cannot resolve it, I use Baidu instead. Bae, if you don’t have a public IP, you can try it. The initial access test feels very convenient. You can log in with a Baidu account. It should be noted that when using bae, you need to use svn and other management applications, but the user name is not supported. Chinese, so if your Baidu account is Chinese, you should re-register an English one.
After the preparations are completed, start writing code to become a developer of the WeChat public platform. The following code is from Teacher Liu Feng’s blog
Core class:
package com.vlive.action.connector;
import java.io.IOException;
import java.io.PrintWriter;
import javax.servlet.ServletException;
import javax.servlet.http.HttpServlet;
import javax.servlet.http.HttpServletRequest;
import javax.servlet.http.HttpServletResponse;
import com.vlive.utils.SignUtil;
public class URlresponse extends HttpServlet{
    @Override
    protected void doGet(HttpServletRequest req, HttpServletResponse resp)
            throws ServletException, IOException {
         // 微信加密签名
        String signature = req.getParameter("signature");
        // 时间戳
        String timestamp = req.getParameter("timestamp");
        // 随机数
        String nonce = req.getParameter("nonce");
        // 随机字符串
        String echostr = req.getParameter("echostr");
        PrintWriter out = resp.getWriter();
        // 通过检验signature对请求进行校验,若校验成功则原样返回echostr,表示接入成功,否则接入失败
        if (SignUtil.checkSignature(signature, timestamp, nonce)) {
            out.print(echostr);
        }
        out.close();
        out = null;
    }
}package com.vlive.utils;
import java.security.MessageDigest;
import java.security.NoSuchAlgorithmException;
import java.util.Arrays;
public class SignUtil {
private static String token="vlive";
public static boolean checkSignature(String signature, String timestamp, String nonce) {
String[] arr = new String[] { token, timestamp, nonce };
// 将token、timestamp、nonce三个参数进行字典序排序
Arrays.sort(arr);
StringBuilder content = new StringBuilder();
for (int i = 0; i < arr.length; i++) {
content.append(arr[i]);
}
MessageDigest md = null;
String tmpStr = null;
try {
md = MessageDigest.getInstance("SHA-1");
// 将三个参数字符串拼接成一个字符串进行sha1加密
byte[] digest = md.digest(content.toString().getBytes());
tmpStr = byteToStr(digest);
} catch (NoSuchAlgorithmException e) {
e.printStackTrace();
}
content = null;
// 将sha1加密后的字符串可与signature对比,标识该请求来源于微信
return tmpStr != null ? tmpStr.equals(signature.toUpperCase()) : false;
}
/**
* 将字节数组转换为十六进制字符串
*
* @param byteArray
* @return
*/
private static String byteToStr(byte[] byteArray) {
String strDigest = "";
for (int i = 0; i < byteArray.length; i++) {
strDigest += byteToHexStr(byteArray[i]);
}
return strDigest;
}
/**
* 将字节转换为十六进制字符串
*
* @param mByte
* @return
*/
private static String byteToHexStr(byte mByte) {
char[] Digit = { '0', '1', '2', '3', '4', '5', '6', '7', '8', '9', 'A', 'B', 'C', 'D', 'E', 'F' };
char[] tempArr = new char[2];
tempArr[0] = Digit[(mByte >>> 4) & 0X0F];
tempArr[1] = Digit[mByte & 0X0F];
String s = new String(tempArr);
return s;
}
}<?xml version="1.0" encoding="UTF-8"?>
<web-app version="2.5"
xmlns="http://java.sun.com/xml/ns/javaee"
xmlns:xsi="http://www.w3.org/2001/XMLSchema-instance"
xsi:schemaLocation="http://java.sun.com/xml/ns/javaee
http://java.sun.com/xml/ns/javaee/web-app_2_5.xsd">
<display-name></display-name>
<servlet>
<servlet-name>URlresponse</servlet-name>
<servlet-class>
com.vlive.action.connector.URlresponse
</servlet-class>
</servlet>
<!-- url-pattern中配置的/coreServlet用于指定该Servlet的访问路径 -->
<servlet-mapping>
<servlet-name>URlresponse</servlet-name>
<url-pattern>/urlresponse</url-pattern>
</servlet-mapping>
<welcome-file-list>
<welcome-file>index.jsp</welcome-file>
</welcome-file-list>
</web-app>The above is the detailed content of Introduction to graphic code in the preparation stage of WeChat development. For more information, please follow other related articles on the PHP Chinese website!


![[Web front-end] Node.js quick start](https://img.php.cn/upload/course/000/000/067/662b5d34ba7c0227.png)


