
Take the Canon LIDE 100 on hand as an example
First install the scanner driver, which can be done using the built-in driver CD or driver wizard.
Open the Photoshop program, take CS5 as an example, find the scanner entrance:
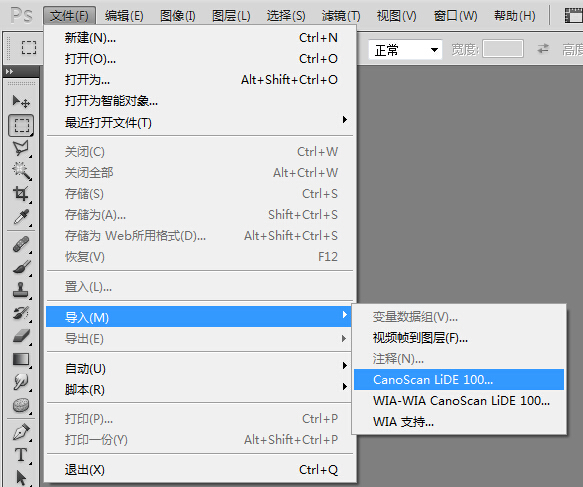
Click on Advanced Configure the mode. What the pen owner is planning to scan is ordinary B5 notebook data. The paper size is usually marked on the notebook cover. Entering it into the corresponding settings can reduce the scanning time and automatically crop it
About dpi:
Since the monitor currently used by the author is 18.5 inches and has a resolution of 1366*768, the current applied pixel density is calculated to be 85ppi (the pixel density of ordinary monitors is about 100ppi) , so the output resolution here is generally set to 150dpi, which is enough for general information document reference (about 2 times the effect of magnification)
Of course, it can also be set higher according to actual needs. The higher the dpi setting, the actual effect is The larger the size of the scanned image file, the more space it takes up.
The optical resolution of the scanner on hand is 2400x4800dpi, so theoretically the maximum available dpi for lossless is 2400
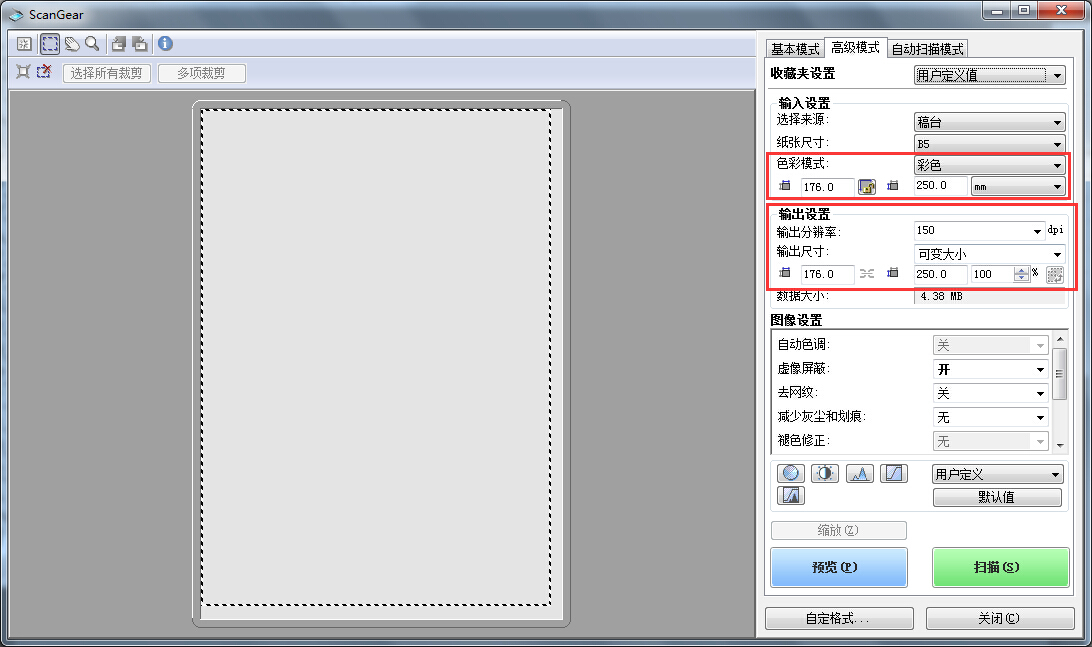
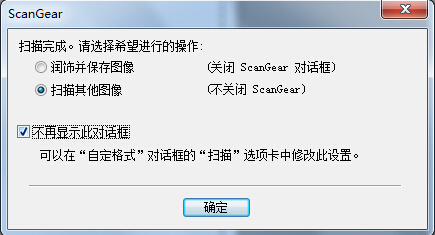
Insert the file to be scanned (aligned with the lower left corner as the benchmark) and click scan. After the scan is completed, you can click Scan other images in the pop-up prompt box And check Don't show again and continue scanning other files. The scanned images will automatically enter Photoshop's workspace (unsaved state)
After all files are scanned, close the ScanGear window, open the action panel (Alt+F9), create a new action, name it [Save], and record the saving and closing process of one of the scanned files
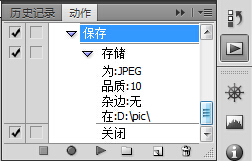
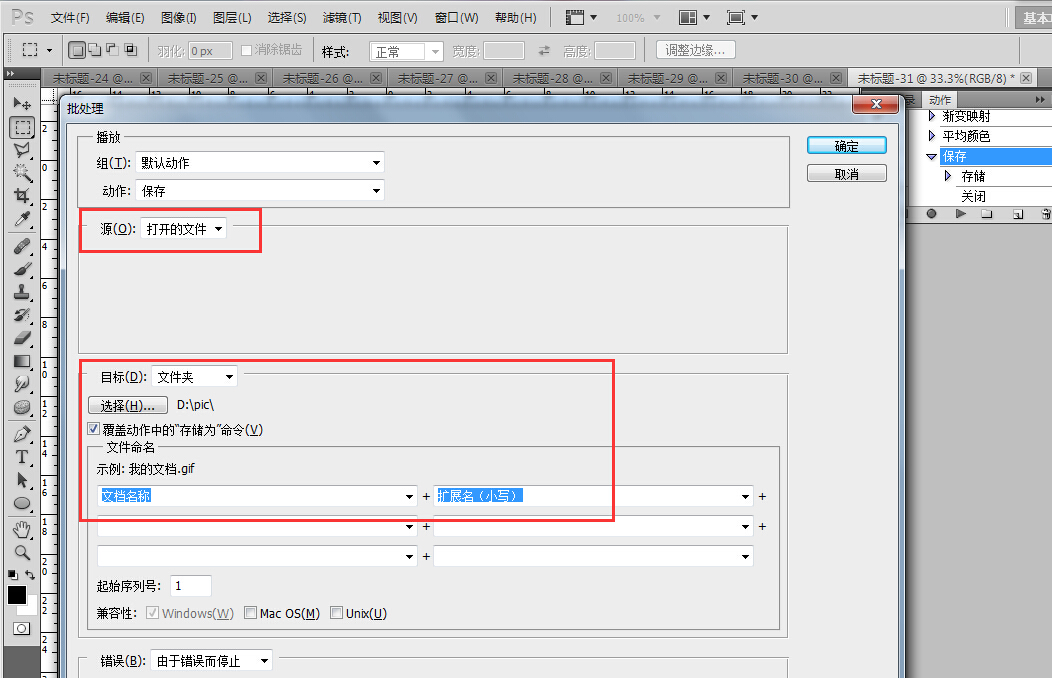
Open File-Auto-Batch Processing, select the [Save] action just recorded, select other options as shown below, click OK, the current job All scanned images in the area will be automatically saved in a batch to a designated folder (such as D:\pic\). Later, other batch naming tools can be used to rename all scanned image sequence files
taking into account system availability There is a memory space problem (each scanned image in the workspace occupies 15M of memory). It is recommended that after scanning a certain number of files (about 30 images), perform an automatic save batch operation and clear the temporary data in the workspace
MoreHow to use Photoshop to scan and save documents in batches For related articles, please pay attention to the PHP Chinese website!


