
Photos taken by digital cameras are generally very large, and the Internet has restrictions on the size of uploaded pictures. Pictures uploaded on Baidu Space cannot exceed 500KB, and some cannot even exceed 200KB. In this way, you need to We change the image size. Both Photoshop and Aseedc can achieve this goal by changing the pixel size of the image. When you want to change a lot of photos, you can use Photoshop's batch processing commands to let the computer complete the work automatically, which saves time and effort.
For example, I have 1,000 photos in the root directory of E:\bb photoes\20081004. The pixels are 2592*1944 and the size is about 1.5MB. I want to change them all to 800*600 pixels and save them in E:\bb photoes\ Copy to the root directory of 20081004.
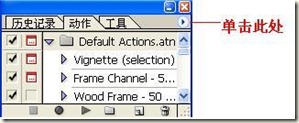
Run Photoshop, click the Window menu, select Action, the action tool window will pop up on the right side of the screen, click the small icon in the upper right corner Arrow, as shown in the figure:
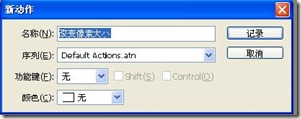
Click New Action in the pop-up menu, the action dialog window will pop up, type in the name to change the pixel size, such as Picture:
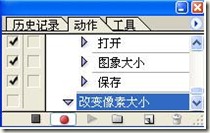
Click record. Then we can see that the small dot under the action tool window on the right turns red, indicating that action recording has started. As shown in the picture:
Now we start the action to be recorded. Click the Photoshop file menu and open the picture under the root directory of E:\bb photos\20081004.
Click the Image menu, select Image Size, change the pixel size to 800*600, and click OK.
Click the Photoshop file menu, select Save As, and save the image in the root directory of E:\bb photos\copy 20081004 (the file name does not need to be changed). Do not make any changes in the JPEG option that pops up, and click OK.
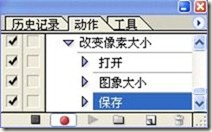
We can see that in the action tool window on the right, three newly recorded actions appear under changing pixel size, open, image size, and save, as shown in the figure:
Click the small box to the left of the red dot to stop recording and the recording will be completed.
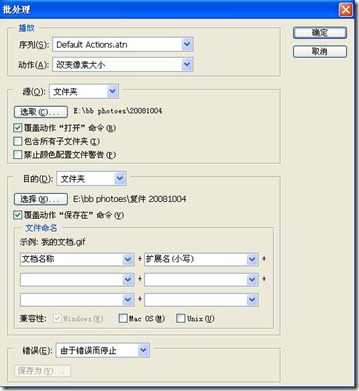
Then execute the batch command. Click the Photoshop file menu, select Automatic, select Batch Processing, the batch processing dialog window pops up, select the action to change the pixel size, select the correct source folder and destination folder paths, override the action "Open" command Check the "Save in" command and the overlay action, and then click OK, as shown in the figure:
More resolutions (sizes) for batch processing of photos using PhotoShop For related articles, please pay attention to the PHP Chinese website!


