
The material picture does not look complicated, but it is difficult to retain all the hair details, colors, etc. using a single cutout method. The author here used to adjust the edges to quickly cut out the subject, used the extraction filter to retain the details of the hair, and then used the channel to restore the color. The final effect was perfect. Final effect

Original image

1. Open the image , ctrl+j to copy a layer to get layer 1, click on the red circle to create a new layer 2, place it between layer 1 and the background layer, fill it with the color you like as a check effect and a new background layer.
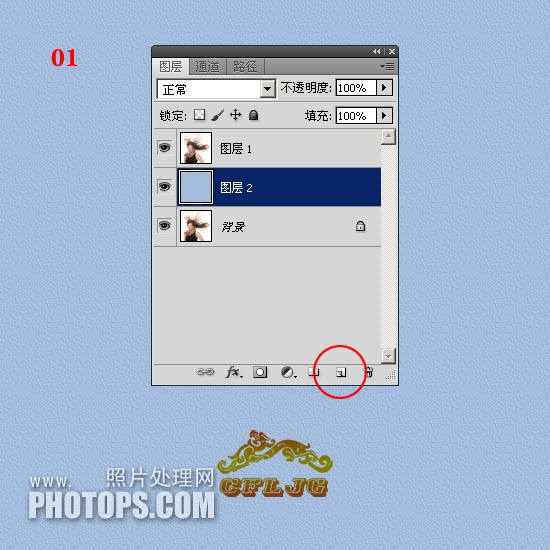
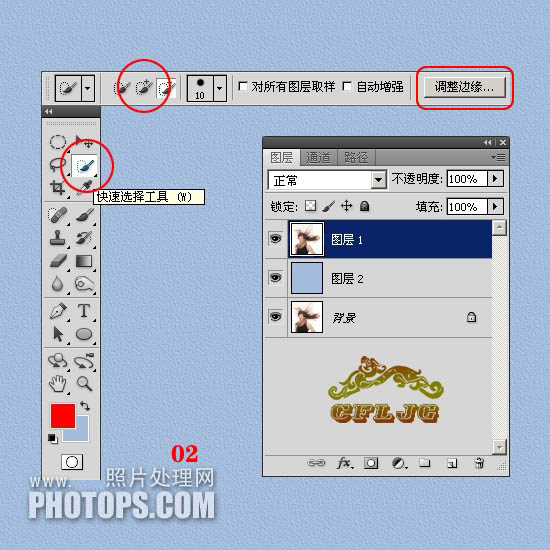
2. Click on layer 1 and use the "Quick Selection Tool" to roughly make a selection. After the selection is made, the "Adjust Edges" option will be activated.
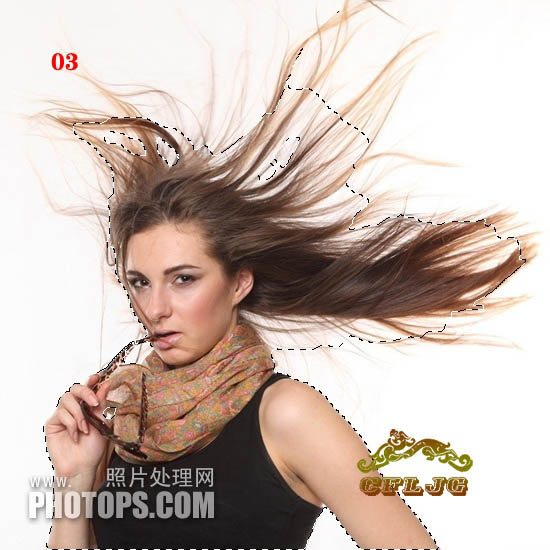
3. An ant line appears in the constituency.
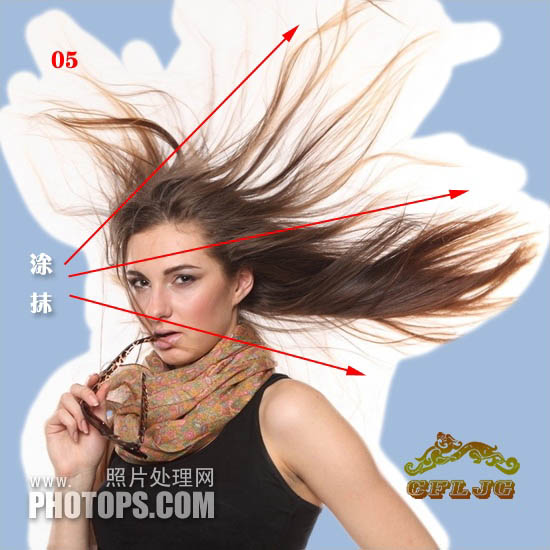
4. Click the Adjust Edge option to bring up the Adjust Edge dialog box. For the time being, refer to the settings of the icons for each parameter. Use the Adjust Radius tool to adjust the character's shape. Paint edges.
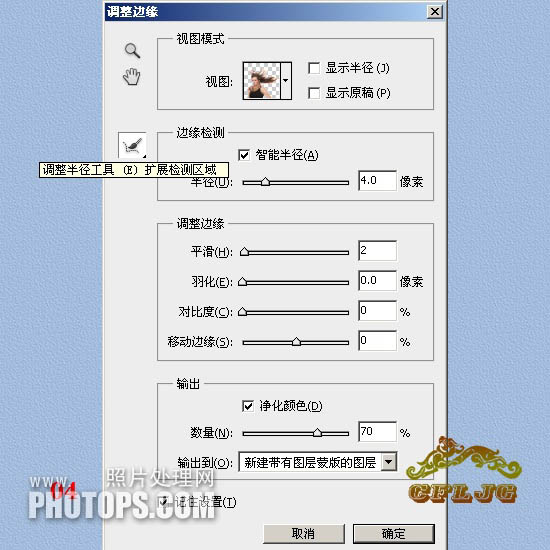
5. When applying, try to coat all the hair. If you find that there is something left that has not been coated, you can re-apply the missed areas. once, until all hair is shown. If you find that the original background color is still left between the hair strands, just apply it where it is and it will be resolved. Click OK when you are satisfied.
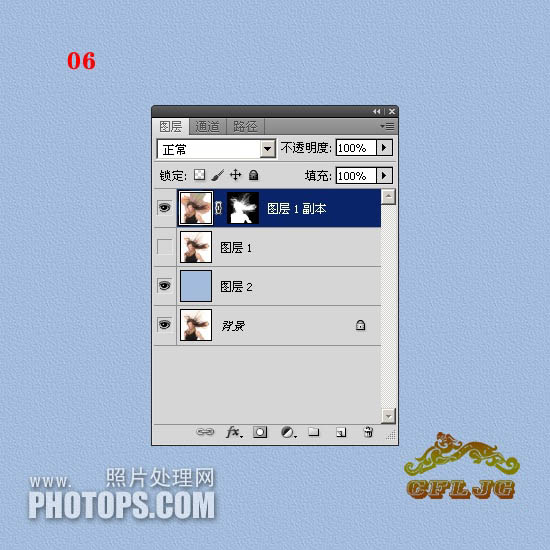
6. After confirmation, create a new copy of layer 1 with a layer mask.
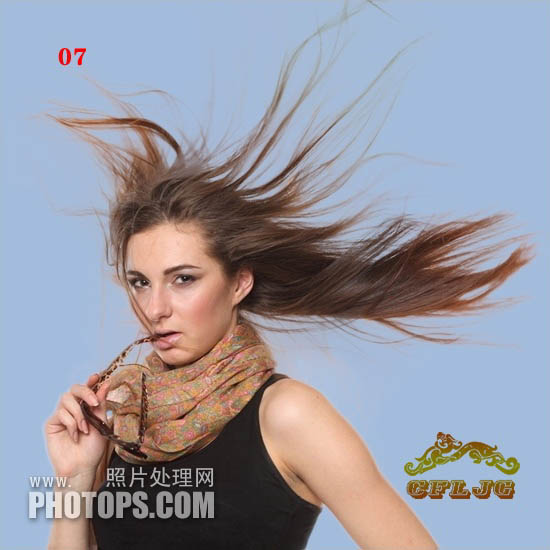
7. At this time, the distribution cutout is basically completed. This is the real "mask cutout", which is a new addition to the photoshop upgrade. Function, it is fast to cut out pictures, and the original color of the edge hair is basically retained. It is an excellent tool. However, we also see that a lot of scattered details are lost, so the edge mask cutout method is not a panacea, so don’t regard it as magical.
 8. What to do with the lost details? This requires an old tool, a tool abandoned by the new version of PS, to extract the filter to retrieve the lost details. Click on layer 1, turn off the small eyes of the copy layer of layer 1, execute filter in layer 1--extract--check the force foreground--take the eyedropper at the darkest red point of the hair in the picture Color - Use the highlighter tool to apply green as shown - OK.
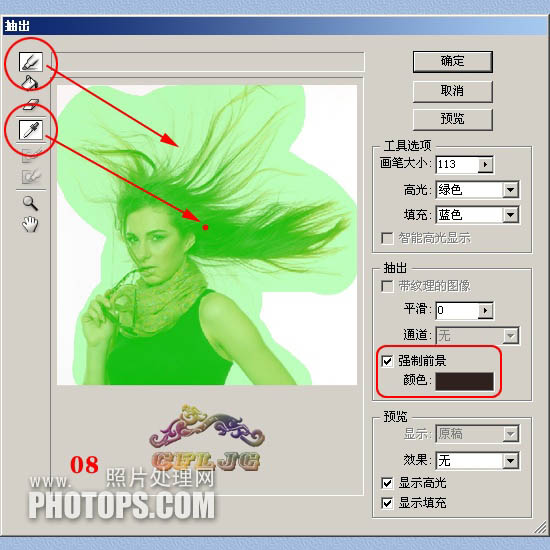
9. Extract the details of the hair. Note that you must enlarge the picture after extracting it, and use an eraser or layer mask to remove the excess. Clean up the edge noise to keep the picture clear.
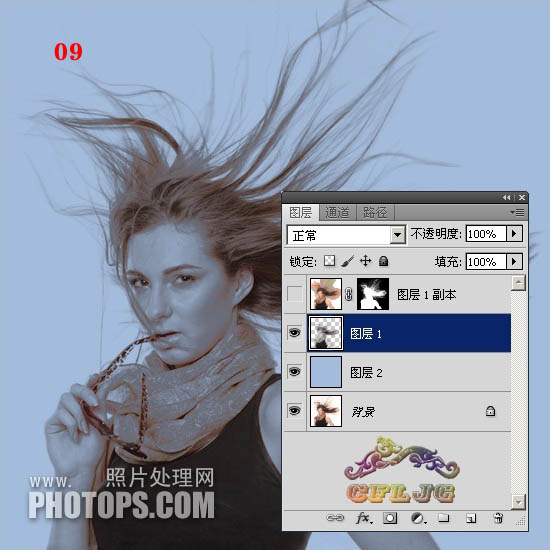
10. Compare and see if there is any obvious loss of details and whether they have been filled in.
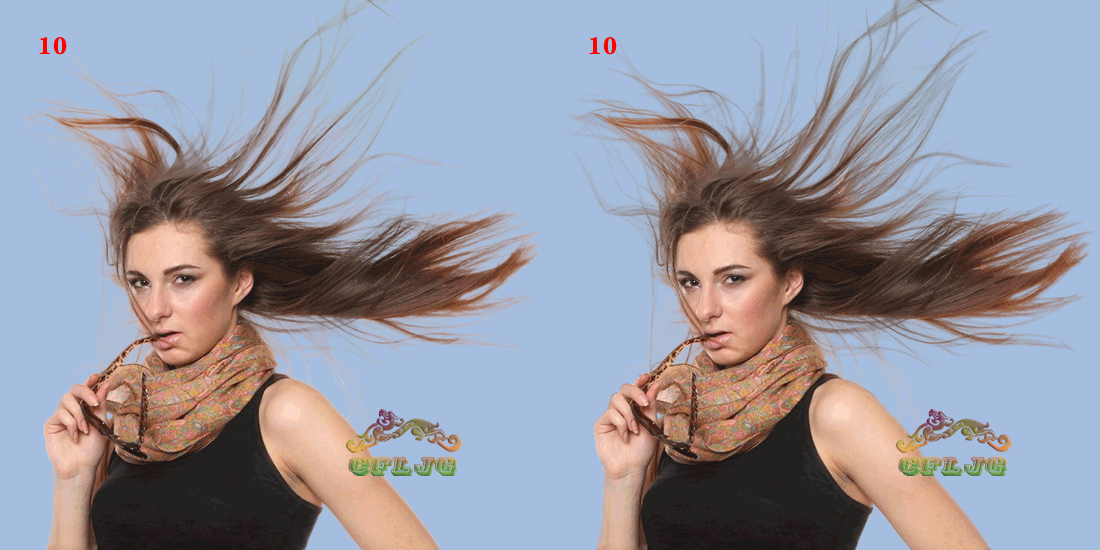
11. The details have been recovered. This is the indelible contribution of taking out the filter. However, new problems have appeared again, and the color of the hair has also been lost. Okay, what should I do? Don't worry, we'll figure it out later.

12. Click on the background layer, turn off the small eyes in front of the copy layer of layer 1, layer 2 and layer 1, and enter the channel , copy the blue channel to get a blue copy, because the blue channel has the richest details.
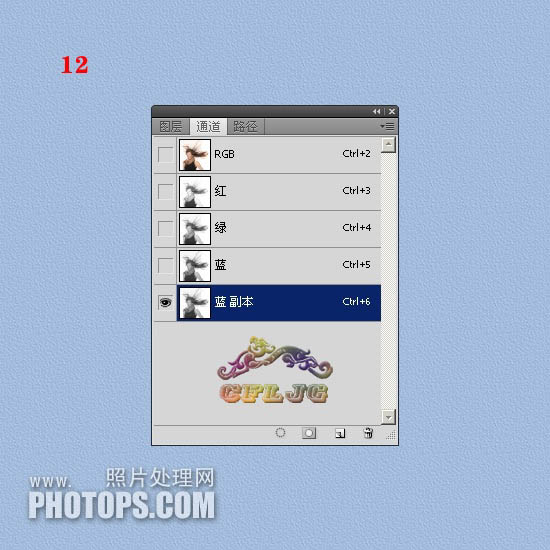
13. Execute Image--Adjustment--Levels in the blue copy, and set the parameters as shown in the figure.
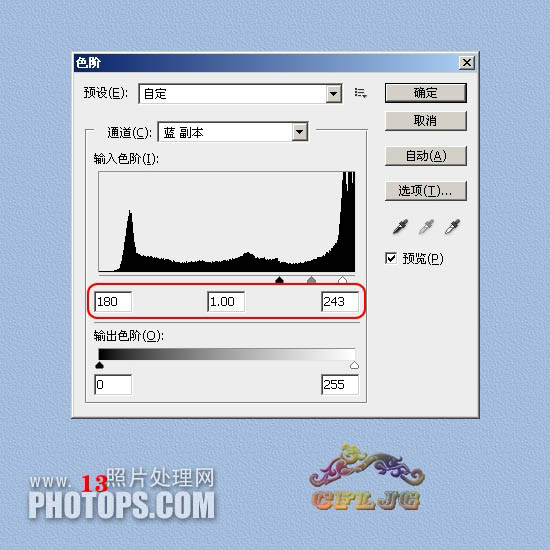
14. We can see that there are still variegated colors on the edge of the hair. Use a white paintbrush to clean it up. There is still white in the main body of the character. Paint solid with black paintbrush.
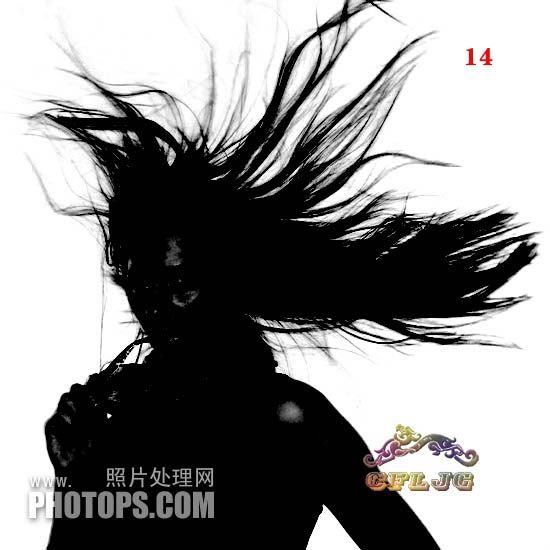
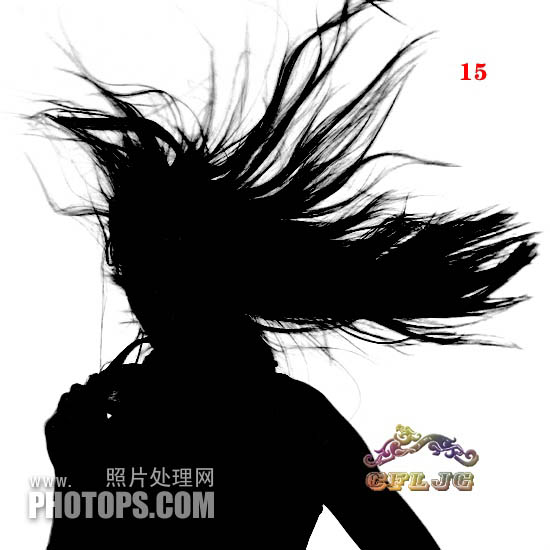
#15. After being painted and modified with a black and white brush, the result is like this.
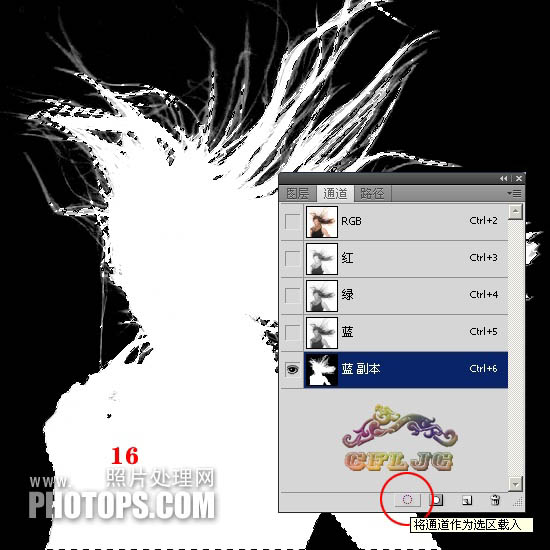
16. We use channels to make selections and extract the parts we want through the channels. The white color in the channels represents what we want to extract. For parts, black represents the part to be discarded, and gray represents the extracted translucent part. In other words, make the part you want white, the unwanted part black, and the translucent part gray. Use ctrl+i to invert, click on the red circle to make a selection, and an ant line will appear.
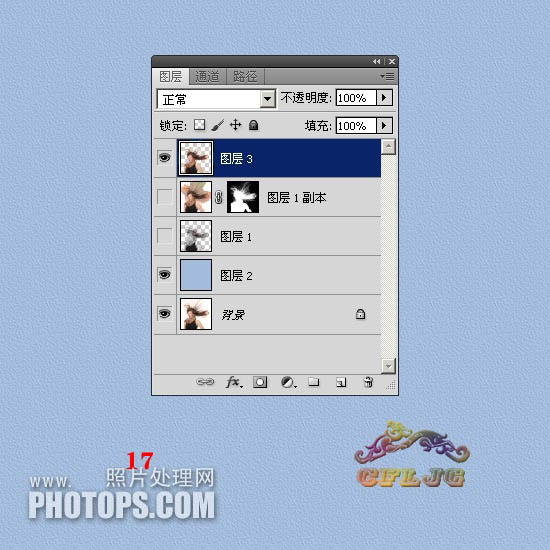
17. Click on the RGB channel, return to the background layer, ctrl+j to copy, and put layer 3 on the top level.
18. This is the channel cutout, and the cutout picture is like this.

19. Set the blending mode of layer 3 to color and turn on the small eyes of all layers.
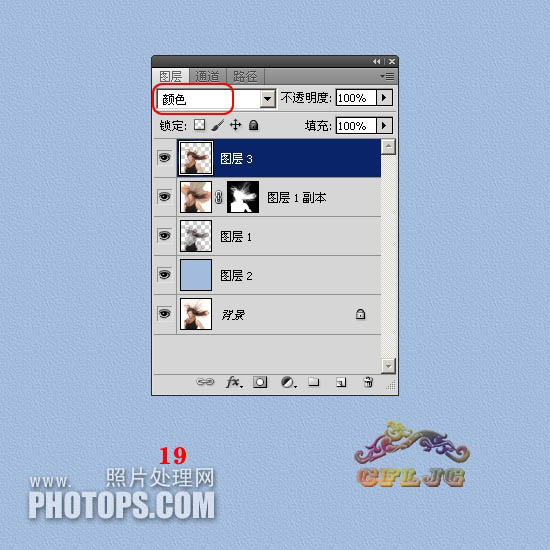
Twenty, wow! The lost color was found.

Twenty-one, ctrl+shift+alt+e stamp the layer to get layer 4, and do appropriate sharpening on layer 4 Add texture.
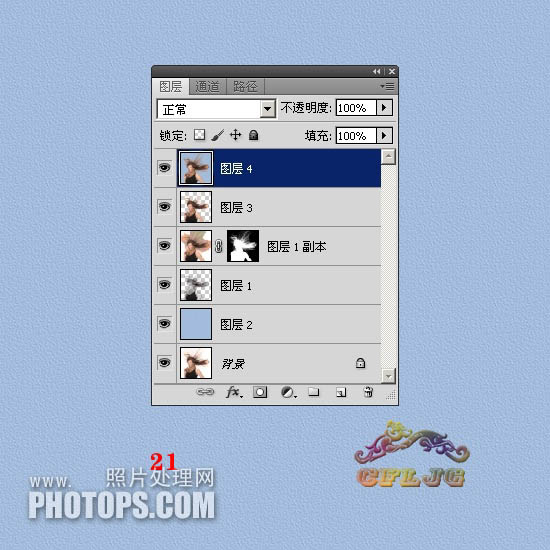
Final effect:

Please pay attention to more articles related to PS mask cutout PHP Chinese website!
 pycharm find file method
 Commonly used permutation and combination formulas
 What are the differences between hibernate and mybatis
 How to use sort function
 ie shortcut cannot be deleted
 What are the differences between cellpadding and cellspacing?
 Why can't my mobile phone make calls but not surf the Internet?
 The difference between xls and xlsx


