
The author has unique insights into character editing. He processes light and shadow based on the structural diagram of the face. In this way, the processed portrait has natural light and shadow, and the effect is very ideal.
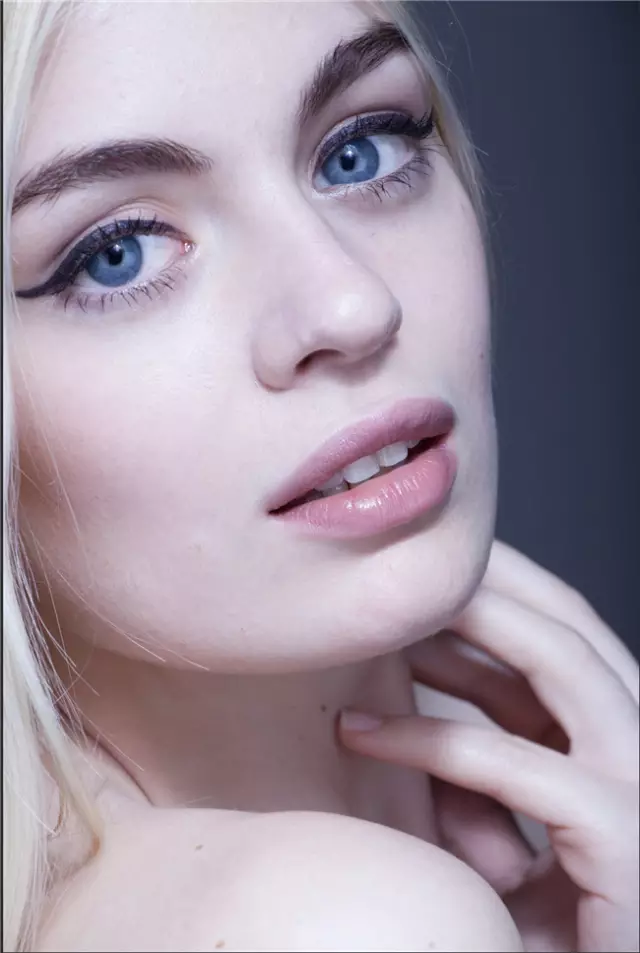
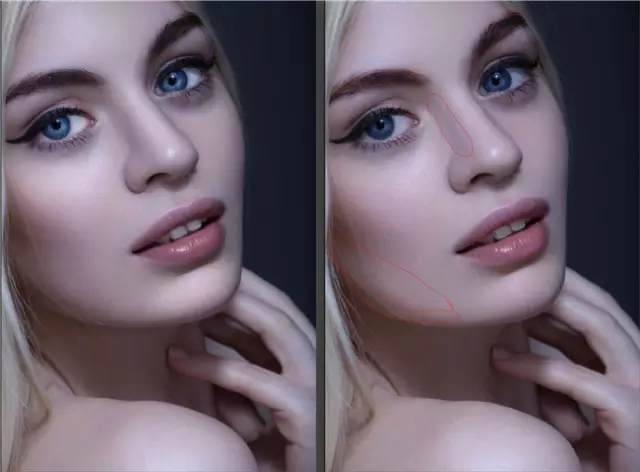
Original image
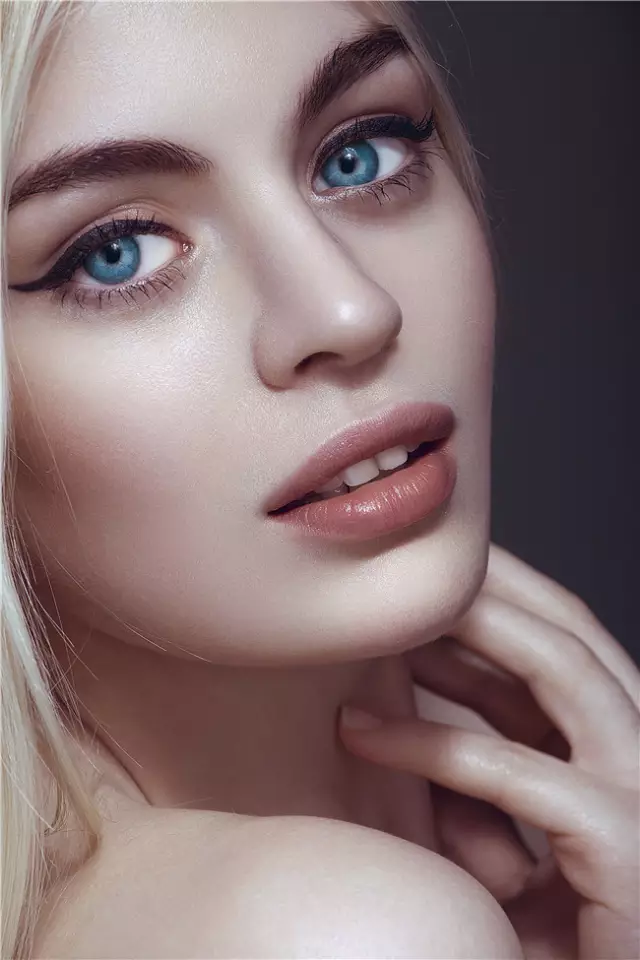
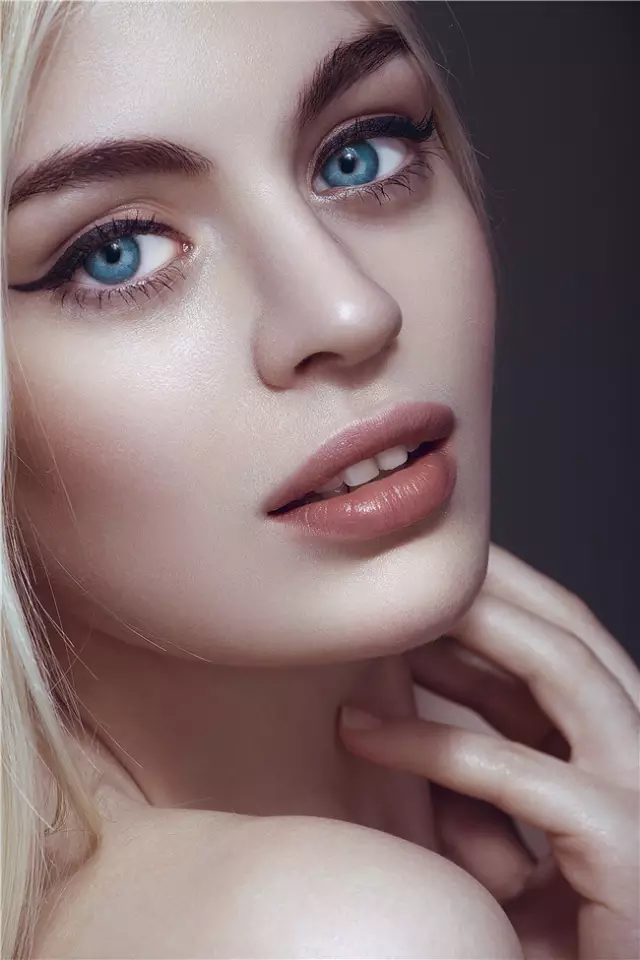
Final effect
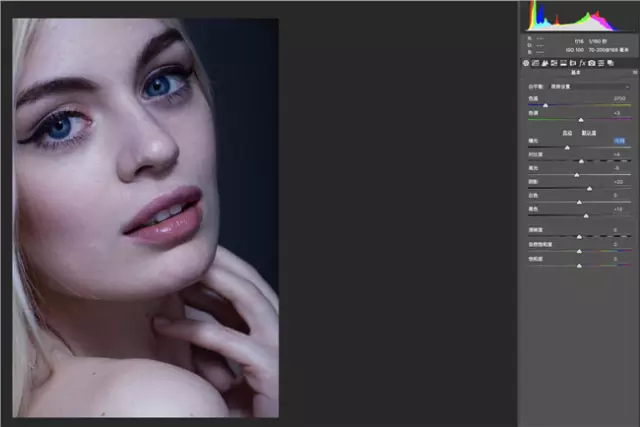
1 , when we transfer the film, we lower the exposure and increase the contrast. Let’s first bring back some of the texture of the image.
#2. Next, we create an observation layer and turn the film into black and white to observe the light and shadow.
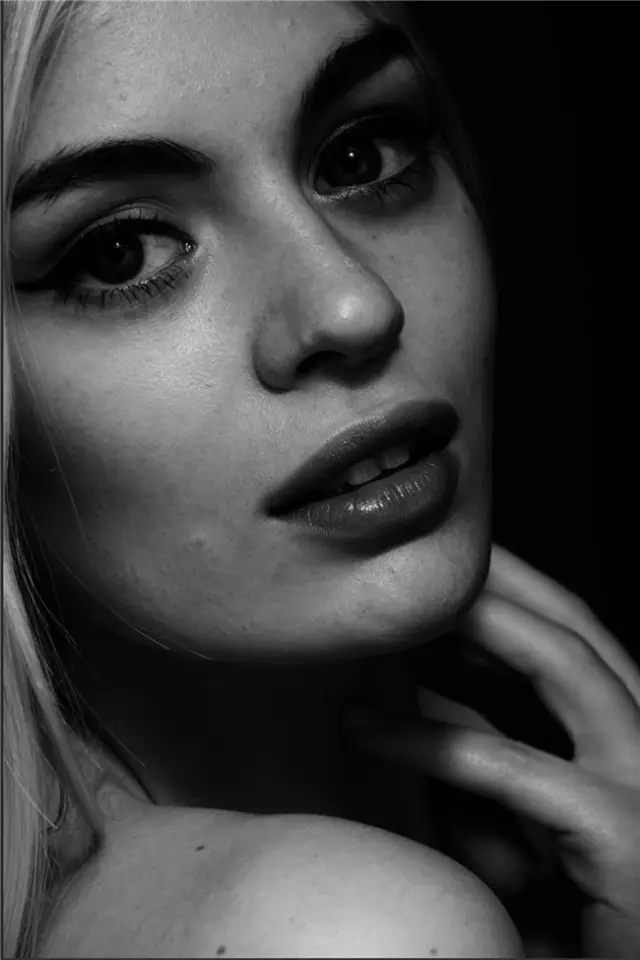
3. We can find that the light and shadow in these areas are very messy. These are the main reasons why our films are dirty, messy, and flowery. How do we deal with this mess? The light and shadow make our film look three-dimensional and clean.
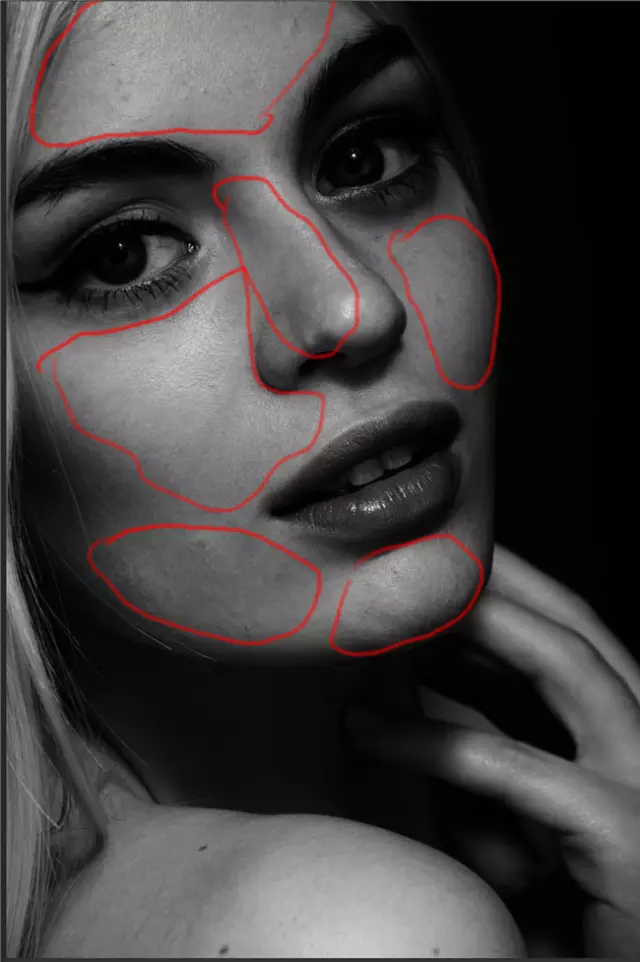
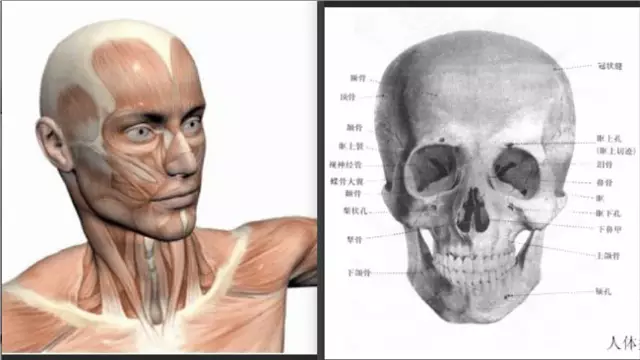
#4. First, we need to understand that a human face is composed of bones, muscles, and skin, and the three are related to each other.
The bones support the highlight points, the muscles connect and fill the main bones, and the skin is the most superficial material (what we call texture). If you only modify the surface of the skin and don't pay attention to the bone points and muscle directions, your picture will be a mess.
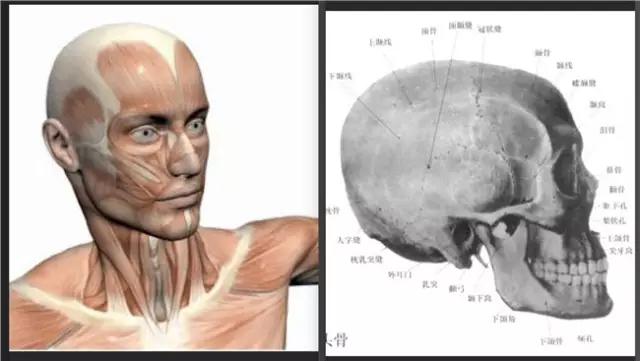
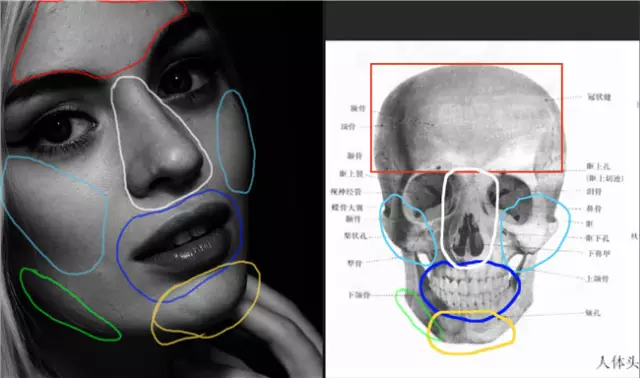
We first need to analyze the character's bones to find the locations of several important structures. We will observe them with the example of the character's skull, so that it is clear at a glance! Find the forehead, cheekbones, mouth, chin, and mandible.
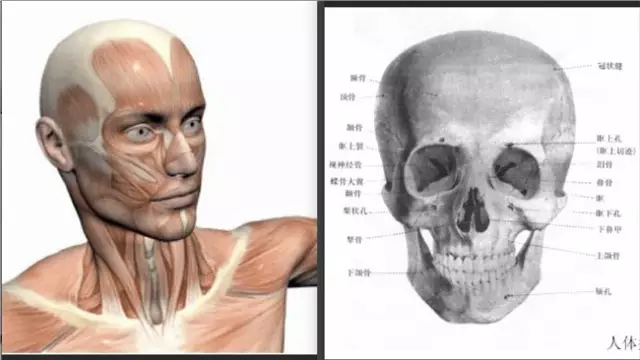
6. We have said that muscles play an important role in connecting bones, so let’s observe the direction of muscles [ps: If you use stamps to follow the direction of muscles, I don’t know how to retouch pictures, except for novices]. When you retouch the picture, you can simulate the movements of the muscles hidden deep under the skin in your mind. You will no longer scribble on them. You will know which places are concave and which are convex. Below we will still explain it with pictures.
#7. First remove the big flaws on the picture.
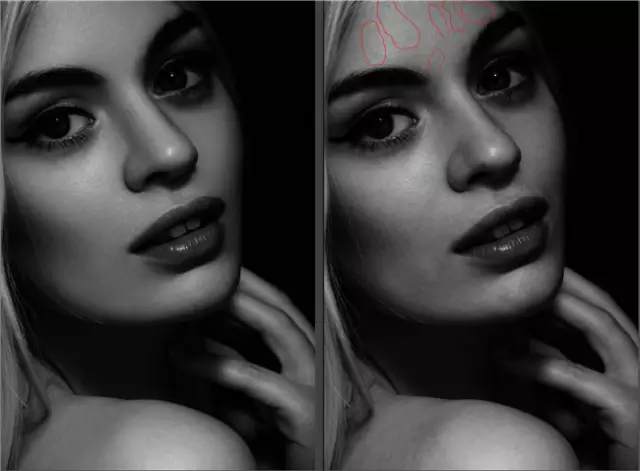
Starting from the forehead, the shape of the forehead has a curvature, we need to resolve the elements that affect the retouching [I use neutral gray here, the method is not limited] The so-called fullness of the heaven refers to the convex middle and the two sides slowly sliding down. According to each person's forehead, we can just make a transition from left to right. There is no need to change the flat forehead into an oval.
#9. Next, let’s look at the problem between the cheekbones and the nose. We can see that there are some obvious black and white areas on the side of the nose and in front of the cheekbones. We use the darken and dodge method to slowly transition these uneven areas, so that the transition between the two important structures becomes gentle.
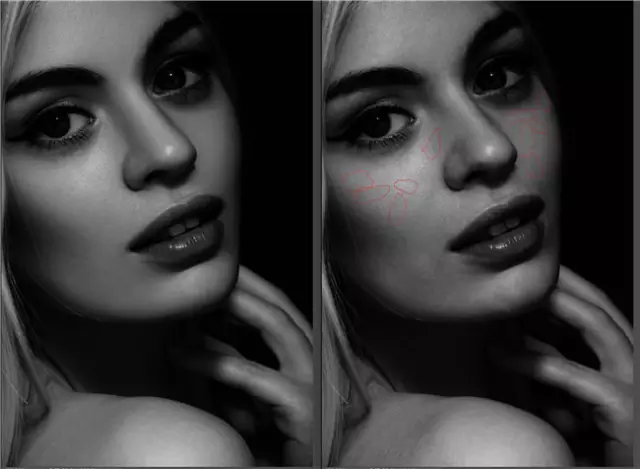
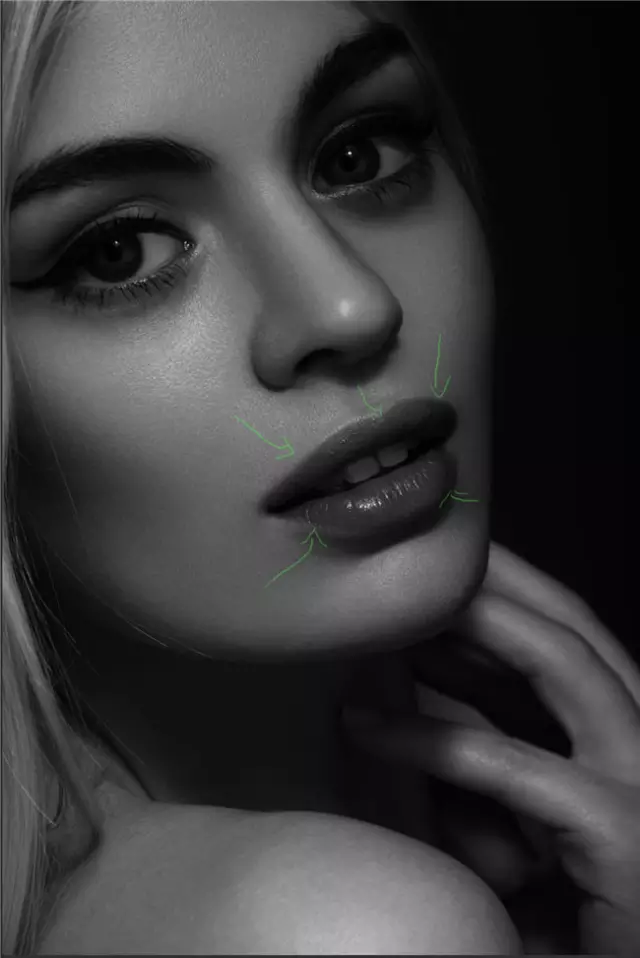
10. Next is the transition from the cheekbones to the mouth. The transition from the cheekbones to the mouth is concave at first, and then slowly raised. You can touch your face to feel it. We can also see that the nasolabial folds and the area above the mouth are very disharmonious and look very dirty. We use the same method to transition them.
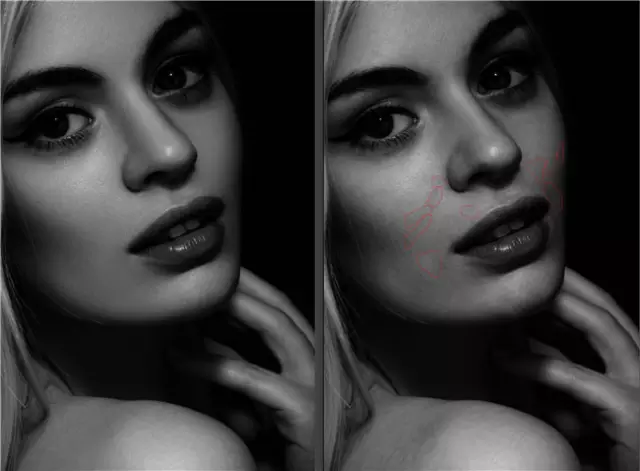
11. The next step is from the cheekbone to the lower jaw. This is also an arc. It is concave first and then protrudes. This transition is very important. You must remember this arc. , you need to find this arc in the original image, and then according to the shape of the original image, appropriately strengthen it without obvious, make an obvious transition, and solve the small patches on this curve one by one.
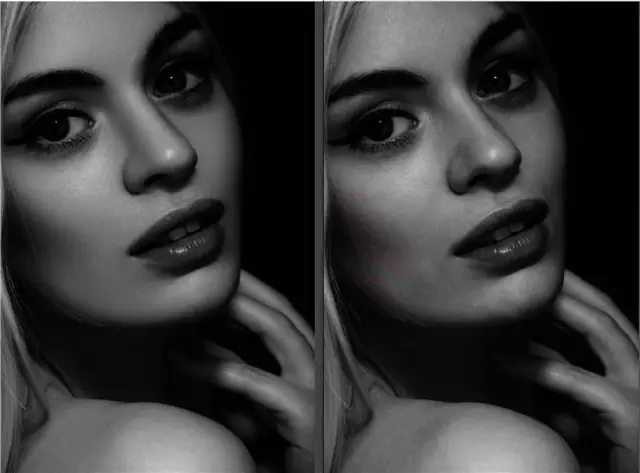
12. Finally, there is the chin, which extends from the middle to both sides and slowly connects with the lower jaw. We must pay attention to the connection here and make the grayscale look harmonious. The transition should not be too bright or dark, otherwise it will affect the realism of the picture.
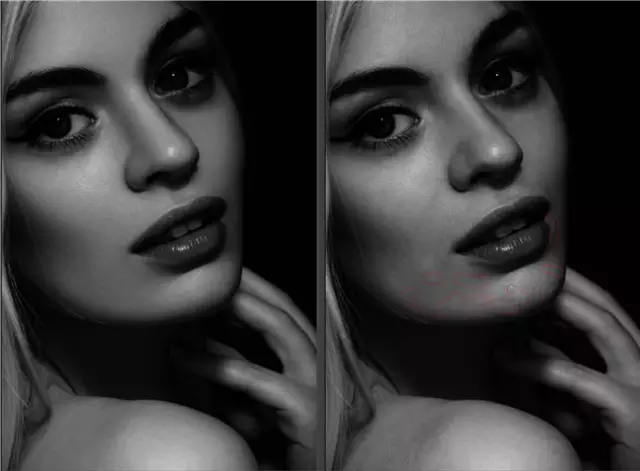
13. Also, we should pay attention when connecting these shapes with the mouth. The mouth is a convex cylinder, so we must move slowly to the position of the mouth. Carry out the embossing slowly, and don't let one grayscale go directly to the mouth. Otherwise, no matter how detailed you are in shaping it, your mouth will look like it is attached to the picture instead of growing on your body.
14. Next, we turn off the observation group and enhance the highlights of the picture to make the picture shine through.
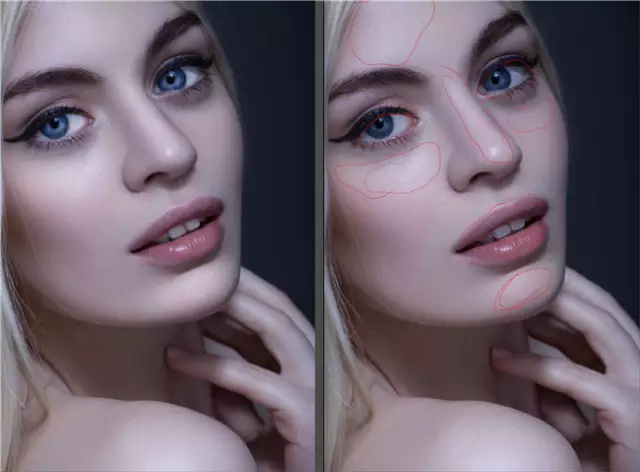
#15. Darken the shadow part. Here I use curves and mask wiping to make the character more three-dimensional, but you should pay attention to the degree. If it is too much, it will be dirty.
#16. Finally, we add some sharpening to make the texture level on the picture better. In this way, our retouching is complete.
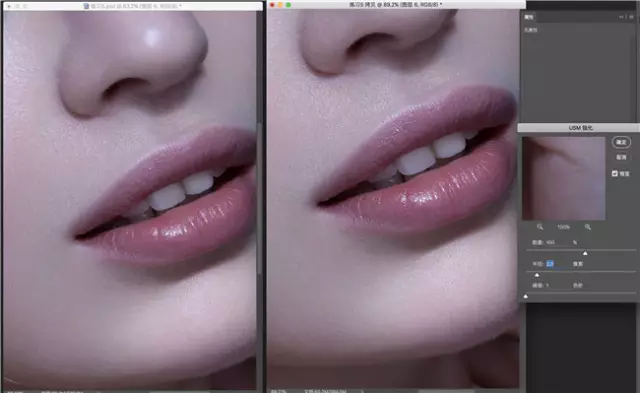
The rest is some color grading and detail adjustments.
Final effect:
Thanks for supporting the PHP Chinese website!
 How to light up Douyin close friends moment
 What should I do if my computer starts up and the screen shows a black screen with no signal?
 Kaspersky Firewall
 plugin.exe application error
 nvidia geforce 940mx
 Do you know if you cancel the other person immediately after following them on Douyin?
 How to calculate the refund handling fee for Railway 12306
 Top ten digital currency exchanges


