AngularJS extends HTML with new properties and expressions. Angularjs is also very easy to learn.
1. Who is AngularJS
Angular JS (Angular.JS) is a set of frameworks, templates, data binding and rich UI components used to develop web pages. It supports the entire development process and provides the architecture of web applications without manual DOM manipulation.
AngularJS is designed to overcome the shortcomings of HTML in building applications. HTML is a good declarative language designed for static text display, but it is weak when it comes to building WEB applications. AngularJS comes into being here, making up for the natural shortcomings of HTML and used to build web applications.
2. How to understand AngularJS
AngularJS was born in 2009, created by Misko Hevery and others, and later acquired by Google.
AngularJS official website: http://www.angularjs.org (generally it will be blocked, so you can visit the following website)
AngularJS Chinese website: http://www.ngnice.com
Books: "AngularJS Authoritative Tutorial", "Developing Next-Generation Web Applications with AngularJS", etc. Personal opinion, For your information
Remarks: Video tutorial. I recently watched Teacher Da Mo’s AngularJS tutorial. I thought it was pretty good, but I feel like I still can’t understand it without any basic knowledge, or I have to watch it several times (not for advertising)
3. Why you need to know AngularJS
For a new technology to come out, become known to everyone, and then stand out, it is definitely not groundless. It must have its unique and unique features. The main points are as follows:
(1) The idea of MVC (or MVVM)
(2) Modularization and dependency injection
(3) Two-way data binding
(4) Command
Each feature can be expanded on in a large space. Obviously, the current capabilities are not enough to expand it. If you are interested, you can search online and get a general understanding.
Today I will mainly talk about the usage and differences of the three directives "@", "=" and "&" of AngularJS (this problem bothered me for most of the day, and I only understood it after communicating with Frank many times)
1.@
in directive scopeis used to pass the current attribute as a string.
First enter the code, the front-end interface:
<!doctype html>
<html ng-app="MyModule">
<head>
<meta charset="utf-">
<link rel="stylesheet" href="../css/bootstrap.css">
</head>
<body>
<div ng-controller="MyCtrl">
<drink water="{{pureWater}}"></drink>
</div>
</body>
<script src="../js/angular.js">
<script src="ScopeAt.js"></script>
</html>JS code:
var myModule = angular.module("MyModule", []);
myModule.controller('MyCtrl', ['$scope', function($scope){
$scope.pureWater="纯净水";
}])
myModule.directive("drink", function() {
return {
restrict:'AE',
scope:{
water:'@'
},
template:"<div>{{water}}</div>"
}
});The execution results are unremarkable, but there are hidden secrets:

(1) In the HTML page, declare a tag
(2) In the JS file, first start with the module, then create a controller line 2~line 4, and then define an instruction. The main implementation is to replace "
(3) Focus on the
here
scope:{
water:'@'
}This expression is equivalent to:
link:function(scope,element,attrs){
scope.water=attrs.water;
}The specific meaning is to define an attribute name: water on the scope of the instruction. Its value is the value of the water attribute in the front-end interface, that is, "{{pureWater}}";
At the same time, the value of {{pureWater}} can be seen from the declared controller:
$scope.pureWater="Pure water";
So the final page displays "purified water", and the main process is:
a. In the instruction, use @ to associate the instruction with the HTML page element;
b. The connection with the page is realized in the controller;
c. This establishes the connection between the controller and the command with the help of HTML page, which is also a communication method.
See the picture below for details:

2. =
in directive scopeThe function is to perform two-way binding with the properties in the parent scope.
<!doctype html>
<html ng-app="MyModule">
<head>
<meta charset="utf-">
<link rel="stylesheet" href="../css/bootstrap.css">
</head>
<body>
<div ng-controller="MyCtrl">
Ctrl:
<br>
<input type="text" ng-model="pureWater">
<br>
Directive:
<br>
<drink water="pureWater"></drink>
</div>
</body>
<script src="../js/angular.js"></script>
<script src="ScopeEqual.js"></script>
</html>
var myModule = angular.module("MyModule", []);
myModule.controller('MyCtrl', ['$scope', function($scope){
$scope.pureWater="纯净水";
}])
myModule.directive("drink", function() {
return {
restrict:'AE',
scope:{
water:'='
},
template:'<input type="text" ng-model="water"/>'
}
});The method of = here is similar. Two input boxes are set up on the page to represent the scope of the command and the controller respectively. Two-way binding is implemented in the JS code, so that the controller and the command can affect each other within their respective scopes. That is two-way communication. The specific idea is similar to @, so I won’t go into details. The picture above:

3.&
in directive scopeThe main function is to pass a function from the parent scope to be called later.
<!doctype html>
<html ng-app="MyModule">
<head>
<meta charset="utf-">
<link rel="stylesheet" href="../css/bootstrap.css">
</head>
<body>
<div ng-controller="MyCtrl">
<greeting greet="sayHello(name)"></greeting>
<greeting greet="sayHello(name)"></greeting>
<greeting greet="sayHello(name)"></greeting>
</div>
</body>
<script src="../js/angular.js"></script>
<script src="ScopeAnd.js"></script>
</html>
var myModule = angular.module("MyModule", []);
myModule.controller('MyCtrl', ['$scope', function($scope){
$scope.sayHello=function(name){
alert("Hello "+name);
}
}])
myModule.directive("greeting", function() {
return {
restrict:'AE',
scope:{
greet:'&'
},
template:'<input type="text" ng-model="userName" /><br/>'+
'<button class="btn btn-default" ng-click="greet({name:userName})">Greeting</button><br/>'
}
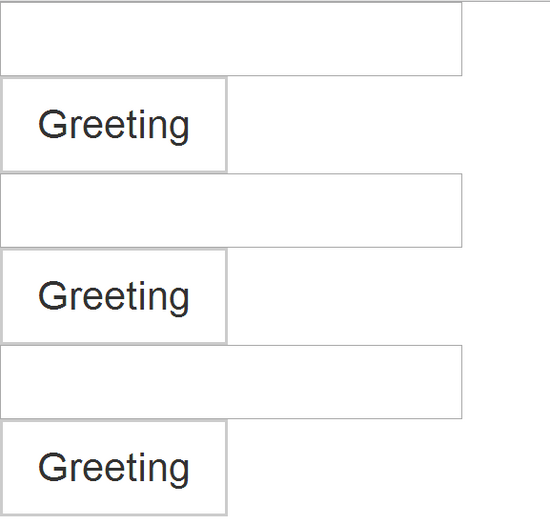
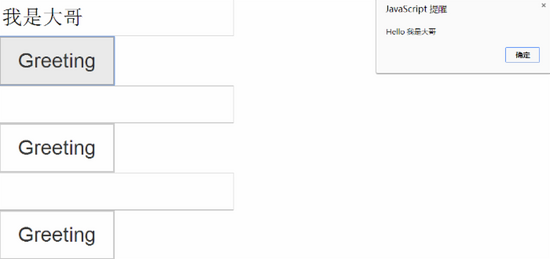
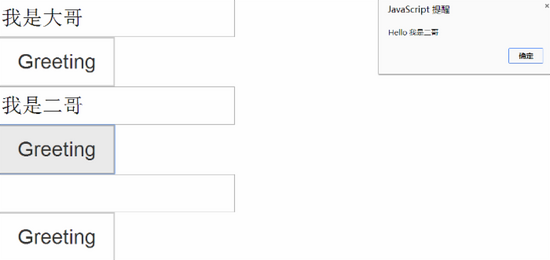
});As can be seen from the page, a tag
(1)Initial interface

(2) Fill in the value in the first text box

(2) Fill in the value in the second text box

(3) Fill in the third text box


