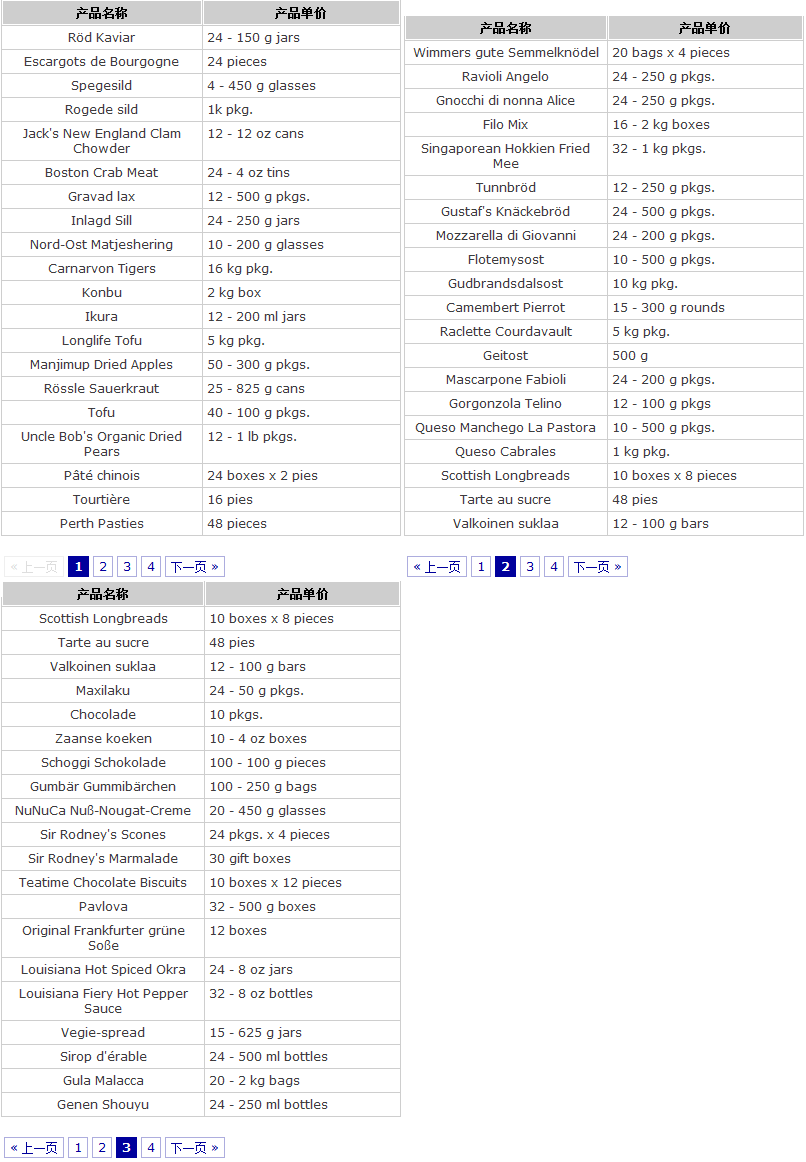
的表格,然后再加上了我们使用到的Jquery的插件—Paination,在这里我们只需定义一下一个以id为Pagination的层就可以了。页面的代码我们分析到这里,下面就来看一下关键的js代码
这样我们页面所要进行的操作就完成了,注释都写入上面了,如果有什么看不明白的,可以联系我哦。下面我就要看看关键的GetData.ashx是如何进行数据操作的,在这里先提示一下,我是用到了SqlHelper类进行sql语句操作的,再辅以分页的存储过程,然后又用到Json.NET,将从数据库得到的数据转换成json,现在发现json真是个好东西的,操作起来比较简便。废话不多说了呈上代码,代码还是有说服力的。虽然写得比较简单。
string strConn = ConfigurationManager.AppSettings["ConnectionString"];
//具体的页面数
int pageIndex;
int.TryParse(context.Request["pageIndex"], out pageIndex);
//排序的依据
string orderType = "ProductID";
int sortType = 1;
if (!string.IsNullOrEmpty(context.Request["sortType"]))
{
string[] strArr = context.Request["sortType"].Split('_');
if (strArr[1] == "0")
{
orderType = strArr[0];
sortType = 0;
}
else
{
orderType = strArr[0];
sortType = 1;
}
}
if (pageIndex == 0)
{
pageIndex = 1;
}
//下面就是分页的存储过程了,把相应的参数传进去就可以了。
System.Data.SqlClient.SqlParameter[] p =
{
SqlHelper.MakeOutParam("@Counts", SqlDbType.Int, 4),
SqlHelper.MakeInParam("@tblName", SqlDbType.VarChar, 128, "Products"),
SqlHelper.MakeInParam("@strGetFields", SqlDbType.VarChar,200, "ProductName,QuantityPerUnit"),
SqlHelper.MakeInParam("@fldName", SqlDbType.VarChar, 128, orderType),
SqlHelper.MakeInParam("@PageSize", SqlDbType.Int, 4, 20),
SqlHelper.MakeInParam("@PageIndex", SqlDbType.Int, 1, pageIndex),
SqlHelper.MakeInParam("@OrderType", SqlDbType.Bit, 1, sortType),
SqlHelper.MakeInParam("@strWhere", SqlDbType.VarChar, 1500, "")
};
DataTable dt = SqlHelper.ExecuteDataset(strConn, CommandType.StoredProcedure, "sp_PageCut", p).Tables[0];
int pageCount = Convert.ToInt32(p[0].Value.ToString());
//将得到的数据转换成json
context.Response.Write(Util.DataTableToJSON(dt, "Products", pageCount));
下面我们看看DataTableToJson这个方法的代码,这个比较简单,我也是看它的帮助文档写出来的,代码的详细说明就不说了。
public static string DataTableToJSON(DataTable dt, string tableName, int pageCount)
{
StringBuilder sb = new StringBuilder();
StringWriter sw = new StringWriter(sb);
using (JsonWriter jw = new JsonTextWriter(sw))
{
JsonSerializer ser = new JsonSerializer();
jw.WriteStartObject();
jw.WritePropertyName(tableName);
jw.WriteStartArray();
#region TableName属性
foreach (DataRow dr in dt.Rows)
{
jw.WriteStartObject();
foreach (DataColumn dc in dt.Columns)
{
jw.WritePropertyName(dc.ColumnName);
ser.Serialize(jw, dr[dc].ToString());
}
jw.WriteEndObject();
}
#endregion
jw.WriteEndArray();
jw.WriteEndObject();
sw.Close();
jw.Close();
}
return sb.ToString();
}
这样我们的工作基本上就完成了,声明绑定的table,然后在服务端获取数据,再把得到的数据转化成json,在页面里面将数据绑定完成,一气呵成真是不错,看得呈现的数据心里比较美吧,不过这个时候你也许会发现,页面怎么只用一页呢,嘻嘻,别忘了一点---就是取出数据的总数,用过分页的都知道,是根据记录的总数来计算到底有多少页的哦。那么我们该怎么做呢?
其实比较简单哦,在页面的Page_Load中得到数据的总数就可以了,然后将其进行数据绑定,不信你去看看前面的代码,是不是有句
$("#Pagination").pagination(这个就是起到了记录总数的作用。
if (!IsPostBack)
{
SqlParameter[] p =
{
SqlHelper.MakeOutParam("@Counts", SqlDbType.Int, 4),
SqlHelper.MakeInParam("@tblName", SqlDbType.VarChar, 128, "Products"),
SqlHelper.MakeInParam("@strGetFields", SqlDbType.VarChar,200, "*"),
SqlHelper.MakeInParam("@fldName", SqlDbType.VarChar, 128, "ProductID"),
SqlHelper.MakeInParam("@PageSize", SqlDbType.Int, 4, 20),
SqlHelper.MakeInParam("@PageIndex", SqlDbType.Int, 1, 1),
SqlHelper.MakeInParam("@OrderType", SqlDbType.Bit, 1, 0),
SqlHelper.MakeInParam("@strWhere", SqlDbType.VarChar, 1500, "")
};
DataTable dt = SqlHelper.ExecuteDataset(conn, CommandType.StoredProcedure, "sp_PageCut", p).Tables[0];
pageCount = Convert.ToInt32(p[0].Value.ToString());
}
至此,整篇介绍如何利用jquery的插件---pagination进行分页就介绍到这里,简单的回顾一下就是声明绑定的table,利用jquery的ajax方法进行数据绑定的,然后在后台得到数据转换为json,整个流程就是这样的,也许你会觉得这样做比较繁琐,不知你有何高见,可以在下面的评论为我点出,我不胜感激哦。^_^。写博客真的是一件挺费神的事情,不过在写的过程中,又让自己巩固了一下这些知识,也是很不错的。就请各位看官评论吧。
经过请教了美工了,把页面中分页的效果做成了gif图片,大家看看图吧。


