 Software Tutorial
 Computer Software
 How to create a bootable drive for macOS on Windows using diskpart
How to create a bootable drive for macOS on Windows using diskpart
You cannot fully create a bootable macOS installer using only diskpart on Windows because it lacks support for APFS/HFS and macOS-specific file structures. 2. You can use diskpart to prepare the USB drive by cleaning it, converting to GPT, and formatting as exFAT, making it compatible for further use. 3. To actually create the bootable installer, you must either use a Mac with the createinstallmedia command or third-party tools like TransMac on Windows with a trusted macOS .dmg or .iso file. 4. Third-party methods are not officially supported, may have reliability issues, and carry risks if using unverified images. 5. Apple prohibits installing macOS on non-Apple hardware, so use this process only for legitimate purposes such as Mac repairs or Hackintosh setups at your own risk. Therefore, while preparation is possible on Windows, completing the process requires access to macOS or unreliable workarounds, making a Mac the only recommended and fully supported solution.

Creating a bootable macOS installer drive from a Windows PC is not straightforward because Apple’s operating system and tools are designed to work within the macOS ecosystem. While diskpart is a powerful command-line utility in Windows for managing disks, it cannot be used alone to create a bootable macOS installer due to the specific file system and structure macOS requires (APFS or HFS ), which Windows does not natively support.

However, if you still want to create a bootable macOS USB drive using a Windows machine, here’s what you need to know and the limitations involved.
Why diskpart alone won’t work
diskpart can format and partition drives, but:

- It cannot write macOS installation files correctly because Windows can’t read or properly handle APFS/HFS .
- macOS installers are distributed as
.dmgor.appfiles that require special tools to convert and write to a USB. - The resulting USB must be bootable on Apple hardware, which expects a specific partition map (GUID) and file system.
So while you can use diskpart to clean and prepare a USB drive, you cannot complete the process on Windows alone.
What you can do on Windows with diskpart (preparation only)
You can use diskpart to properly format and partition the USB drive so it’s ready for use on a Mac or another tool. Here’s how:

- Connect your USB drive (16GB or larger).
- Open Command Prompt as Administrator.
- Run
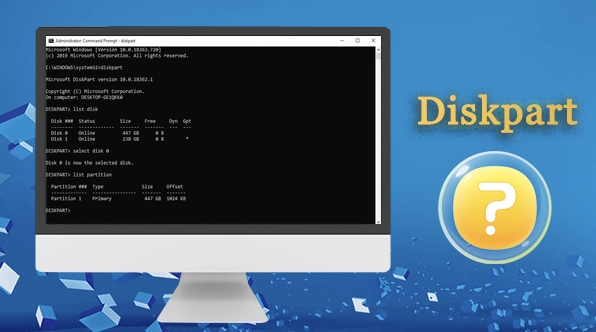
diskpart. - Use the following commands:
list disk
Identify your USB drive (e.g., Disk 1).
select disk 1
clean
convert gpt
create partition primary
format fs=exfat quick
assign letter=Z
exit
This prepares the drive with a GPT partition scheme and exFAT formatting — compatible with macOS.
But again, this only prepares the drive. You still need to get the macOS installer onto it.
How to actually create the bootable macOS drive
To proceed, you’ll need access to one of the following:
1. A Mac (recommended method)
- Download the macOS installer from the App Store (e.g., macOS Sonoma).
- Use Terminal with the
createinstallmediacommand:
sudo /Applications/Install\ macOS\ Sonoma.app/Contents/Resources/createinstallmedia --volume /Volumes/MyUSB
This will erase the USB and make it bootable.
2. Third-party tools on Windows (limited reliability)
Some tools claim to help create bootable macOS drives on Windows, such as:
- TransMac (paid, Windows)
-
Etcher (free, but macOS images must be in
.imgor.dmgformat)
Steps using TransMac:
- Run TransMac as Administrator.
- Right-click your USB drive and select “Restore with Disk Image.”
- Choose a macOS
.dmgor.isofile (converted from.dmg). - Wait for the process to complete.
Note: Many macOS images found online are modified or potentially unsafe. Always verify sources.
Important notes
- Apple does not support installing macOS on non-Apple hardware (violates EULA).
- Creating a bootable macOS USB is only officially supported on Macs.
- USB created on Windows may fail to boot due to incorrect partitioning or file system issues.
- Use only for legitimate purposes (e.g., repairing a Mac, setting up a Hackintosh at your own risk).
Summary
You cannot fully create a bootable macOS installer using only diskpart on Windows. You can use diskpart to prepare the USB drive (clean, GPT, format), but writing the actual macOS installer requires macOS-specific tools or third-party software with significant limitations.
For best results:
- Use diskpart on Windows to prepare the USB (GPT exFAT).
- Move the USB to a Mac and use
createinstallmedia. Or: - Use a tool like TransMac on Windows with a trusted macOS image.
It’s not impossible — but it’s not officially supported or simple.
Basically, if you don’t have access to a Mac, your options are limited and come with caveats.
The above is the detailed content of How to create a bootable drive for macOS on Windows using diskpart. For more information, please follow other related articles on the PHP Chinese website!

Hot AI Tools

Undress AI Tool
Undress images for free

Undresser.AI Undress
AI-powered app for creating realistic nude photos

AI Clothes Remover
Online AI tool for removing clothes from photos.

Clothoff.io
AI clothes remover

Video Face Swap
Swap faces in any video effortlessly with our completely free AI face swap tool!

Hot Article

Hot Tools

Notepad++7.3.1
Easy-to-use and free code editor

SublimeText3 Chinese version
Chinese version, very easy to use

Zend Studio 13.0.1
Powerful PHP integrated development environment

Dreamweaver CS6
Visual web development tools

SublimeText3 Mac version
God-level code editing software (SublimeText3)
 How to add chapters to a YouTube video
Jul 26, 2025 am 03:42 AM
Addproperlyformattedtimestampsatthebeginningofthevideodescriptionusingminutes:secondsformat(e.g.,0:00,2:15)followedbyaspaceandaclearchaptertitle.2.Ensuretimestampsareinchronologicalorder,startwith0:00,includeatleastthreechapters,andplacethemwithinthe
 how to check for app updates in microsoft store
Aug 03, 2025 am 12:17 AM
Open the Microsoft Store app, click the icon in the Start menu or taskbar, or find it by searching; 2. Enter the "Locals" section in the lower left corner to view all installed applications; 3. Click the "Get Update" button at the top, and the system will automatically check and download available updates; 4. Optionally, click the profile picture in the upper right corner, enter "App Settings", and enable "Automatic Update App" to achieve automatic background update; 5. If the application is not updated, you can try restarting the Store or computer, or run the "WindowsStore Application" troubleshooting tool in Windows settings. After completing these steps, all applications will remain up to date.
 How to find which disk is which in diskpart's 'list disk' command
Aug 21, 2025 am 02:07 AM
Usedisksizefromlistdiskoutputtomatchknowndrivecapacities,asDisk0(238GB)likelycorrespondstoa256GBSSD,Disk1(931GB)toa1TBHDD,andDisk2(14GB)toaUSBdrive.2.Cross-referencewithDiskManagement(diskmgmt.msc)toverifydiskhealth,partitionlayout,andvolumelabelsmat
 Fresh doubts raised about Windows 11's Recall are more reasons I wouldn't go near Microsoft's cornerstone AI feature
Aug 05, 2025 am 08:09 AM
Windows 11's Recall feature has just been put through its pacesIt did better than when it was first released in preview, but still made slips with its sensitive info filterIn some scenarios, this filter simply isn't keeping vital data - like credit c
 How to convert a Word document to PDF using Adobe Acrobat?
Jul 30, 2025 am 12:33 AM
The steps to convert Word documents to PDF using Adobe Acrobat are as follows: 1. Make sure to use Acrobat instead of Reader, the document has no layout problems and close redundant programs; 2. Select the file and convert it through "Tools" > "Create PDF" to retain editability; 3. Or use the printing function, select the "Adobe PDF" virtual printer to convert and customize the output settings; 4. Pay attention to font embedding, margin adjustment, image compression and security settings to avoid common problems. Following the above method can ensure smooth conversion and complete format.
 How to create a comic book effect in Photoshop
Aug 02, 2025 am 03:03 AM
The key to creating comic-style effects in Photoshop is to master three core steps. 1. Use the "Style" filter or the "Comic Style Conversion" in the new AI neural network filter to base the image. After copying the background layer, try different filters and pay attention to the need to adjust it later; 2. Enhance clear lines through "Find Edges" or "High Contrast Retention Color Dodge", and combine "Soft Light" to improve details. It is recommended to select the main body to strengthen the outline on complex pictures; 3. Use "color level" and "curves" to enhance the light and dark contrast, and then reduce the overall saturation of "hue/saturation" to locally brighten the key parts, superimpose the soft light layer to simulate the texture of the paper, or use clipping masks and brushes to create a hand-painted feeling. Each step needs to flexibly adjust the parameters according to the original picture, and then combine them to realize
 How to disable the tools pane in Adobe Acrobat Reader?
Jul 30, 2025 am 12:43 AM
To hide the tool panel on the right side of Adobe AcrobatReader, the most direct way is to click the panel title or icon to close it; if you do not want it to pop up automatically, you can right-click to cancel the "Always Show Tool Panel"; for some versions, you can uncheck "Show Tool Panel at Startup" through "Edit > Preferences > Documents or Interfaces"; in addition, you can also use the shortcut key Shift F4 to close the current side panel, or Ctrl Shift B to control the display of the bookmark panel. The above method is suitable for different usage scenarios. Manual closing is suitable for temporary hiding, modification of settings is suitable for long-term adjustment, and shortcut keys facilitate frequent switching of views.
 How to set up a vacation responder in Gmail
Aug 04, 2025 am 02:18 AM
TosetupavacationresponderinGmail,login,clickthegearicon,goto“Seeallsettings,”thenthe“General”tab,andenablethevacationresponder.First,toggleon“Turnonvacationresponder”toactivatethefeature.Next,setyourstartandenddates,whichGmailauto-fillsbutyoucanadjus


